Things to remember:
Tax items need to be set up in QuickBooks Point of Sale to accurately reflect how much tax your online store has collected on any given order. Why? Because an online store can be set up to charge a variable tax rate based on the shipping location, and QuickBooks POS usually only collects one rate - the rate for the location of the brick-and-mortar store.
To collect a variable tax rate, you need to set up a Tax Line item. Since this is a line item, the tax reports in POS and QuickBooks Financial (Pro, Premiere, or Enterprise) will not reflect the online taxes.
In order to do so, an item specific report based on the tax line item will need to be run in QuickBooks Point of Sale. This will provide the dollar amount for online taxes to add to the brick-and-mortar taxes collected. If you have a version of QuickBooks Financials connected to your QuickBooks Point of Sale, you will need to adjust the tax and move the dollar amount out of the income account and into sales tax payable. For easier tracking, you may want to silo this tax amount to a completely separate account.
First, set your tax settings in Webgility to Online Store Tax.
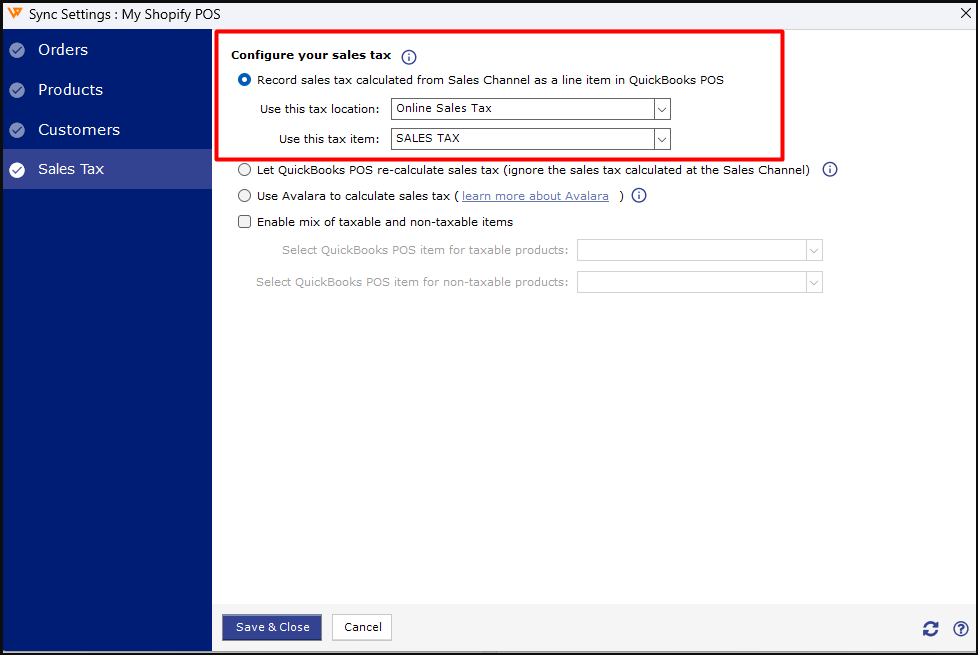
Creating Tax Items in QuickBooks POS
Tax items are created just like regular items in QuickBooks POS, but the tax item has a few different qualities.
1. Create the item by going to Inventory > New item.
2. Give the tax item a name that shows what this is. This name will show as an item within a Sales Receipt.
-
Type: The tax item should always be a Non-Inventory part. You can not have a quantity for this type of item.
-
Department: Should be assigned to an admin department. In this example, it is set to the default system department.
-
Tax: The tax item must be set to Non.
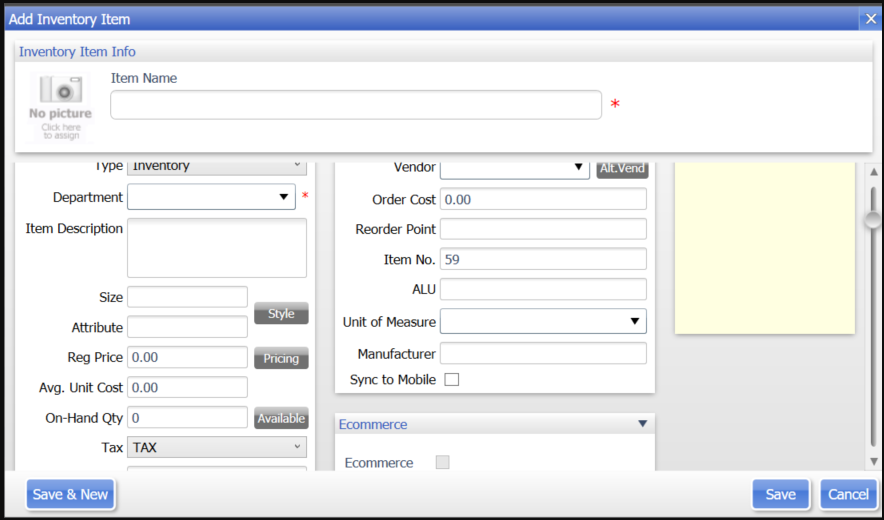
Note: If it is set to tax, the tax item will be taxed by QuickBooks, resulting in double tax and errors when posting to QuickBooks POS.
3. Click Save to successfully create the tax item in QB POS.
4. Optional: If you have your QuickBooks Point of Sale connected to QuickBooks Pro, Premiere, or Enterprise, you will want to direct the tax to a sales tax holding account in your QuickBooks Pro, Premiere, or Enterprise. This should be set up as a liability account in the Chart of Accounts.

This is done to keep the sales tax from hitting the revenue collected in QuickBooks. After the Point of Sale sync to QuickBooks Pro, Premiere, or Enterprise, transfer the amount in this holding account to your tax liability account.
What Happens in QuickBooks POS
1. When the tax item is used to calculate tax, the tax appears on a sales receipt as a line item, just like a purchased item.
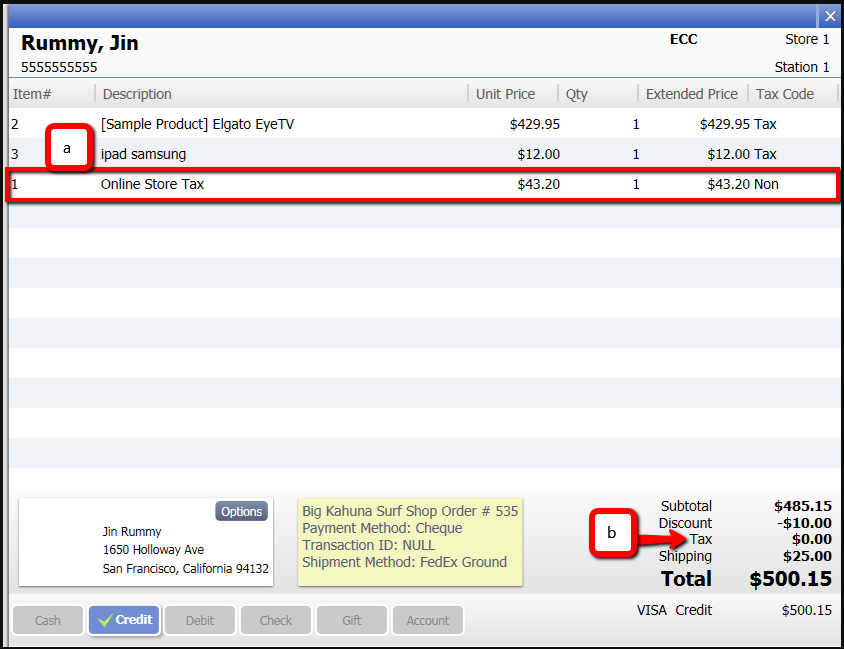
2. The tax indicator is set to $0 because QuickBooks did not calculate the tax. Since it was calculated by the online store, there is no need to have QuickBooks calculate the tax again.