
Note: This article uses Shopify as an example sales channel.
If Webgility Online is creating a new customer in QuickBooks Online when you post a Shopify order — even though that customer already exists in QuickBooks — this article explains why it happens and how to fix it.
Symptoms
-
A Shopify order posts to QuickBooks Online under a new customer instead of the existing one.
-
You see duplicate or near-duplicate customer names in QuickBooks (for example, the same person with and without a last name or company).
-
Some orders from the same buyer match correctly, while others create a new customer.
-
Re-downloading accounting data and sales channel data from scratch does not stop the duplicates.
Cause
Webgility Online decides whether a customer already exists using the customer-matching criteria set under Sync Settings > Customer. It compares the customer details on the Shopify order's billing address with the customer record in QuickBooks. Refer to Customer Setup in Webgility Online.
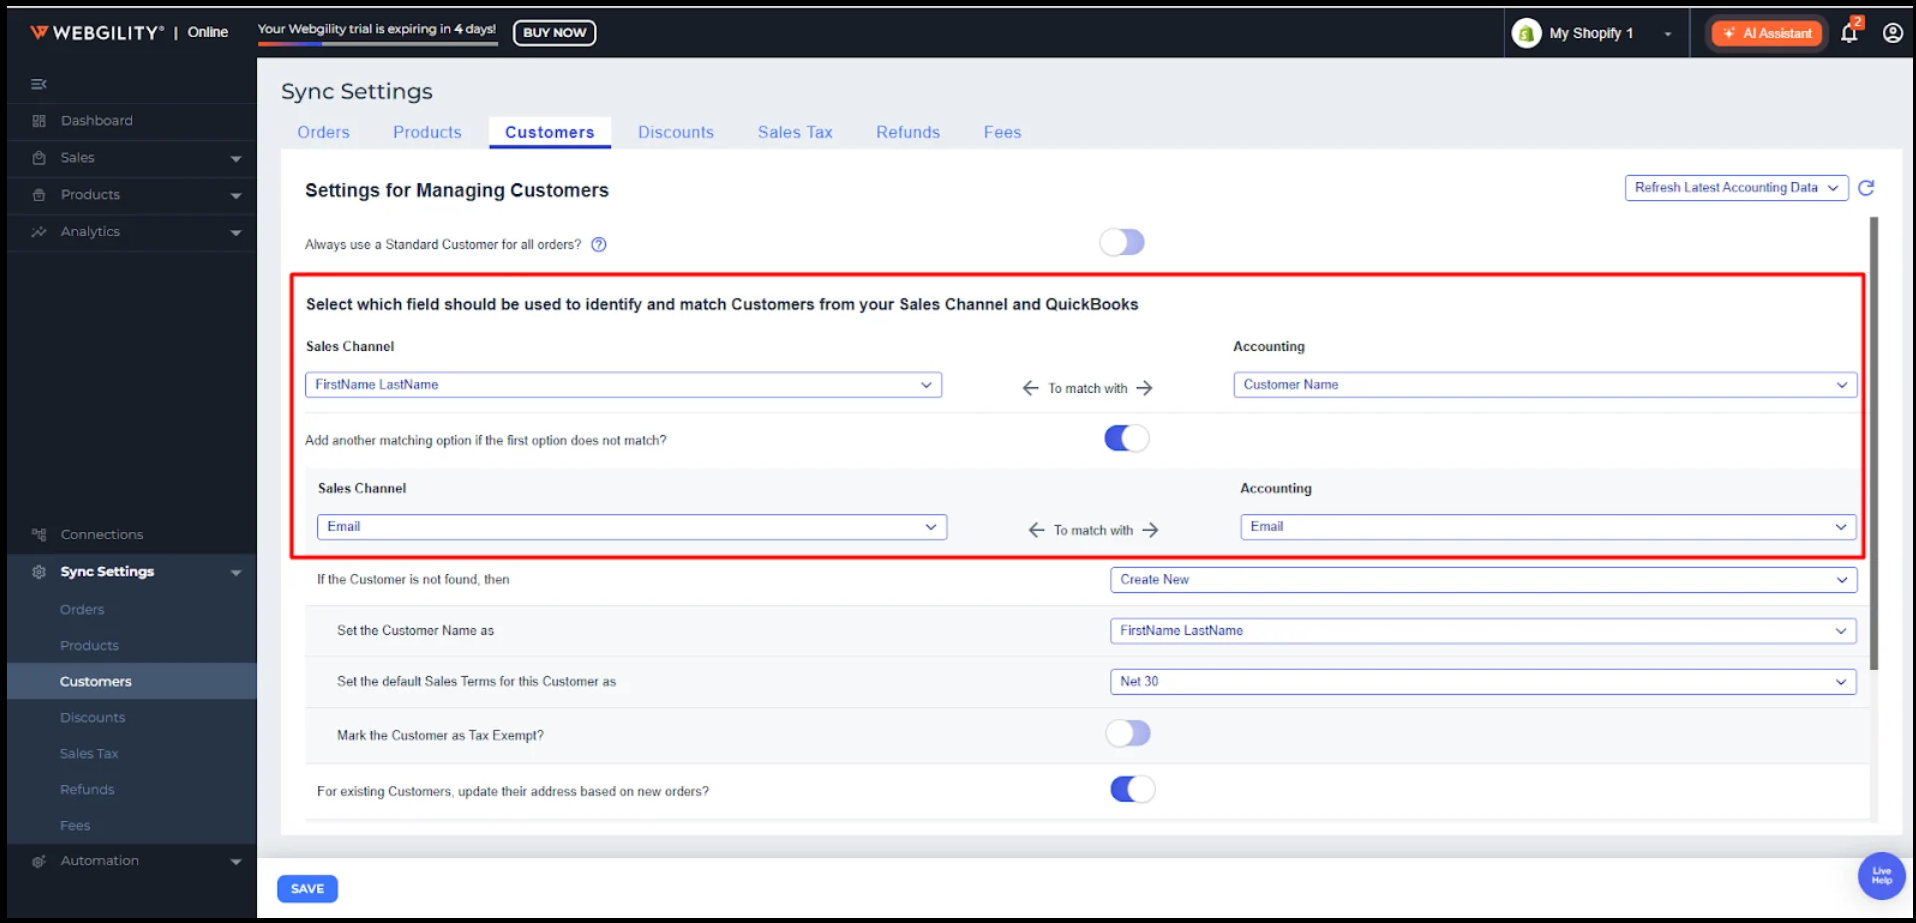
If the order's billing details don't satisfy these criteria, Webgility Online treats the buyer as a new customer and creates one in QuickBooks when posting the order. This is expected behavior based on your settings, not a sync error.
Solution
Option 1: Make the Shopify billing details match QuickBooks
-
Open the affected order in Shopify and check the billing address: first name, last name, and company name.
-
Compare these with the Customer Name of the existing customer in QuickBooks Online.
-
Update the Shopify customer or order details so they meet your matching criteria (for example, add the missing last name or correct the company name).
-
Post the order again from Webgility Online. It should now match the existing QuickBooks customer.
Option 2: Adjust your customer-matching criteria
If your Shopify customers often leave fields blank (such as company name or last name), change the criteria to fields your data fills in reliably.
-
In Webgility Online, go to Sync Settings > Customer.
-
Review the fields used for Sales Channel (Shopify) and QuickBooks.
-
Choose criteria that reflect how customers are entered in both Shopify and QuickBooks (for example, avoid Company Name if most orders don't include it).
-
Save your settings and post a test order to confirm it matches the expected customer.
Clean up existing duplicates
After fixing the matching, you can merge duplicate customers in QuickBooks Online by renaming the duplicate to exactly match the original customer's display name and confirming the merge. Check with your accountant before merging, as it can't be undone.
Prevention
-
Keep billing names and company names consistent in Shopify.
-
Pick matching criteria based on fields your Shopify orders actually contain.
-
Spot-check new customers in QuickBooks after changing sync settings.