Overview:
We are introducing a lightweight app designed to seamlessly integrate Shopify with QuickBooks Online. Our primary goal is to enhance the user experience by providing an intuitive and efficient tool that enables merchants to sync key transaction data from their Shopify store directly into QuickBooks Online.
The app will support essential features such as syncing sales transactions, fees, refunds, and payouts, ensuring that financial data remains accurate and up-to-date without manual effort. By focusing on the core functionalities that matter most to users, this integration aims to simplify accounting processes, save time, and reduce errors, all while maintaining a lightweight and easy-to-use experience.
Get started quickly with the Webgility Lite: QuickBooks sync to seamlessly sync your Shopify store with QuickBooks Online. Follow these steps to set up your integration:
Note1 : Webgility Lite: QuickBooks sync is compatible only with the Shopify sales channel and QuickBooks Online (US version)
Install the App
- Log in to your Shopify Admin Panel.
- Navigate to Apps and search for Webgility Lite: QuickBooks sync.
- Install the app. This process will automatically create your Webgility account.
- Once installed, the Webgility Lite: QuickBooks sync app will be automatically integrated with your Shopify channel.
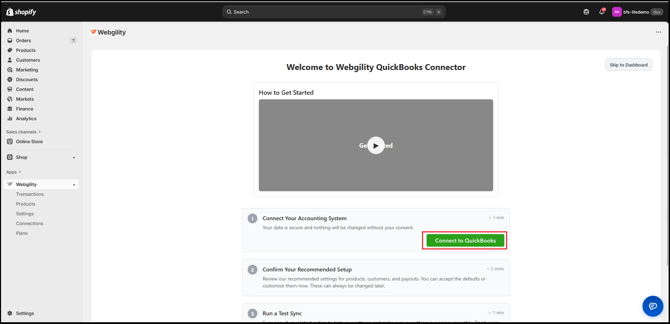
Step 1: Connect QuickBooks Online
- On the onboarding page, click Connect to link your QuickBooks Online account.
- A popup will appear—enter your QuickBooks Online admin login credentials.
Note2 : If sales tax is disabled in QuickBooks Online, you may be prompted to enable it. You can enable it now or choose to continue without enabling.
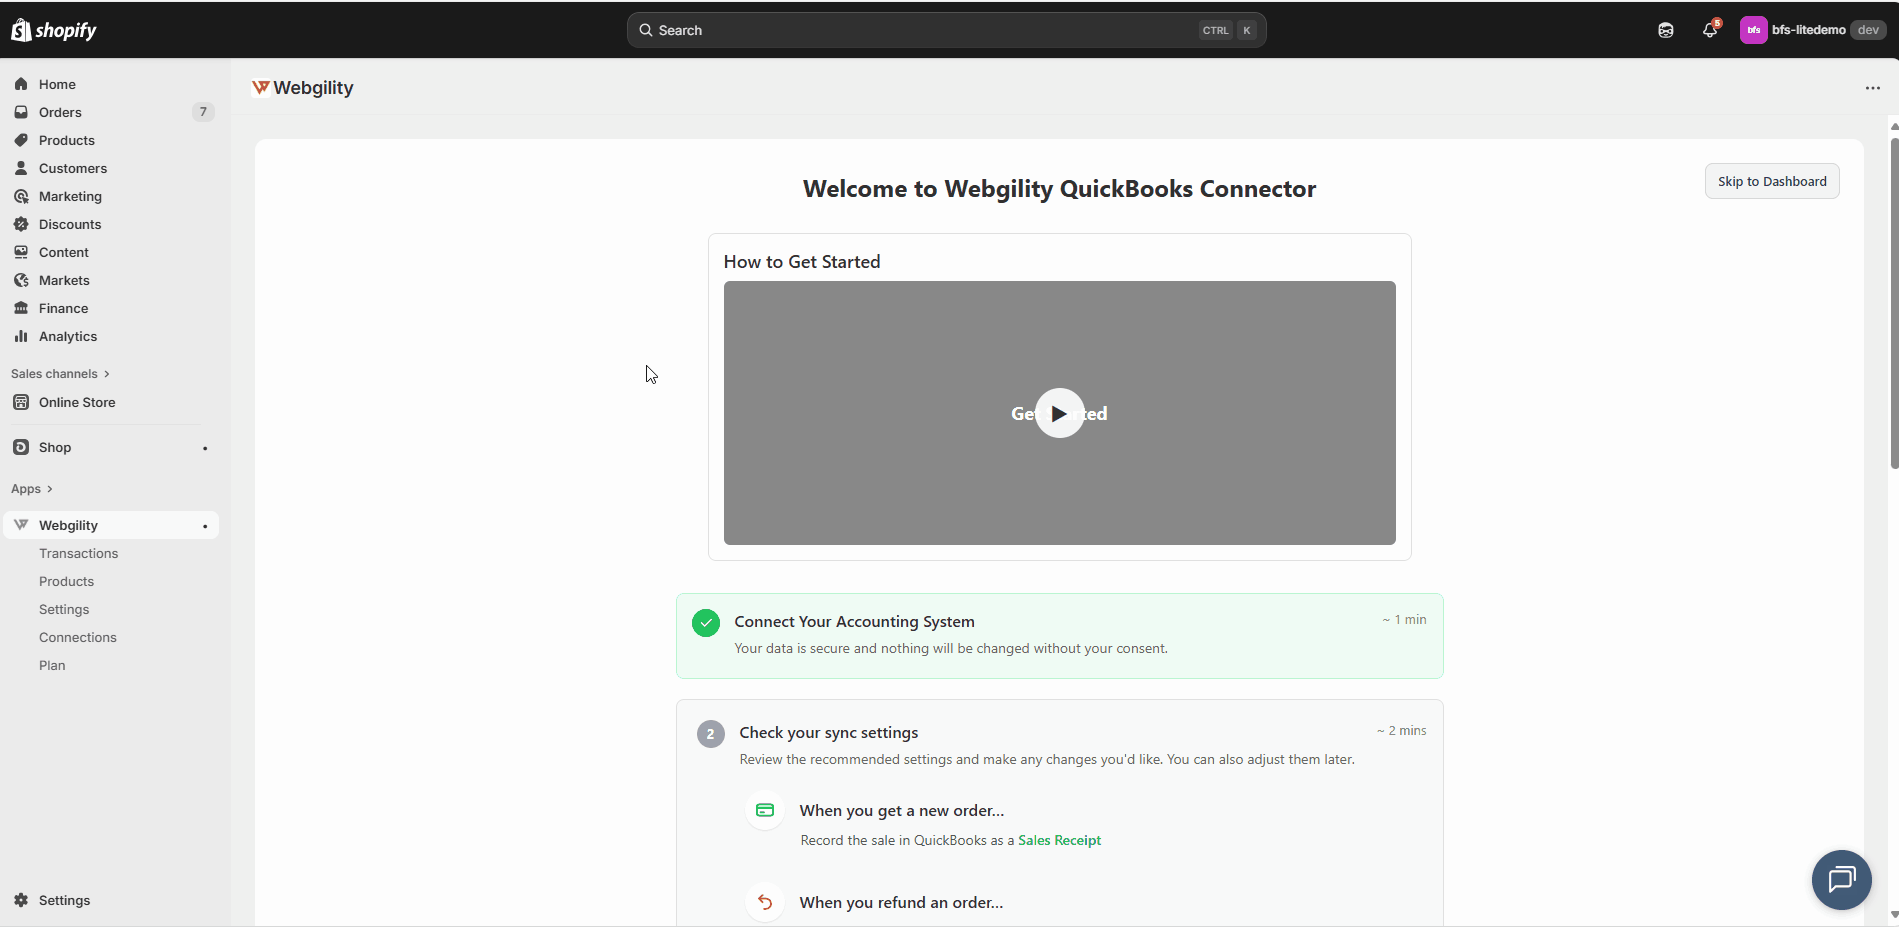
Step 2: Configure Default Settings
Webgility Lite: QuickBooks sync provides suggested default configurations:
- Orders: Creates Sales Receipts in QuickBooks Online.
- Refunds: Creates Refund Receipts automatically.
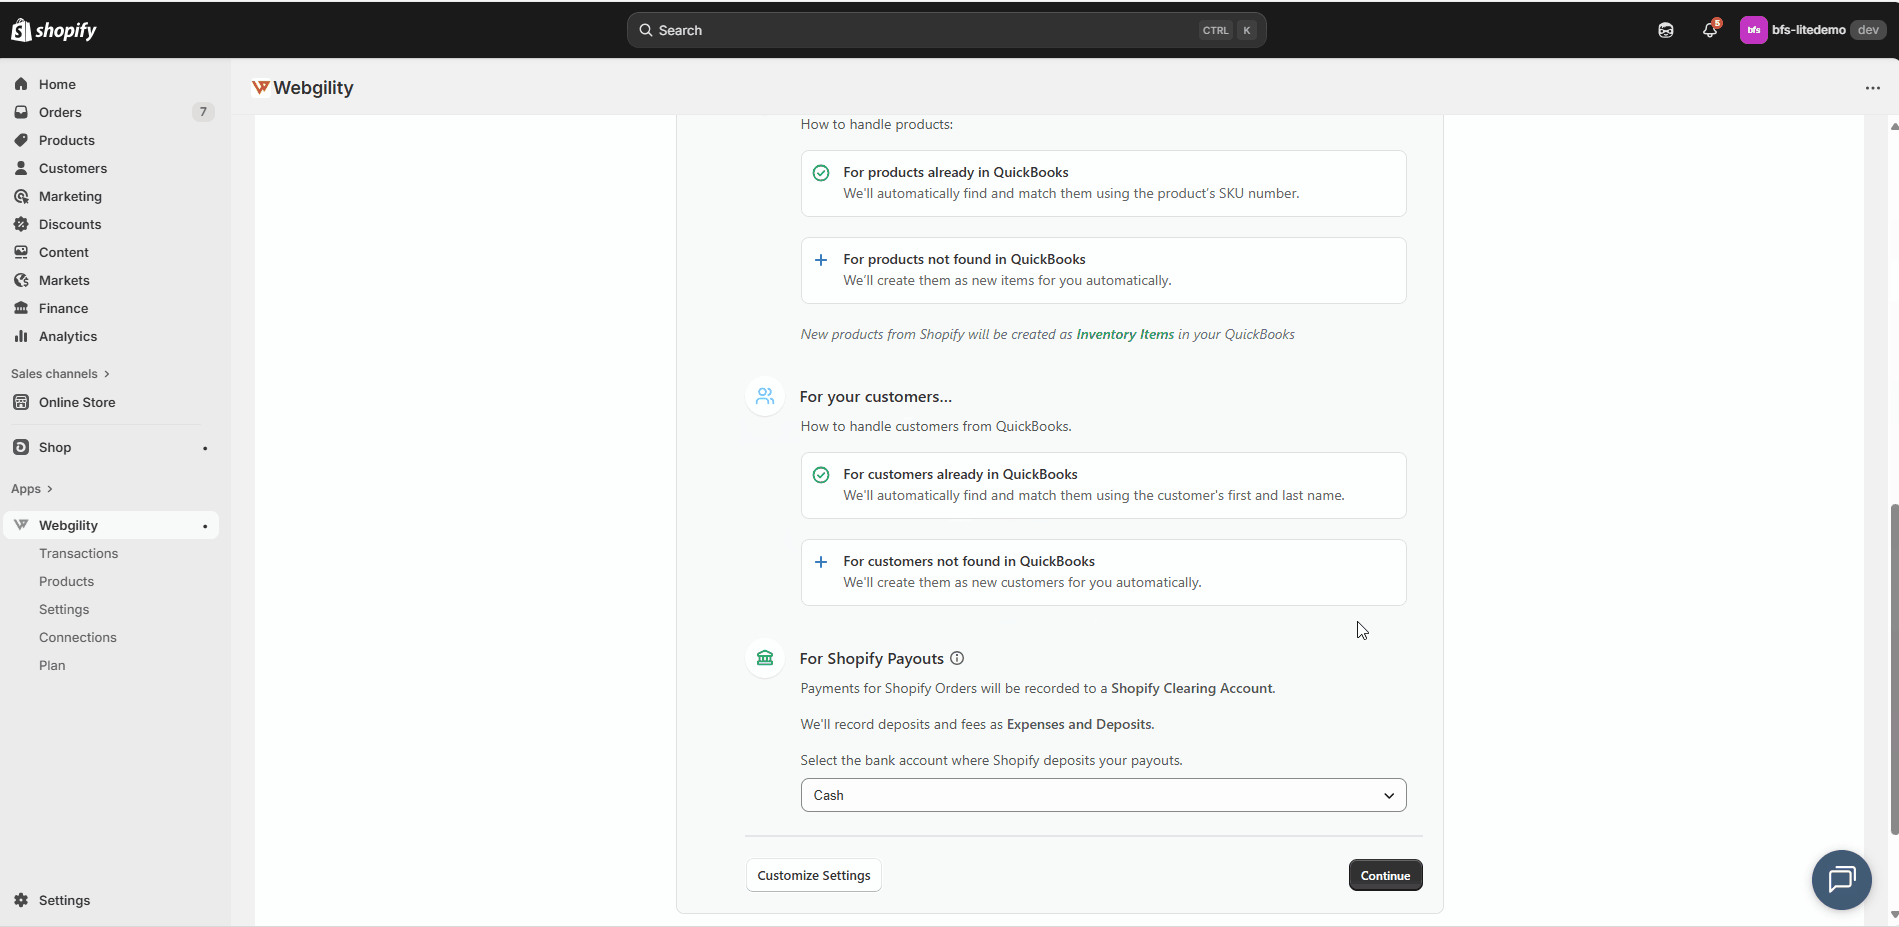
- Products:
- Existing items: Auto-matches SKU (Shopify) to Product Name (QuickBooks ).
- Missing items: Auto-created as Inventory type.
- Customers:
- Existing customers: Auto-matches names.
- Missing customers: Auto-created.
- Shopify Payments:
- Select an existing QuickBooks bank account OR let Webgility create a new account named "Shopify Payout Deposit by Webgility".
- Sale Payments: Recorded to a temporary holding account "Shopify Clearing Account".
- Fees & Deposits: Recorded under Expenses and Deposits in QuickBooks Online.
If you want to customize these settings, click Customize Advanced Settings. Otherwise, click Continue.
Step 3: Run a Safe Test Sync
- You will be prompted to Run a Safe Test Sync.
- Select a sample sale order and click Run a Safe Test Sync to post the order.
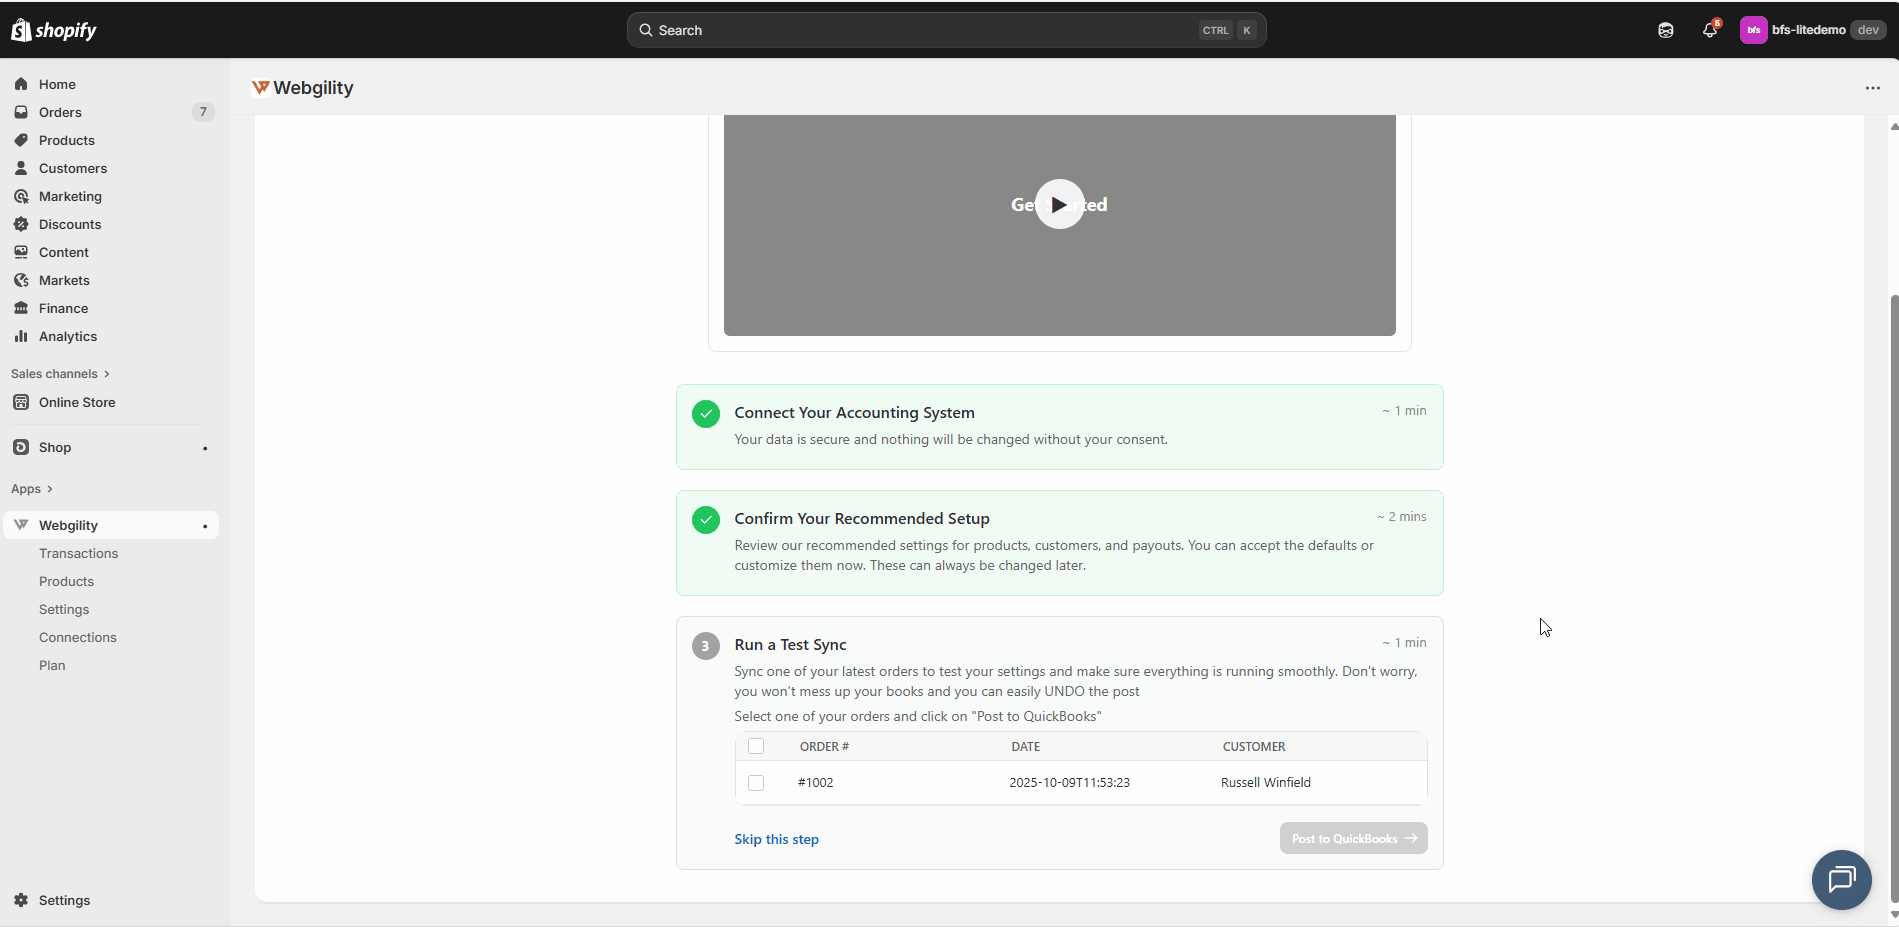
Note3 :
- You can skip "Test Sync" step by clicking Skip for now.
- If needed, you can undo the sync by clicking on Unpost option.
Once done, you can click on “Finish Setup & Go to Dashboard,” and then you will be directed to the Webgility Lite: QuickBooks sync Dashboard.
You’re All Set!
Your Webgility Lite: QuickBooks sync is now fully set up, and your Shopify channel is integrated with QuickBooks Online. You can start syncing sales transactions, refunds, payouts, and fees seamlessly.