
Overview
Use a custom date range on the New Orders and Posted Orders tabs to see every order from the past year, then post the ones that are still waiting.
This helps when you need a complete set of orders for a period, such as the last year, and the lists seem to start part-way through it. In that case the list is usually showing only the first page of results, not a gap in the downloaded orders.
View the orders for a date range
Set one custom date range, show more rows per page, and sort by date to see the whole period in one list.
- Go to the New Orders tab. These are orders that are downloaded but not yet posted to QuickBooks.
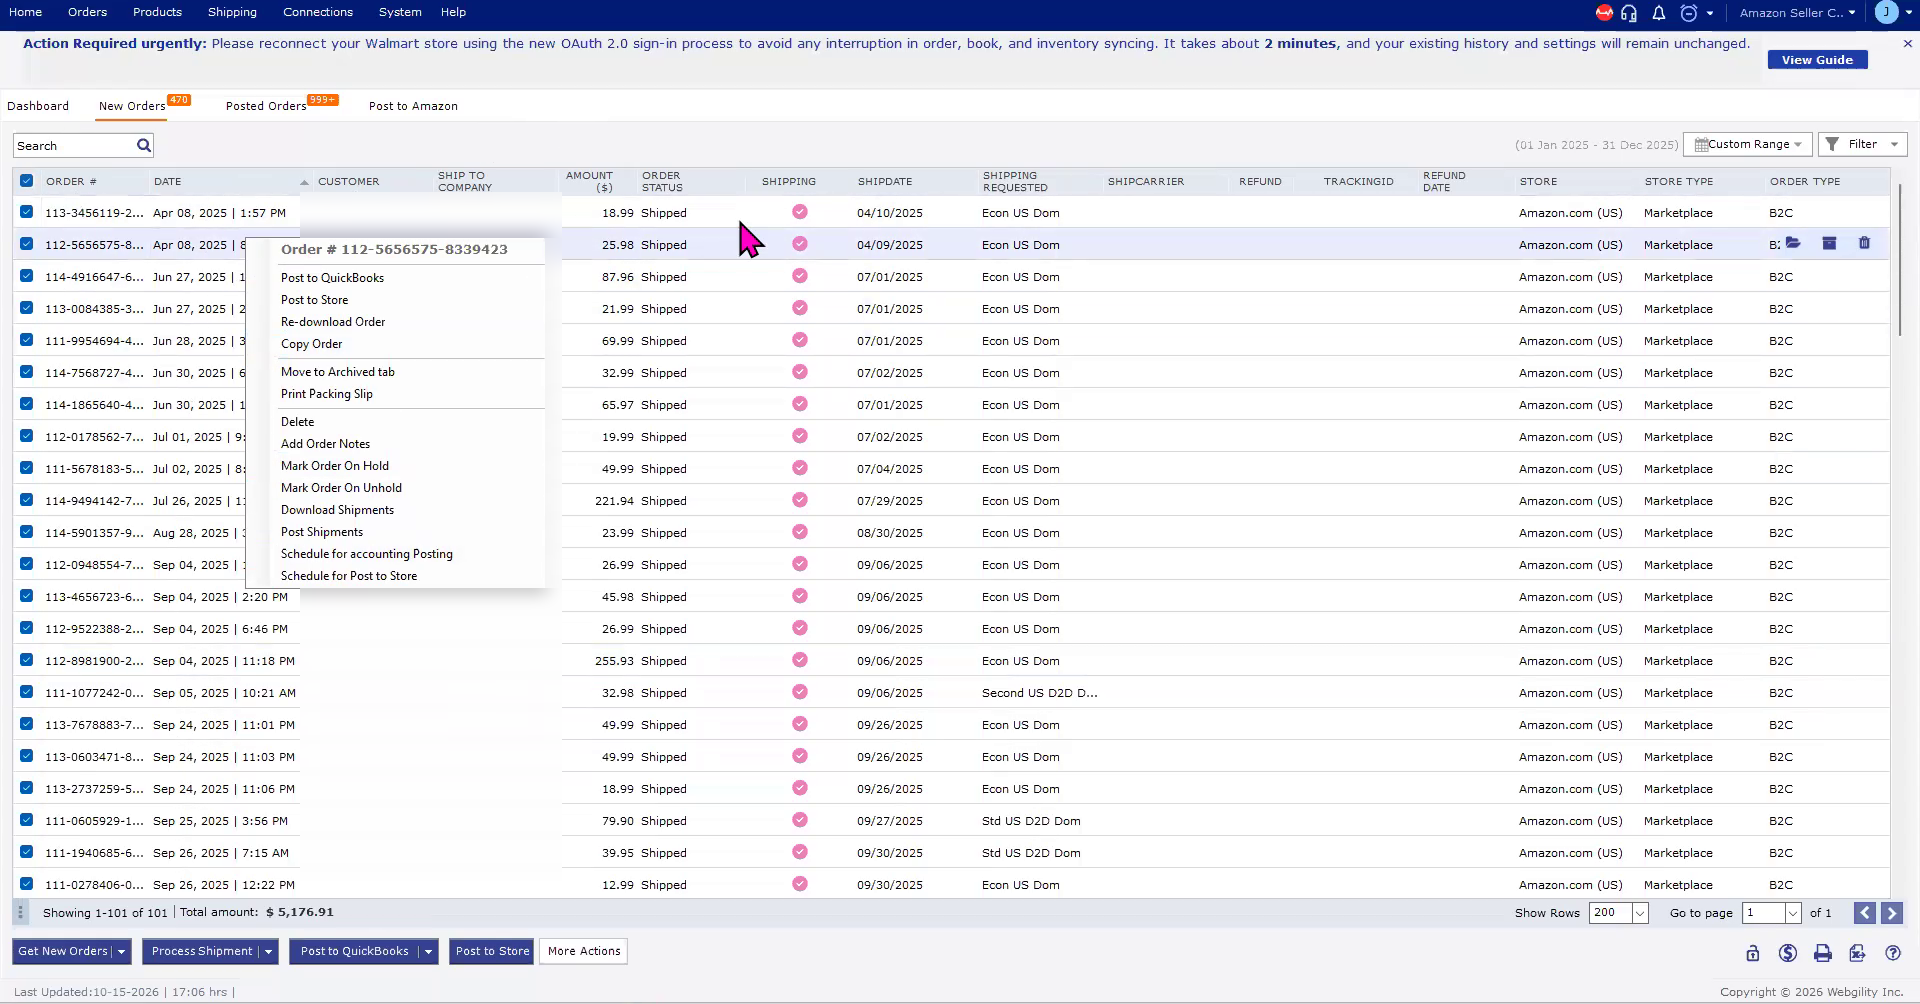
- Click the date range selector at the top right and choose Custom Range. In this example the range is 01 Jan 2025 to 31 Dec 2025.
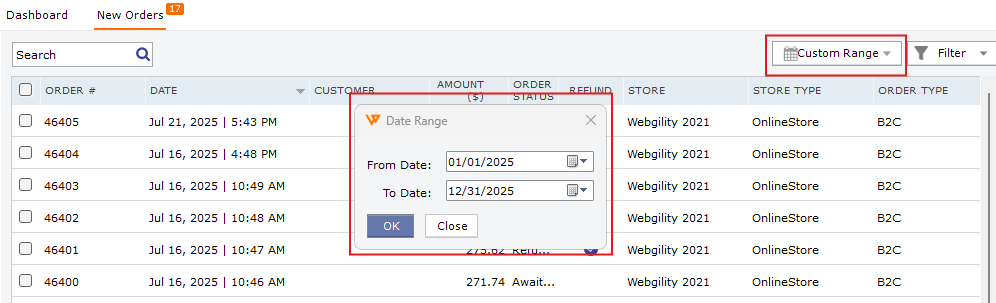
- At the bottom right, set Show Rows to a higher value such as 200. The default of 100 shows only the first page, so the list looks like it starts part-way through the year.
- Check the count at the bottom left, for example "Showing 1-100 of 101". Use Go to page if more than one page remains.
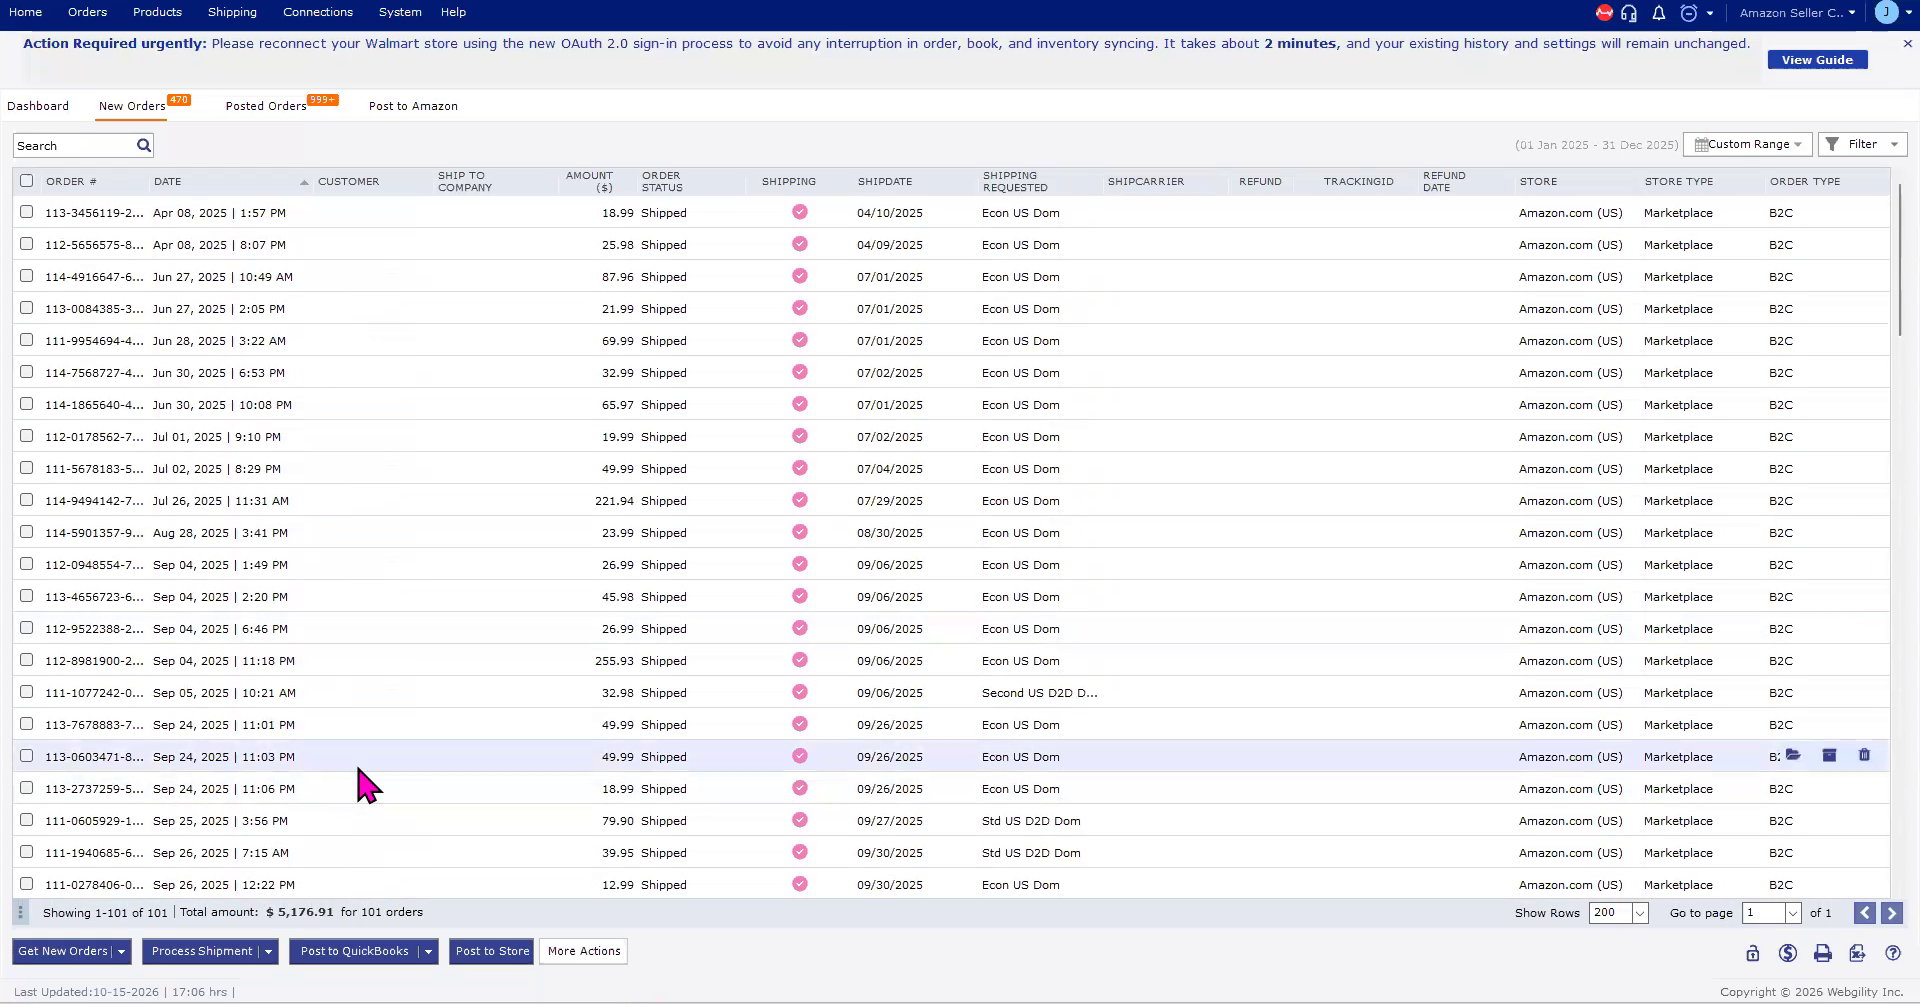
- Click the Date column header to sort the orders by date and confirm the earliest orders in the range are there.
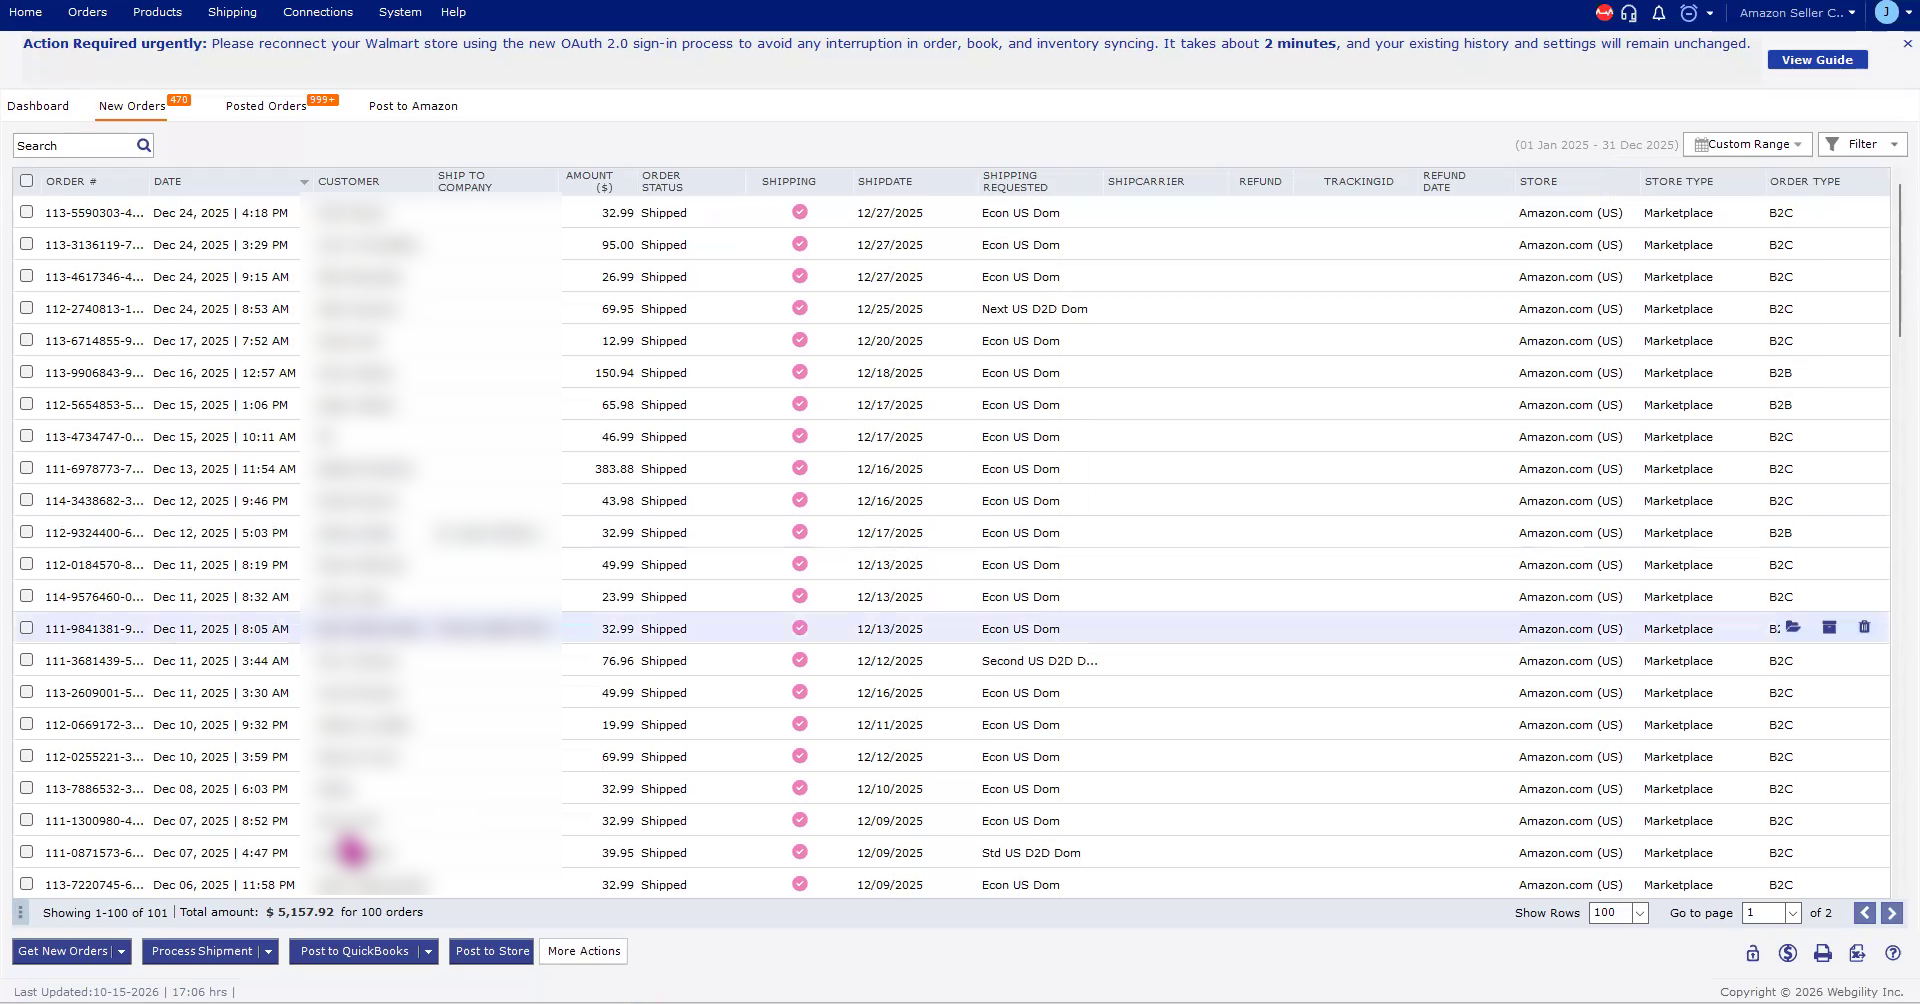
With Show Rows set to 200, all 101 orders appear on one page and can be sorted by date.
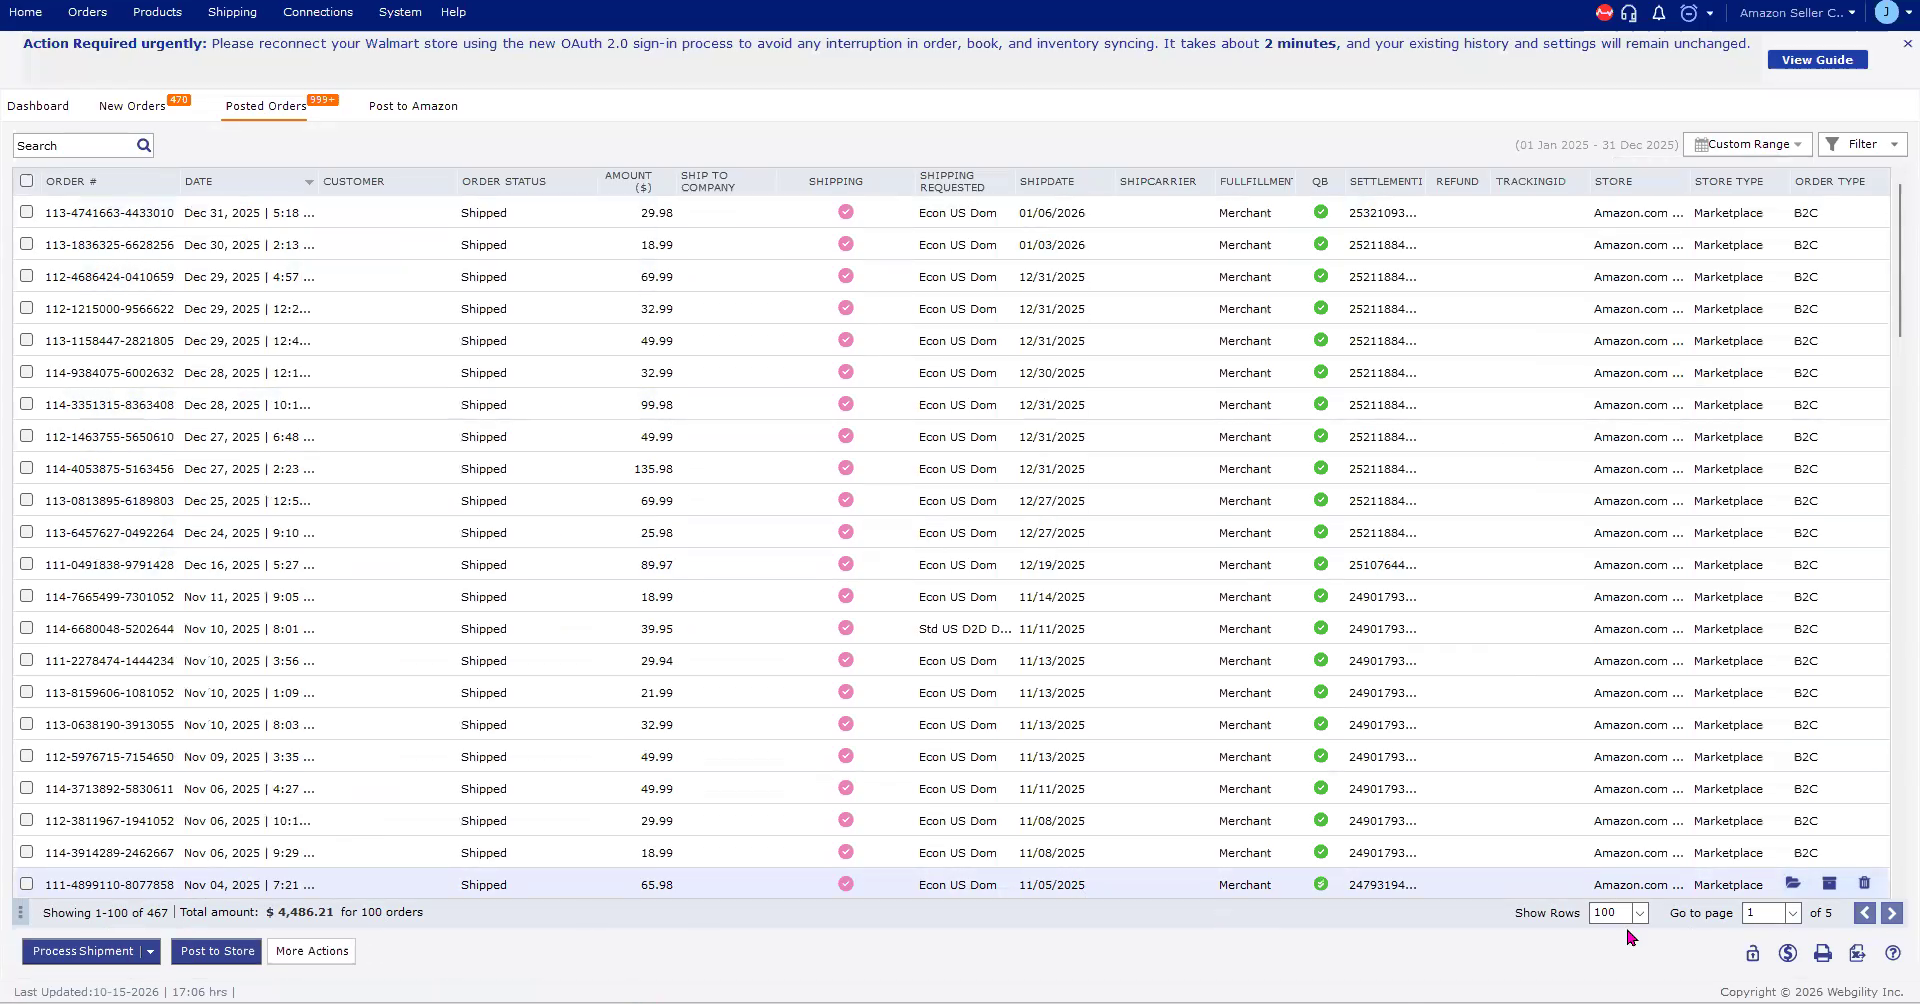
Repeat the same steps on the Posted Orders tab to see the orders already posted to QuickBooks. In this example the same range shows 467 posted orders across 5 pages at 100 rows per page.
Post the remaining orders
Orders still on the New Orders tab have not been posted, and you post them yourself or hand them to the scheduler.
Post them now
- On New Orders, tick the checkbox in the header row to select every order in the list.
- Click Post to QuickBooks at the bottom, or right-click any selected order and choose Post to QuickBooks.
- Wait for posting to finish. 100 or more orders take some time.
- Open the Error tab to review any order that failed, fix the cause, and post it again.
Let the scheduler post them
- Select all the orders as above and right-click any of them.
- Choose Schedule for accounting Posting.
- The orders move to the Schedule tab. Turn the scheduler on.
- The scheduler posts the orders at the frequency it is set to, for example every 15 or 30 minutes.
Once posting begins, posting now and using the scheduler take the same amount of time. Choose the scheduler if you would rather not wait on the screen.
Confirm you have every order
Compare the Posted Orders count for the period with the number of orders in your sales channel.
- After posting finishes, open the Posted Orders tab and select the same custom date range.
- Note the total at the bottom left, for example "Showing 1-100 of 467".
- Compare that number with the order count for the same period in your sales channel, such as Amazon.
- If the numbers differ, export the Posted Orders list to a CSV file, download the order report for the same period from the sales channel, and compare the two to find the missing orders.
Keeping everything in one place, the Posted Orders tab, makes the comparison easier than checking several tabs. Orders that failed to post stay on the Error tab until you fix them, so check that tab before you count.
If you require any further assistance, please feel free to reach out to Webgility Support.