
Overview
Webgility Desktop and QuickBooks Desktop can run on separate computers on the same network. Use this guide to confirm QuickBooks is hosted correctly, authorize Webgility, and test the connection.
Steps1. Confirm QuickBooks multi-user hosting
On the computer that hosts the QuickBooks company file, open QuickBooks and select File > Utilities. Confirm Stop Hosting Multi-User Access is available, which means hosting is enabled.
For more information, see Troubleshooting QuickBooks Desktop Connection Problems on Add-On Systems.
2. Test the Webgility connection
On the add-on computer:
- Open QuickBooks and the correct company file. Close any open QuickBooks pop-ups.
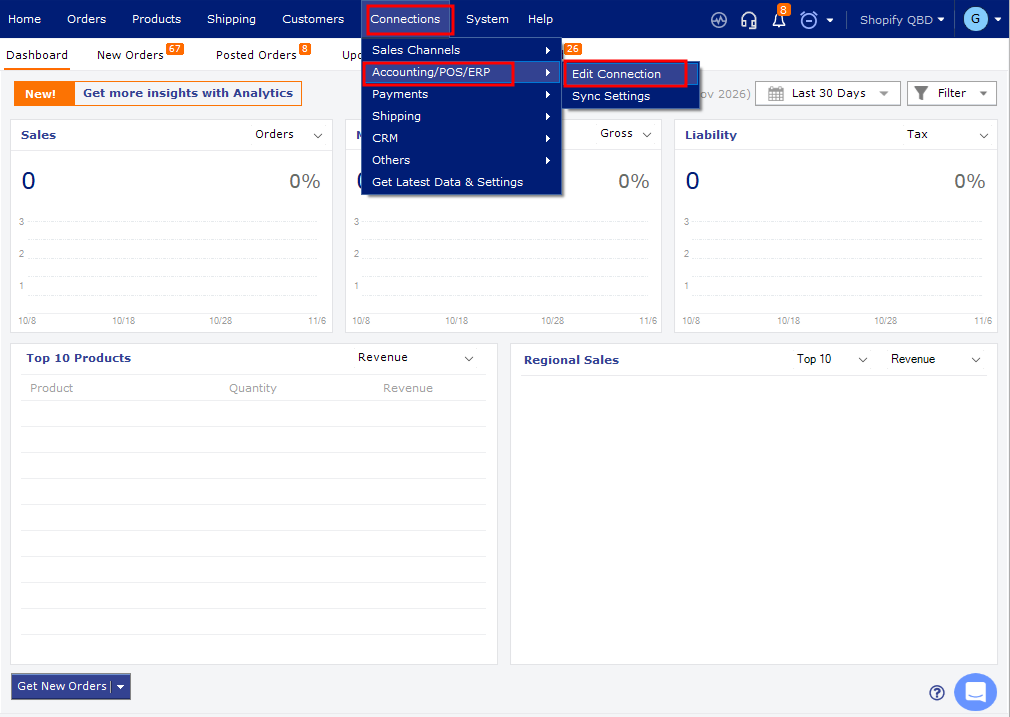
- Open Webgility Desktop and go to Connections > Accounting/POS/ERP > Edit Connection.
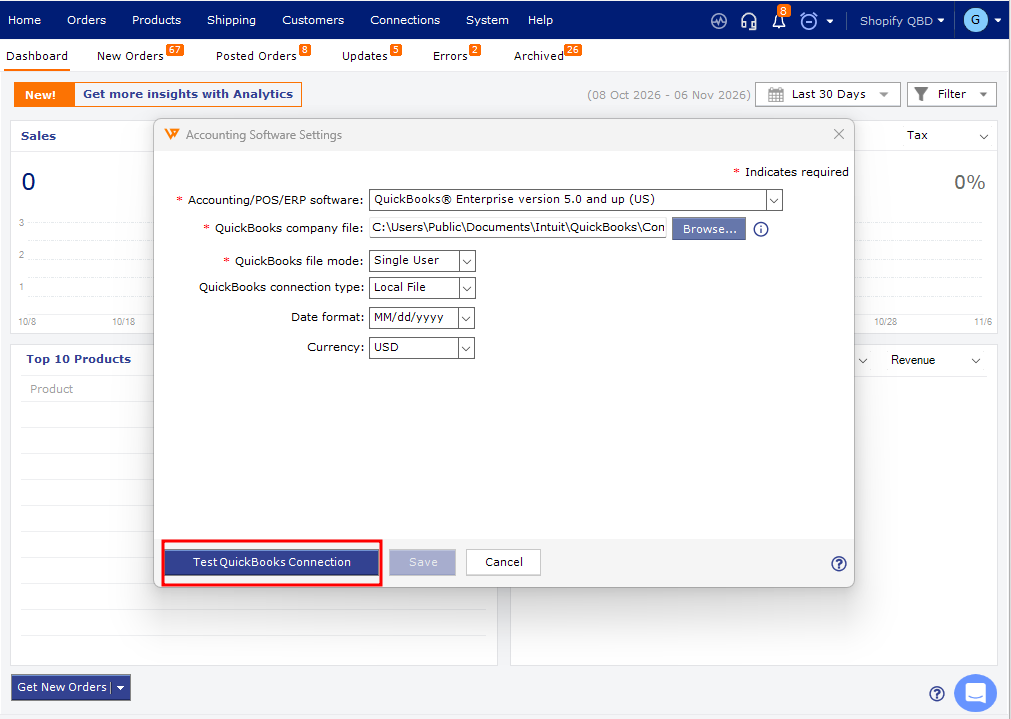
- Confirm the company file is correct, then select Test QuickBooks Connection.
- If QuickBooks displays an access prompt, sign in as Admin and approve Webgility. Select Yes, always; allow access even if QuickBooks is not running when that option is available, then select Continue.
- Select Done in QuickBooks, then OK and Save in Webgility.
See How to Test the QuickBooks Connection in Webgility Desktop for more detail.
3. Check computer permissions
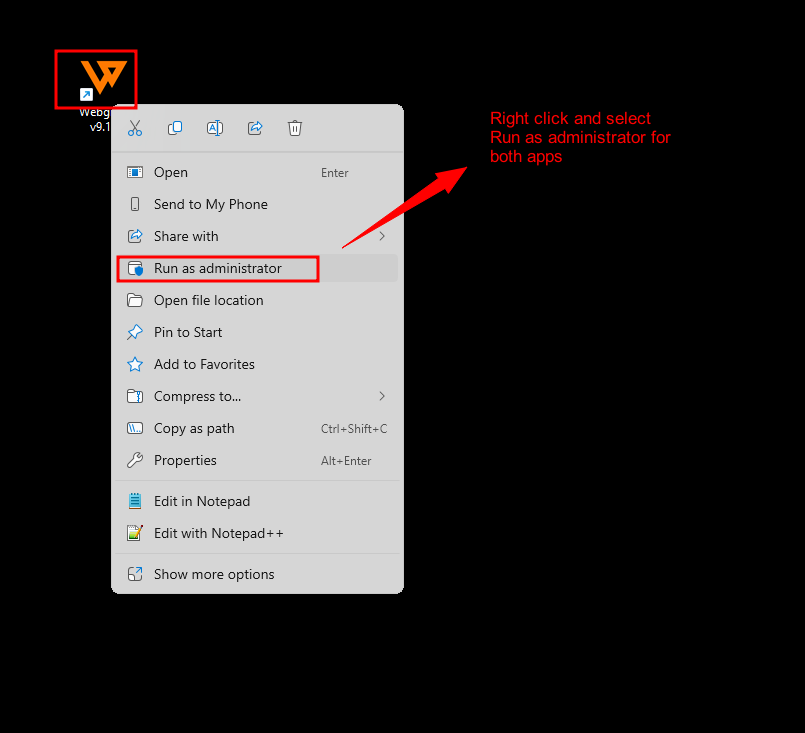
If the connection test does not succeed, close both applications, then reopen QuickBooks and Webgility Desktop using Run as administrator. Also confirm that Windows Firewall or other security software allows both applications on the private network.
If you have any questions or need more help, please contact our support team.