
Symptoms
You may notice one or more of the following after Webgility Online posts a Shopify order to QuickBooks Online:
- The sales receipt total is higher than the Shopify order total
- VAT appears to be added twice — once in the Shopify price and again in QuickBooks Online
Example: A Shopify order totals £100.00 including 20% VAT. In QuickBooks Online, the sales receipt shows £120.00, because an additional 20% was calculated on top of the already VAT-inclusive amount.
Cause
Shopify prices in the UK and EU usually already include VAT. So for example if your Webgility Online order posting settings also apply a 20% tax rate, QuickBooks Online calculates 20% tax on top of those amounts — so the tax is effectively charged twice and the receipt total goes up.
A second, related cause of "extra" amounts is how Shopify fees are posted. If Webgility Online is set to post fees as a line item, they'll appear on the sales receipt itself, which can make it look different from the Shopify order.
Solution
Step 1: Update your tax setting in Webgility Online
-
Open Webgility Online and go to your Order Posting settings for your Shopify store.
-
Find the Tax section.
-
Change the tax rate from the required percentage to 0% or No VAT.
-
Save your settings.
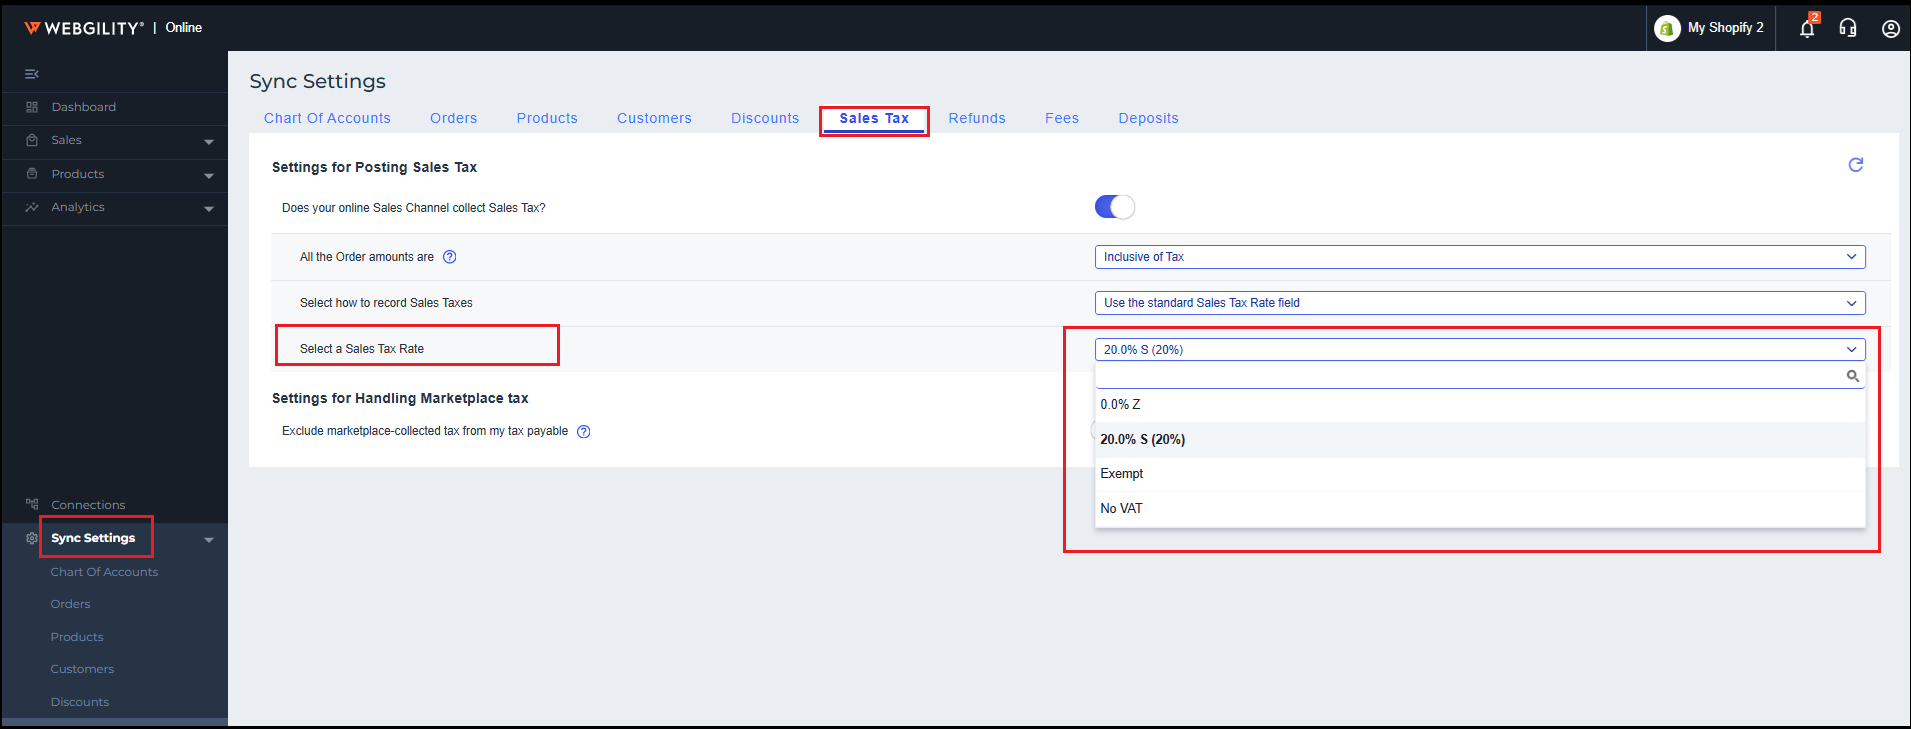
Tip: This tells QuickBooks Online not to calculate additional tax on amounts that already include VAT, so the sales receipt matches Shopify.
Step 2: Unpost and repost affected orders
Settings changes only apply to orders posted after the change. To correct orders already in QuickBooks Online:
- In Webgility Online, find the affected order(s).
- Select Unpost to remove the existing sales receipt from QuickBooks Online.
- Select Post again to recreate the sales receipt with your updated settings.