Processing Orders, Refunds, Fees, and Deposits in Webgility QuickBooks Connector
This article provides an overview of how users can manage and process orders, refunds, fees, and deposits from Shopify to QuickBooks Online using the Webgility QuickBooks Connector. It outlines how to access the Transactions section within the app and describes the workflow for posting, unposting, filtering, and reviewing transaction history for each category. The guide emphasizes how the connector helps automate and streamline financial data management, ensuring that every Shopify transaction — from sales and refunds to fees and deposits — is accurately recorded in QuickBooks Online. By following these steps, users can maintain up-to-date books, improve reconciliation efficiency, and minimize manual data entry errors.
Overview
After setting up your Webgility QuickBooks Connector, integrating QuickBooks Online, and configuring your settings, you’re ready to post orders, refunds, fees, and deposits from Shopify to QuickBooks Online. The Transactions section in the Webgility QuickBooks Connector app allows you to manage these seamlessly with options for posting, unposting, filtering, and reviewing history.
Accessing Transactions
- Log in to your Shopify Admin Panel.
- Navigate to Apps > Webgility.
- Click on the Transactions tab to access separate tabs for Orders, Refunds, Fees, and Deposits.
Orders
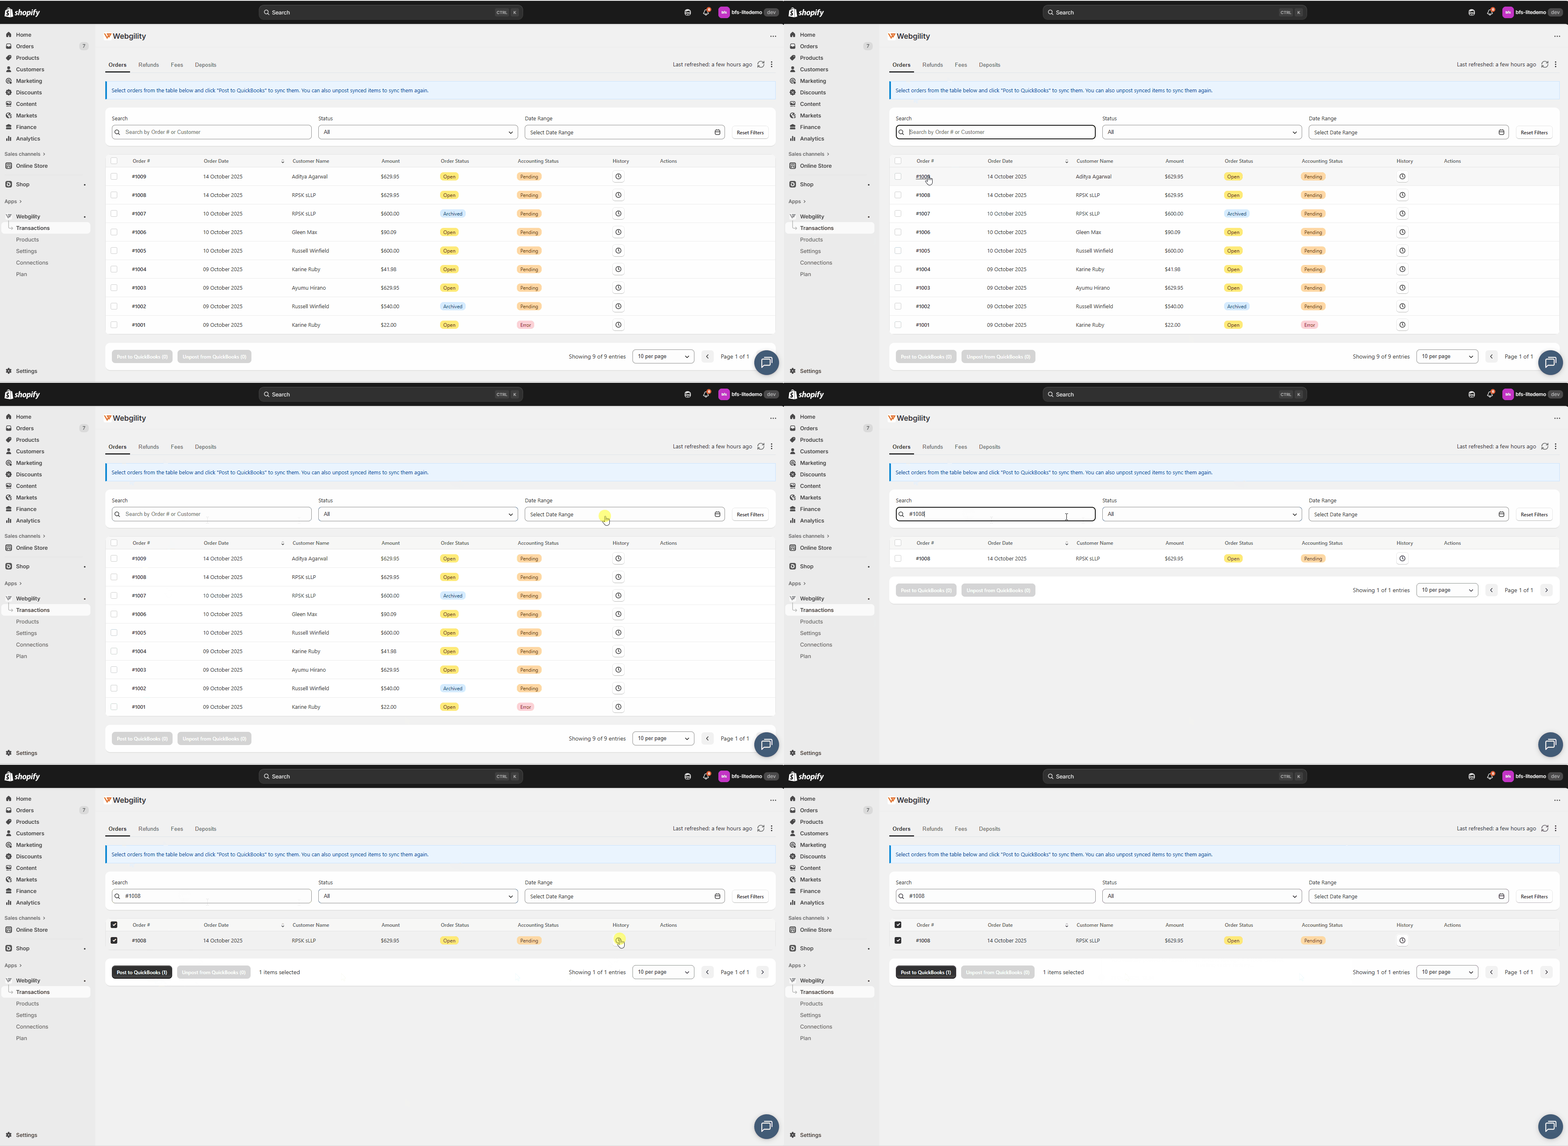
- Posting Orders:
- Go to the Orders tab.
- Use the Search by Order# or Customer Name.
- Select the orders by checking the boxes.
- Click Post to QuickBooks at the bottom.
- Undo Posting:
- Select a posted order and click Unpost from QuickBooks.
- Filtering Orders:
- Filter by status (Pending, Error, Posted).
- Filter by date range to process specific orders.
- Click Reset Filters to clear all filters.
- Reviewing Order History:
- Click the Clock icon under the History column to see the order history from the moment it was downloaded into Webgility QuickBooks Connector.

Refunds
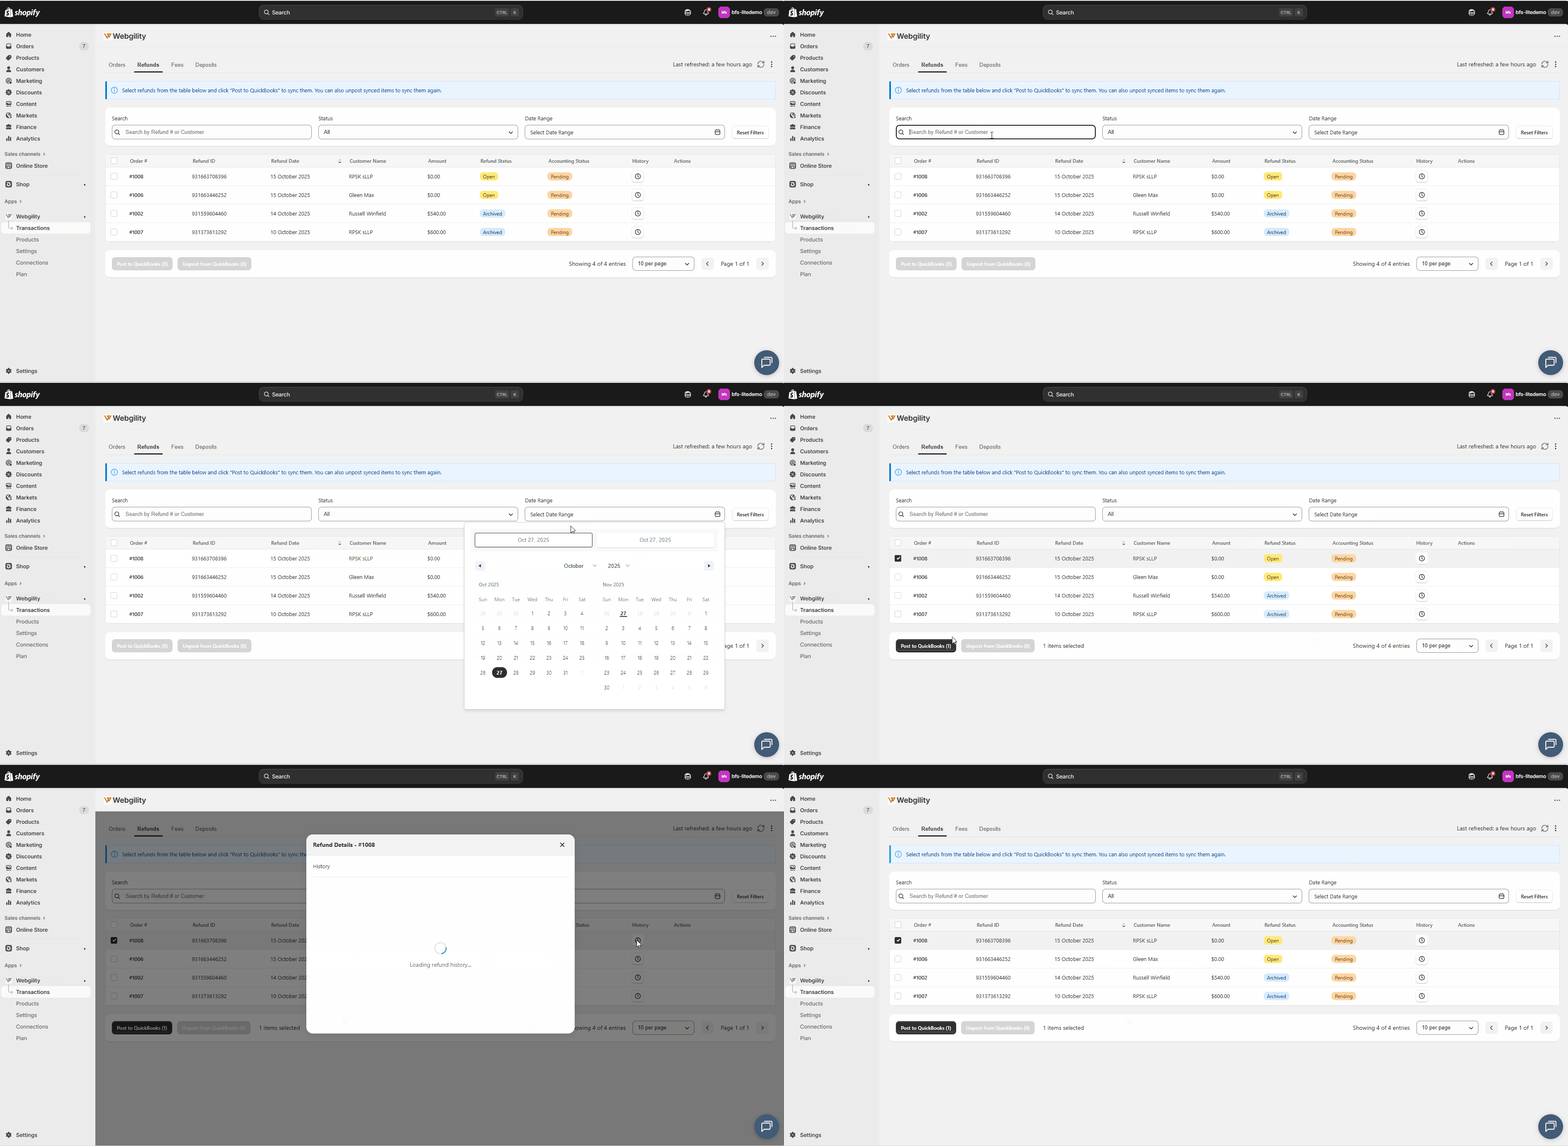
- Posting Refunds:
- Navigate to the Returns tab.
- Use global search by Refund# or Customer Name.
- Select the refund(s) and click Post to QuickBooks.
- Undo Posting:
- Select a posted refund and click Unpost from QuickBooks.
- Filtering Refunds:
- Filter by status (Pending, Error, Posted) or date range.
- Click Reset Filters to clear all filters.
- Reviewing Refund History:
- Click the Clock icon under the History column.

Fees
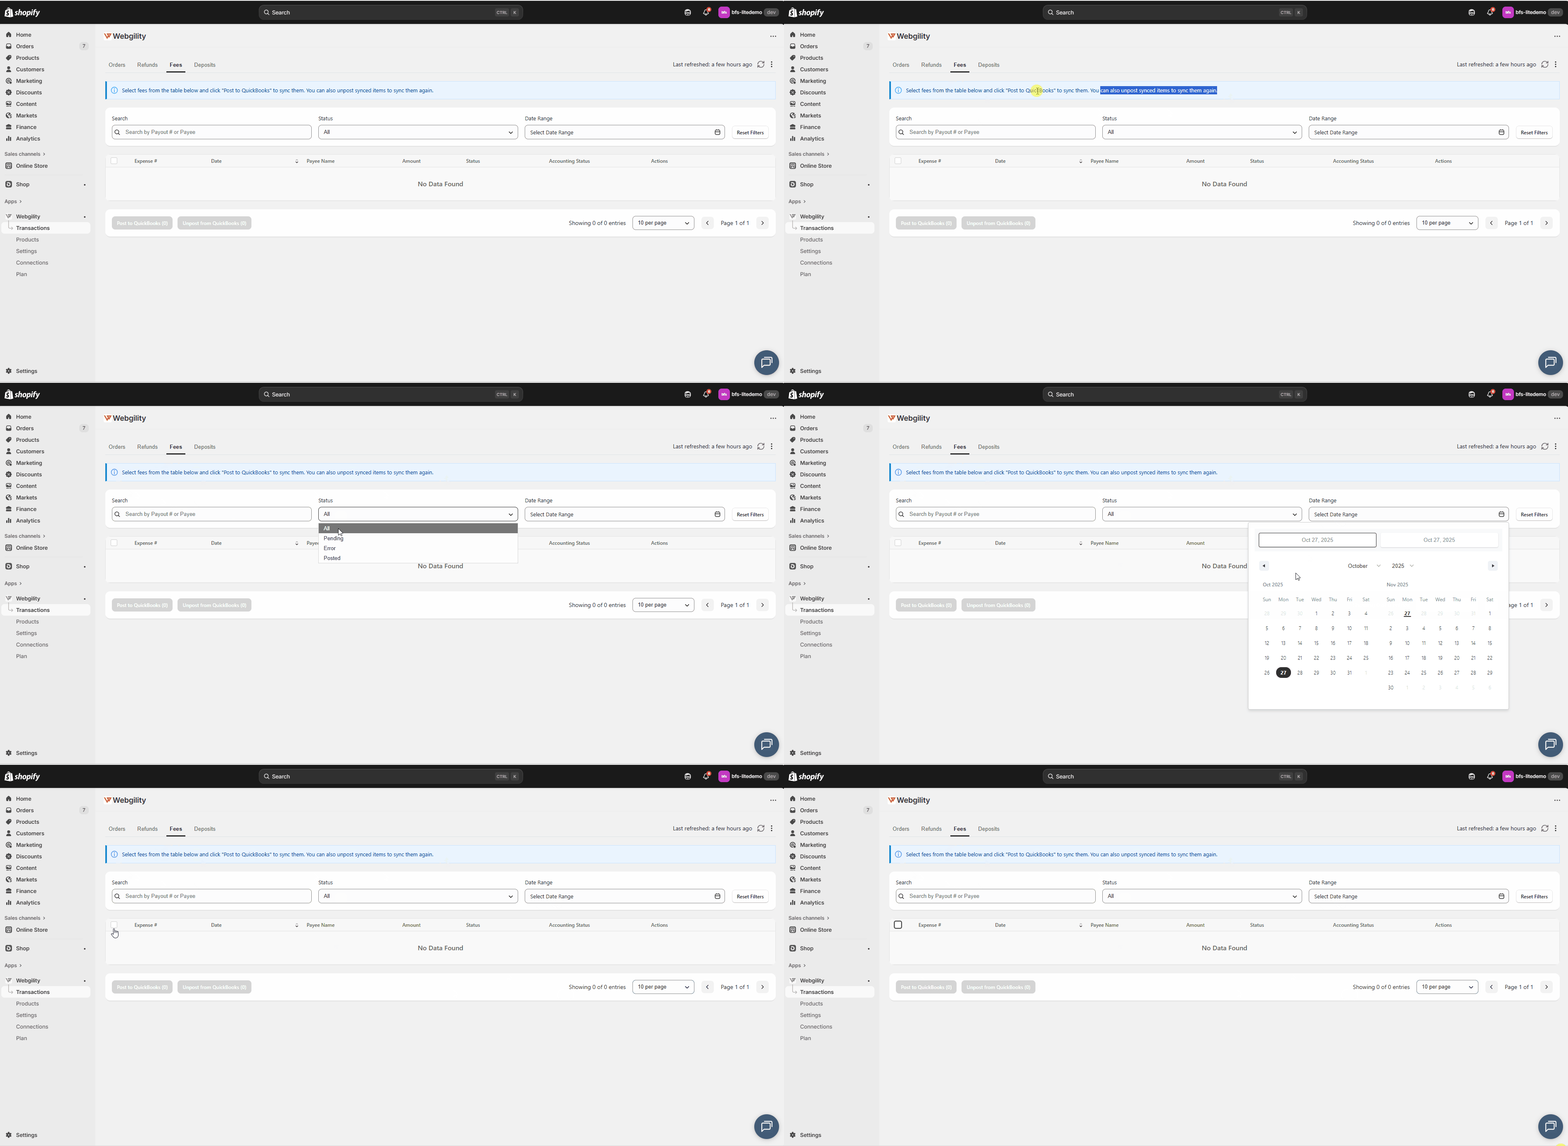
- Posting Fees:
- Go to the Fees tab.
- Search by Payout# or Payee Name.
- Select fees and click Post to QuickBooks.
- Undo Posting:
- Select posted fees and click Unpost from QuickBooks.
- Filtering Fees:
- Filter by status (Pending, Error, Posted) or date range.
- Click Reset Filters to clear filters.
- Reviewing Fee History:
- Click the Clock icon under the History column.

Deposits
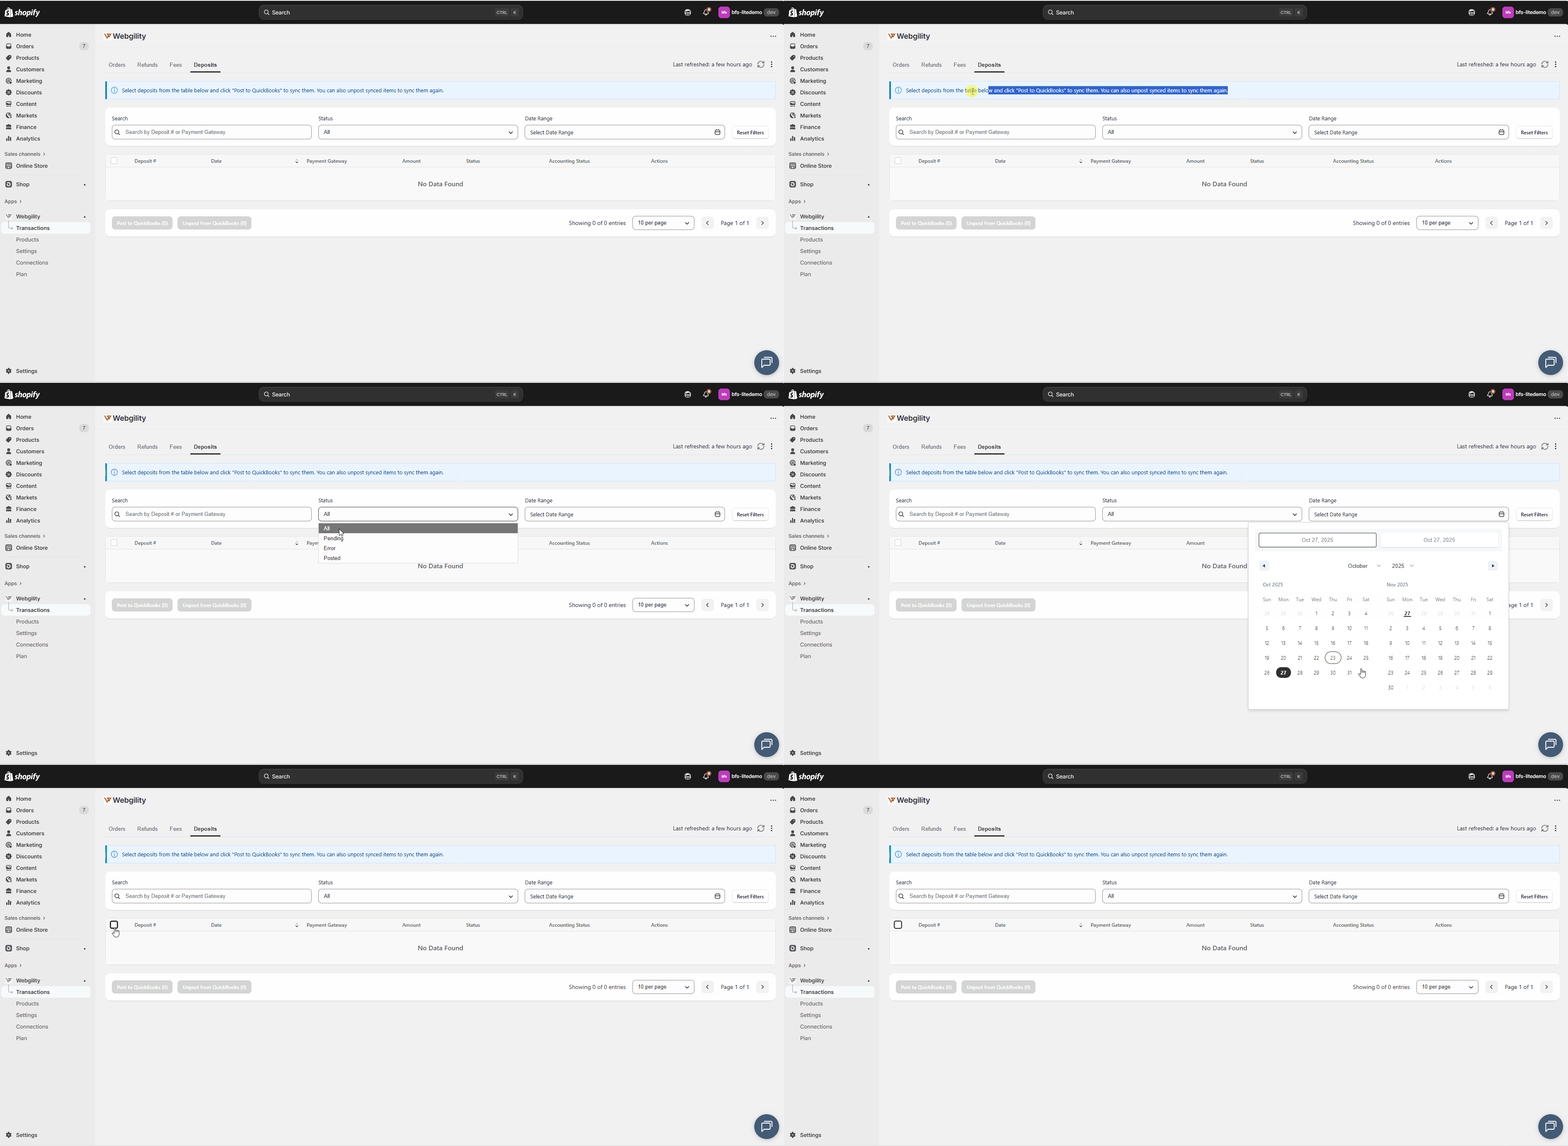
- Posting Deposits:
- Go to the Deposits tab.
- Search by Deposit# or Payment Gateway.
- Select deposits and click Post to QuickBooks.
- Undo Posting:
- Select posted deposits and click Unpost from QuickBooks.
- Filtering Deposits:
- Filter by status (Pending, Error, Posted) or date range.
- Click Reset Filters to clear filters.
- Reviewing Deposit History:
- Click the Clock icon under the History column to track deposit activity.

Summary
By using the Orders, Refunds, Fees, and Deposits tabs in Webgility QuickBooks Connector, you can efficiently post and manage all Shopify transactions in QuickBooks Online. Features like posting, unposting, filtering, and history tracking ensure that your accounting remains accurate and up-to-date.