

Add tags to your orders in Shopify.
Step 2Choose Shopify Tags as the rule driver in Webgility.
Step 3Pick a tag and define its posting settings.
Step 4Save and repeat for every tag that needs its own rule.
OverviewBy default, Webgility Online posts every order from a sales channel the same way. Shopify Tags rules let you override that for specific tagged groups — one tag can post as a sales receipt to one deposit account with one class, while another tag posts as an invoice to a different account with a different class.
When This AppliesUse tag-based rules when a single Shopify store needs to split into multiple postings in QuickBooks Online — for example wholesale versus retail, pickup versus delivery, or by brand under one storefront. This is the recommended approach when connecting the same store multiple times is no longer possible under current Shopify policy.
Steps to Post Shopify Orders by TagStep 1: Add tags to your orders in Shopify
Open the order in Shopify and add one or more tags in the Tags field. Any tag you add becomes selectable in Webgility Online once the connection refreshes.
Step 2: Switch posting to custom rules in Webgility Online
Open the connection for the Shopify store at the top-right, then go to Sync Settings → Orders.
In How should your orders be posted?, pick Apply different settings based on custom rules. In Post Orders differently based on their, pick Shopify Tags.
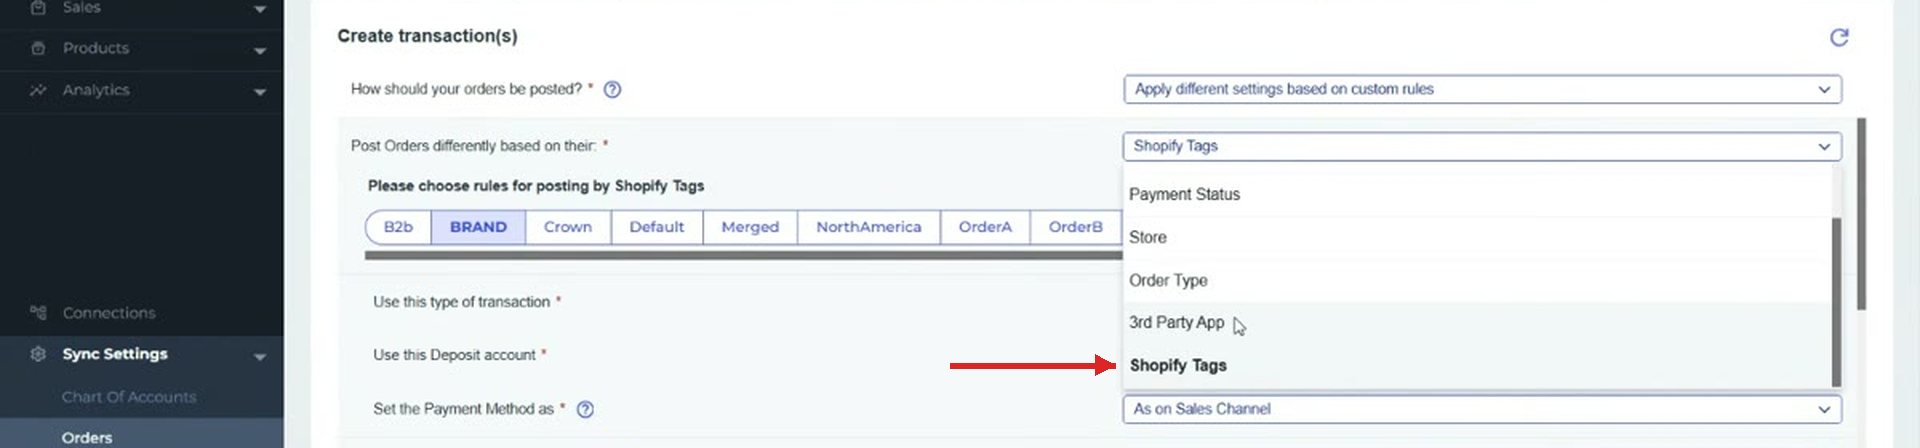 Pick Shopify Tags from the Post Orders differently based on their dropdown.
Step 3: Pick a tag and set its posting rule
Webgility shows every tag that has been seen on orders from this Shopify store as a selectable chip. Click a tag, then fill in the posting settings below for orders carrying that tag — transaction type, deposit account, payment method, dates, memo, and the Class and Location you want these orders to carry in QuickBooks Online.
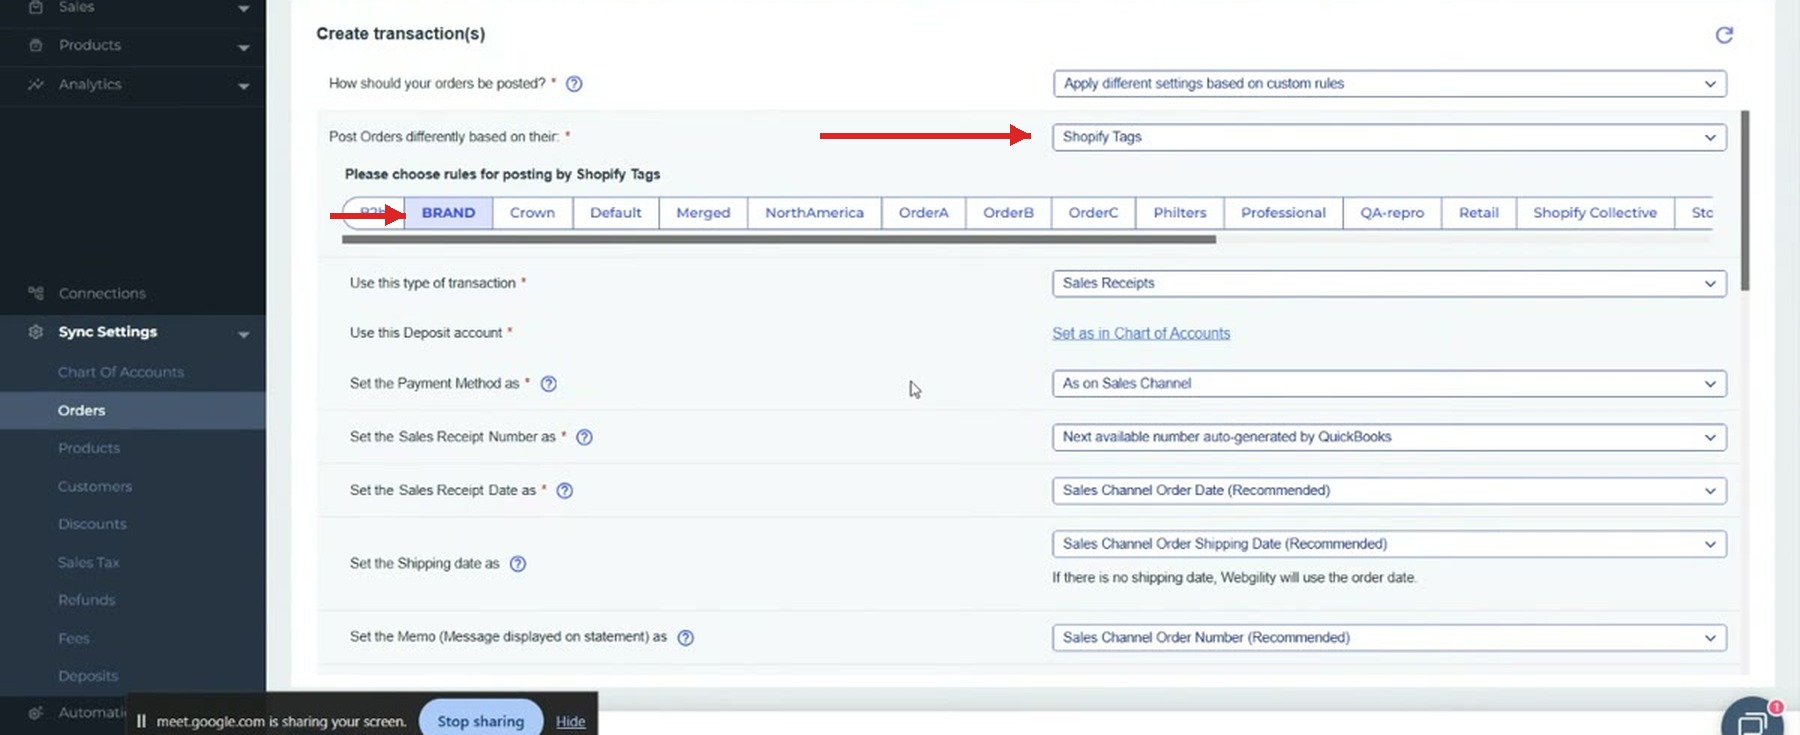 Each tag chip holds its own posting rule — click a chip to edit that rule's fields below.
Step 4: Save and repeat for each tag
Save the rule, then click the next tag chip and define its rule the same way. The Default chip covers any order that arrives without a matching tag.
Current ScopeTag-based rules apply to orders and refunds. Settlement fees, shipping fees, payment fees, and payout fees are configured per channel on the Fees tab and continue to use a single class and location for the whole channel — tags do not drive those postings yet.
Important NoteShopify Tags rules are available only for Shopify-connected channels. Other sales channels continue to use the single-rule setup on the Orders tab, where class and location are set once for the whole channel.
Filter Downloads by TagIf a tag group should never post to QuickBooks Online at all, Click on the Connections and Prefrences for Shopify and uncheck that tag under Shopify Tags in Order Source Settings. Only tags that stay checked here flow through to the rules on the Orders tab.
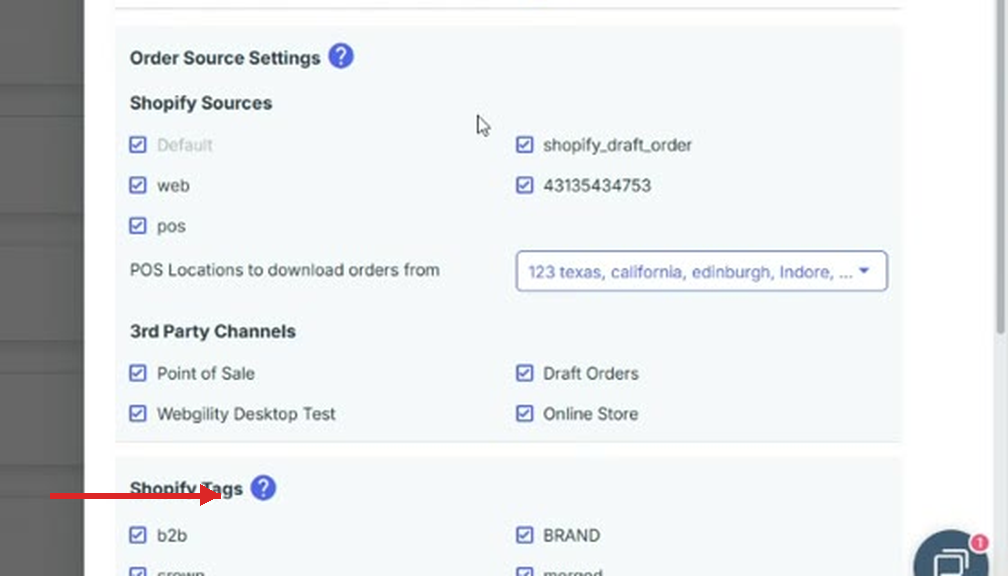 Shopify connection → Order Source Settings → Shopify Tags — checked tags download, unchecked tags do not.
Keep the tag taxonomy inside Shopify stable before setting rules in Webgility Online. A tag renamed or dropped in Shopify no longer matches any Webgility rule, so those orders fall back to the Default rule.
Additional SupportIf a tagged order is posting against the wrong rule, confirm the tag is present on the order in Shopify, is checked in the Shopify connection in Webgility Online, and has a saved rule under the matching chip on the Orders tab.