
Overview
When deposits post into QuickBooks under today's date instead of the actual order date, reconciling payments against invoices becomes slow because the dates no longer line up. Webgility Desktop lets you switch the posting rule so every deposit records on the original order's transaction date.
When This AppliesFollow this when your deposits are landing in QuickBooks under the current system date and you want them to carry the original order date so you can match them to the correct invoices and payment runs.
How It WorksWebgility Desktop reads a single setting under Sync Settings > Orders > Transaction Settings that decides which date each posted transaction carries. Setting it to Order Date makes every subsequent deposit, invoice and sales receipt use the date the shopper placed the order on the sales channel.
Steps to Change the Deposit Date Rule
Step 1: In Webgility Desktop, go to Connections > Accounting/POS/ERP > Sync Settings > Orders.
Step 2: Click Transaction Settings on the Orders tab.
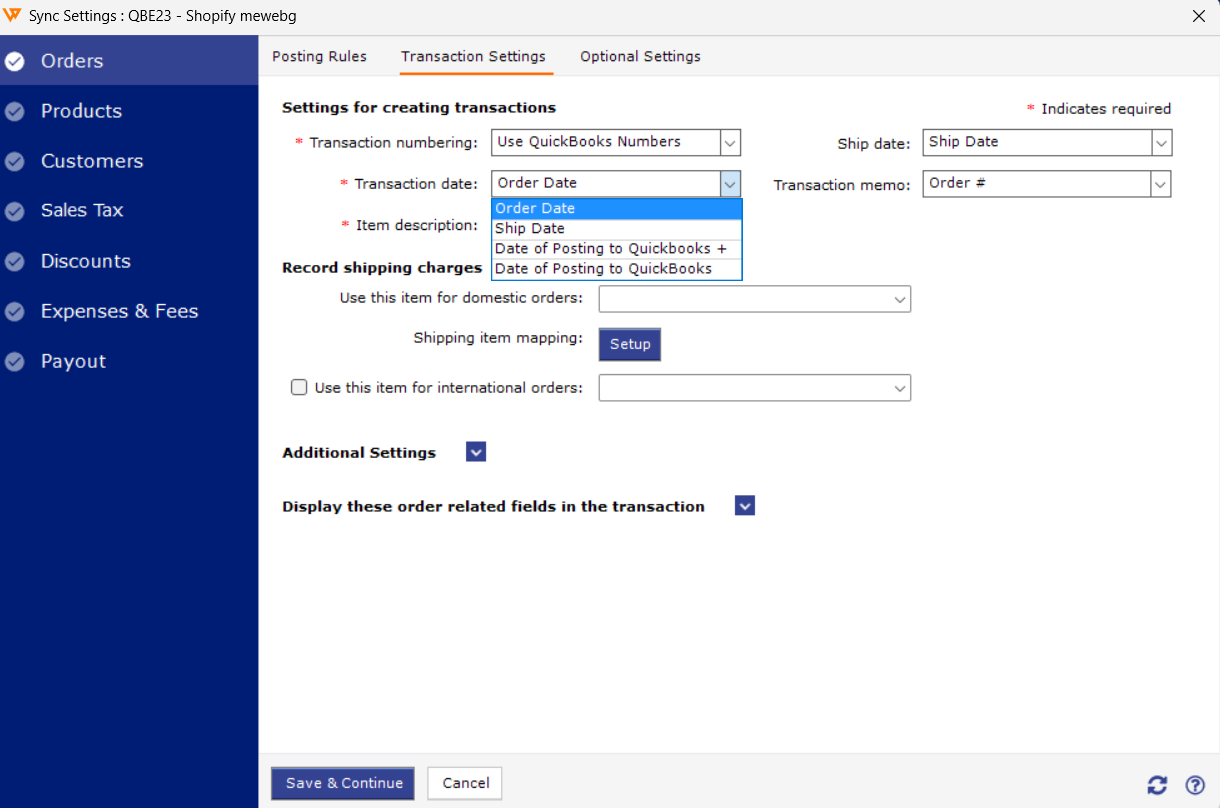
Step 3: In the Transaction Date dropdown, select Order Date.
Step 4: Click Save and close the window.
Step 5: Post one recent order and confirm in QuickBooks that the deposit now records against the sales channel order date.
Note: For Shopify or Amazon store if Payout or Settlement report has been opted for posting then the Payment date settings will be under the Payout settings for Shopify and under Order rules for Amazon.
Make this change outside of your posting hours and let the Scheduler finish its current run first, so the new rule applies cleanly to the next batch rather than mid-cycle.
Additional SupportIf any orders still post under the current date after this change, email support@webgility.com with the sales channel name, one example order number, and the date you saved the new setting.