
Amazon settles your account on a recurring cycle, netting your order revenue, refunds, and Amazon fees into a single deposit that lands in your bank account. Webgility Online already lets you post the fees from a settlement as a Bill or Expense from the Settlement Reports screen — this feature adds a separate Settlement Deposits screen where you can also post the net deposit itself, as a Transfer in QuickBooks Online, so it can be matched against your bank feed during reconciliation.
Follow these steps to set up and post Amazon deposits in Webgility Online.
Configure Deposit Accounts
Step 1: Open the Deposits tab
In Webgility Online, go to Sync Settings. Select your Amazon store from the left-hand panel, then open the Deposits tab. If you have more than one Amazon marketplace connected (for example, Amazon.com and Amazon.ca), use the store tabs at the top to configure each one individually.
Step 2: Turn on net deposit processing
Turn on the toggle for “Download and process the net deposit?”. Two required fields appear: Select account to transfer deposits from and Select account to transfer deposits to.
Step 3: Choose your transfer accounts
Under Select account to transfer deposits from, choose the clearing account in QuickBooks Online where your Amazon orders, refunds, and fee payments are posted (for example, Undeposited Funds). Under Select account to transfer deposits to, choose the bank account where Amazon actually deposits your funds (for example, Amazon 2 Deposit).
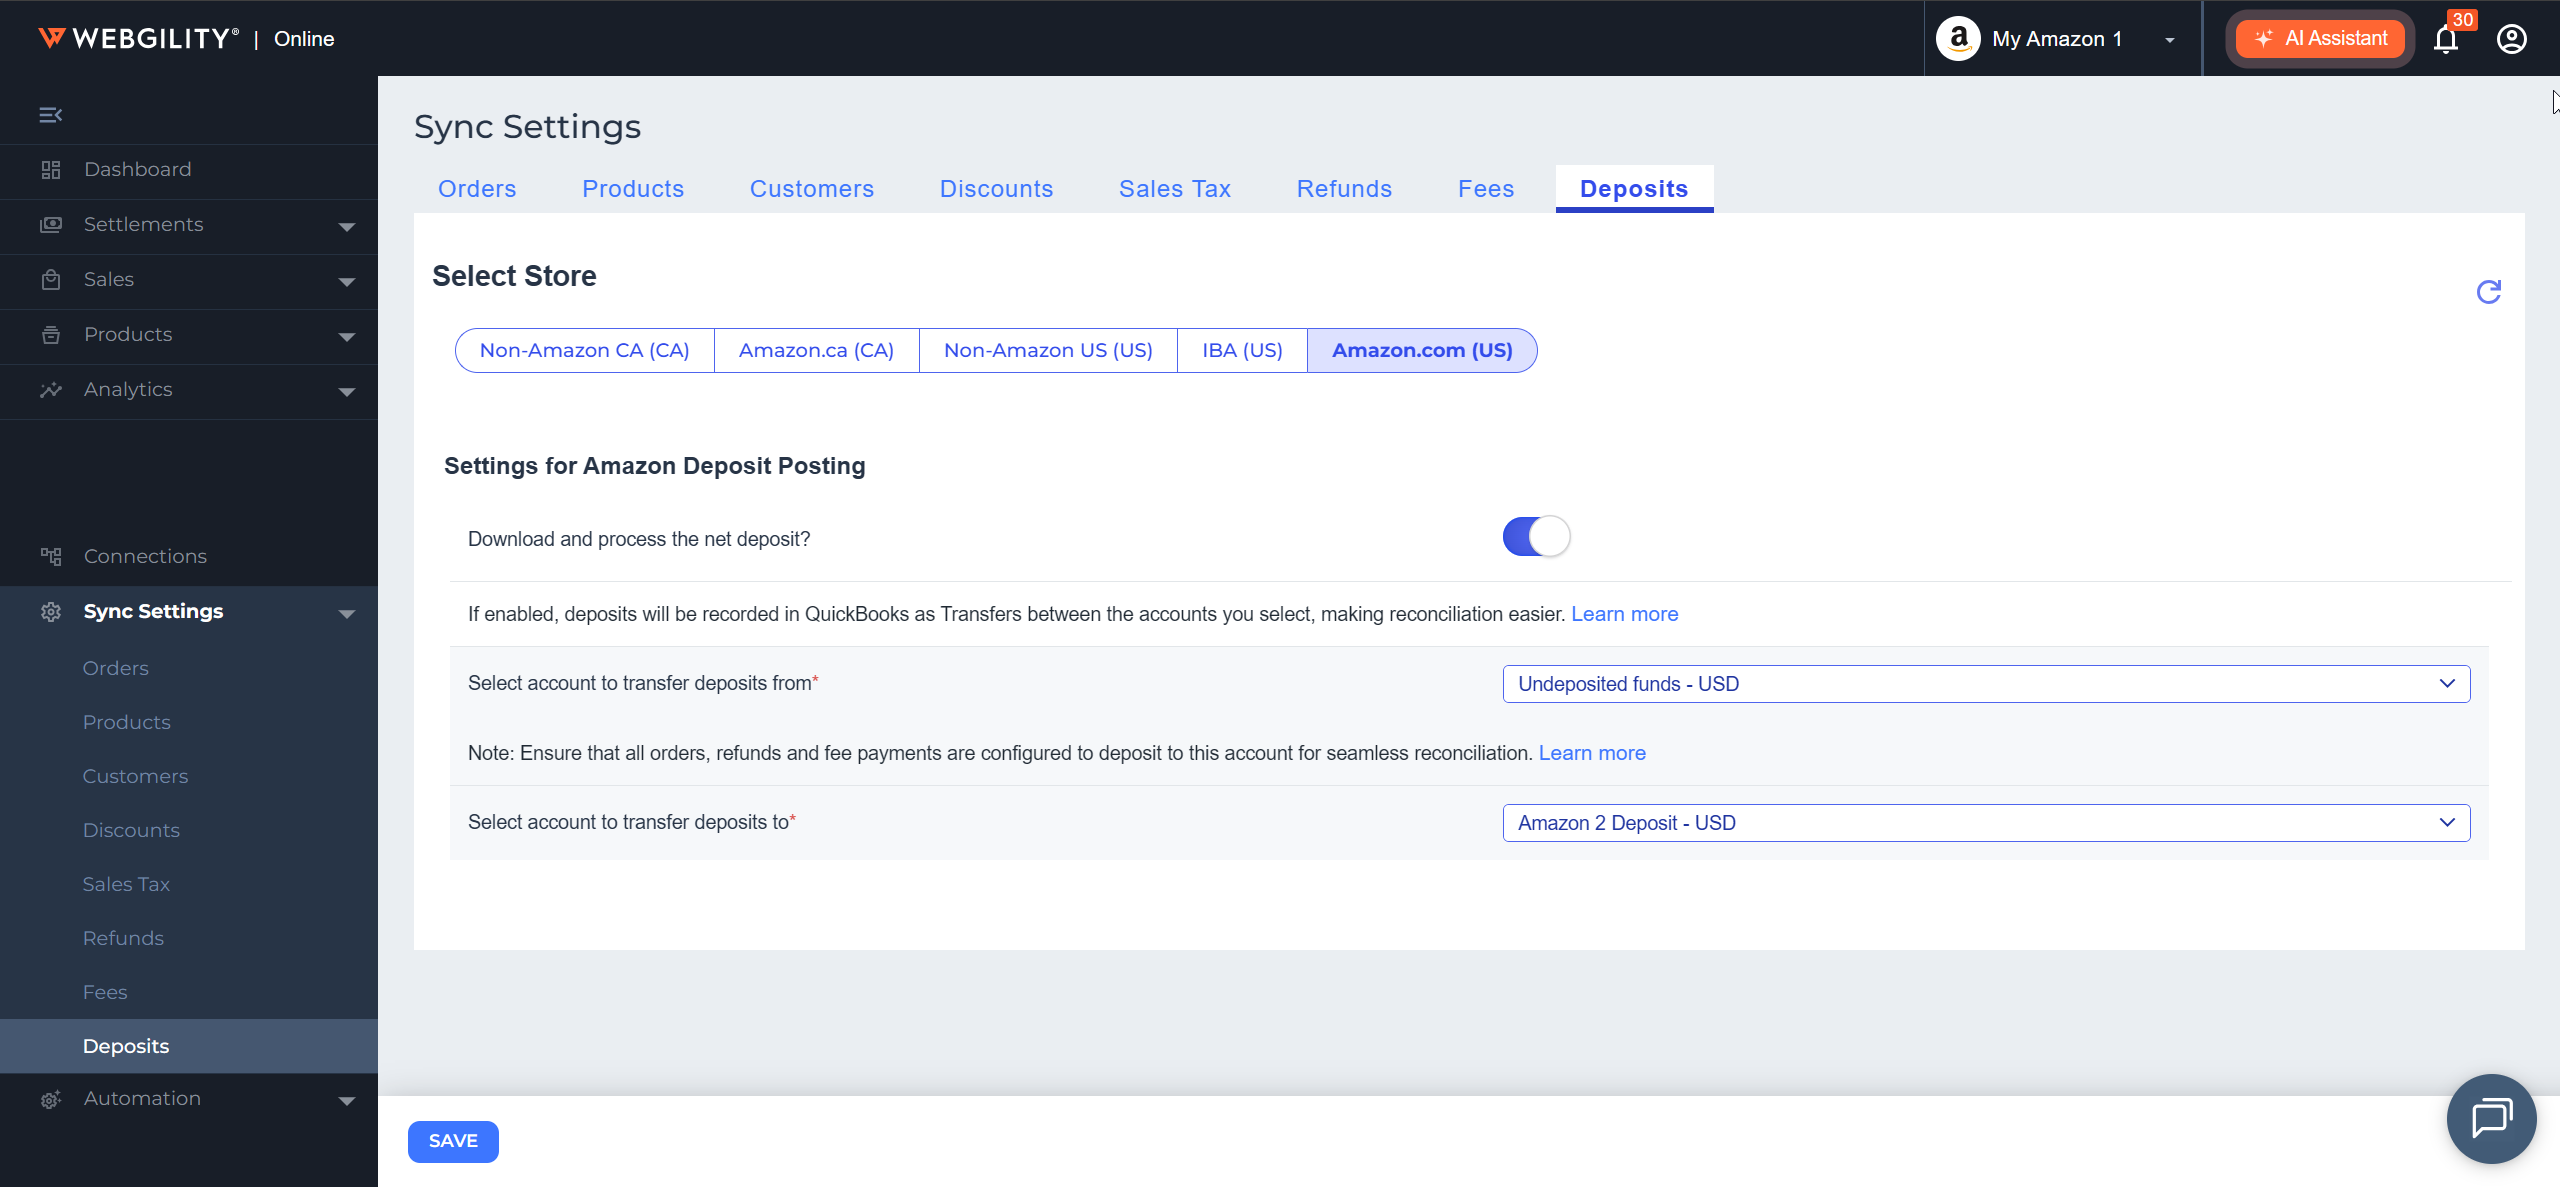
Note: Ensure that all orders, refunds, and fee payments are configured to deposit to the same account you select here, for seamless reconciliation.
Step 4: Save
Click Save.
Note: Both accounts are required while the toggle is on. Unlike some other sales channels, Amazon doesn't use the Chart of Accounts page for this setting — you configure both accounts directly here on the Deposits tab.
Post a Deposit
Step 5: Find the deposit
In the left-hand navigation, go to Settlements → Settlement Deposits. This screen lists your Amazon settlement deposits, separate from the Settlement Reports screen used for fees. Use the store and status filters to find the deposit you want to post — it will show a status of Pending.
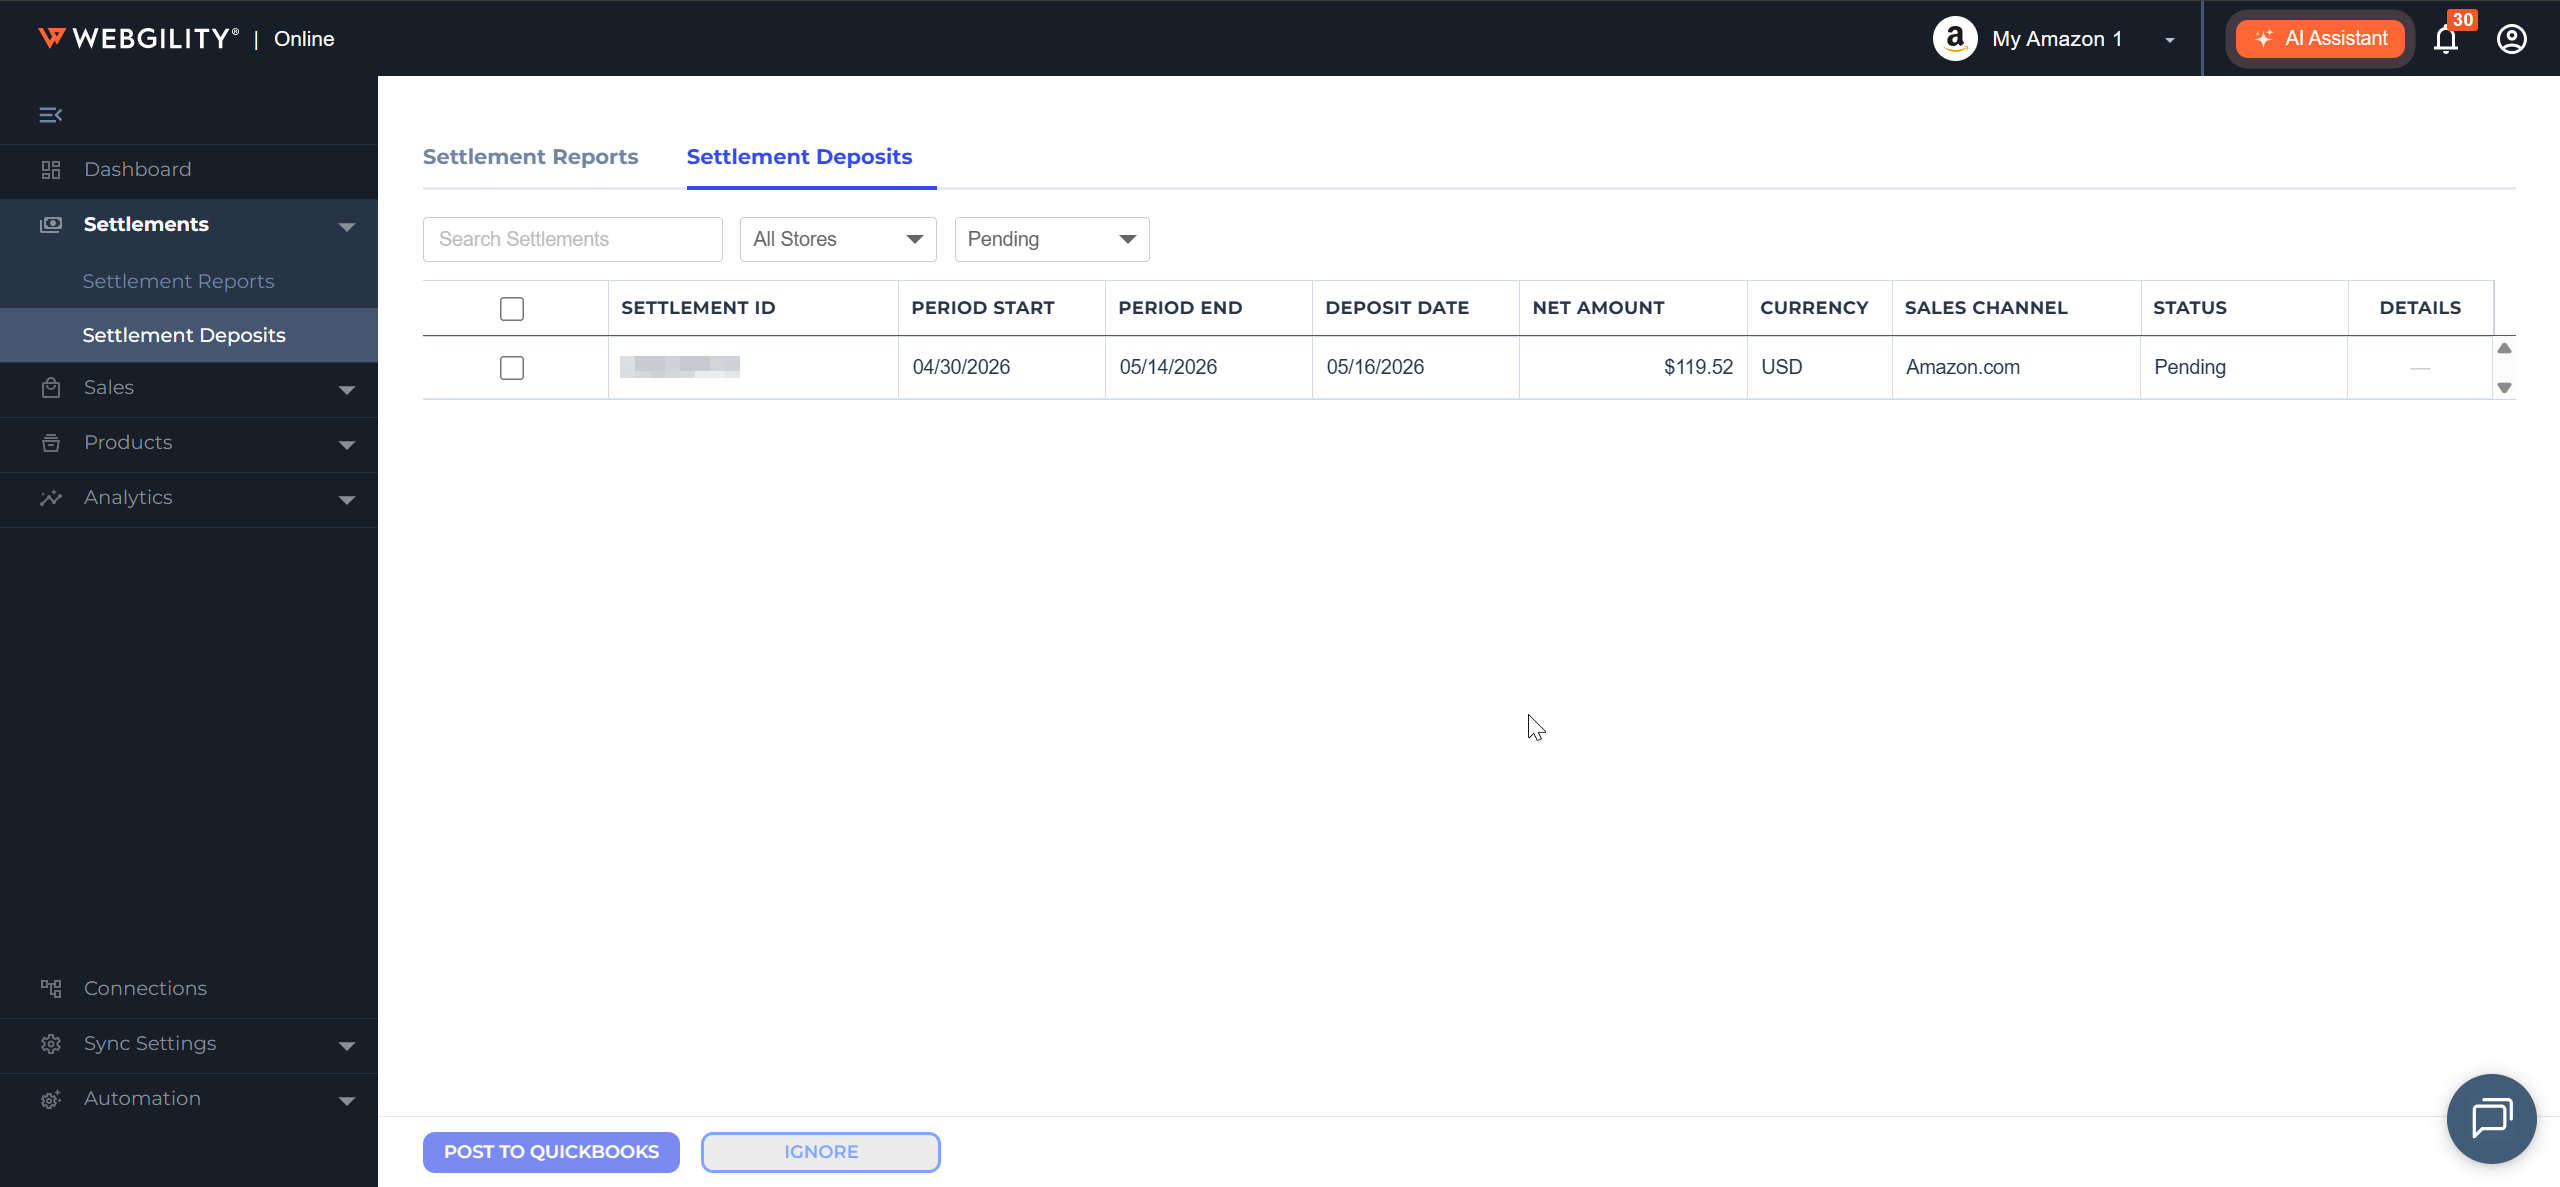
Step 6: Post to QuickBooks
Select the checkbox next to the deposit (or deposits) you want to post, then click POST TO QUICKBOOKS. The button shows a Posting... state while the transaction is created.
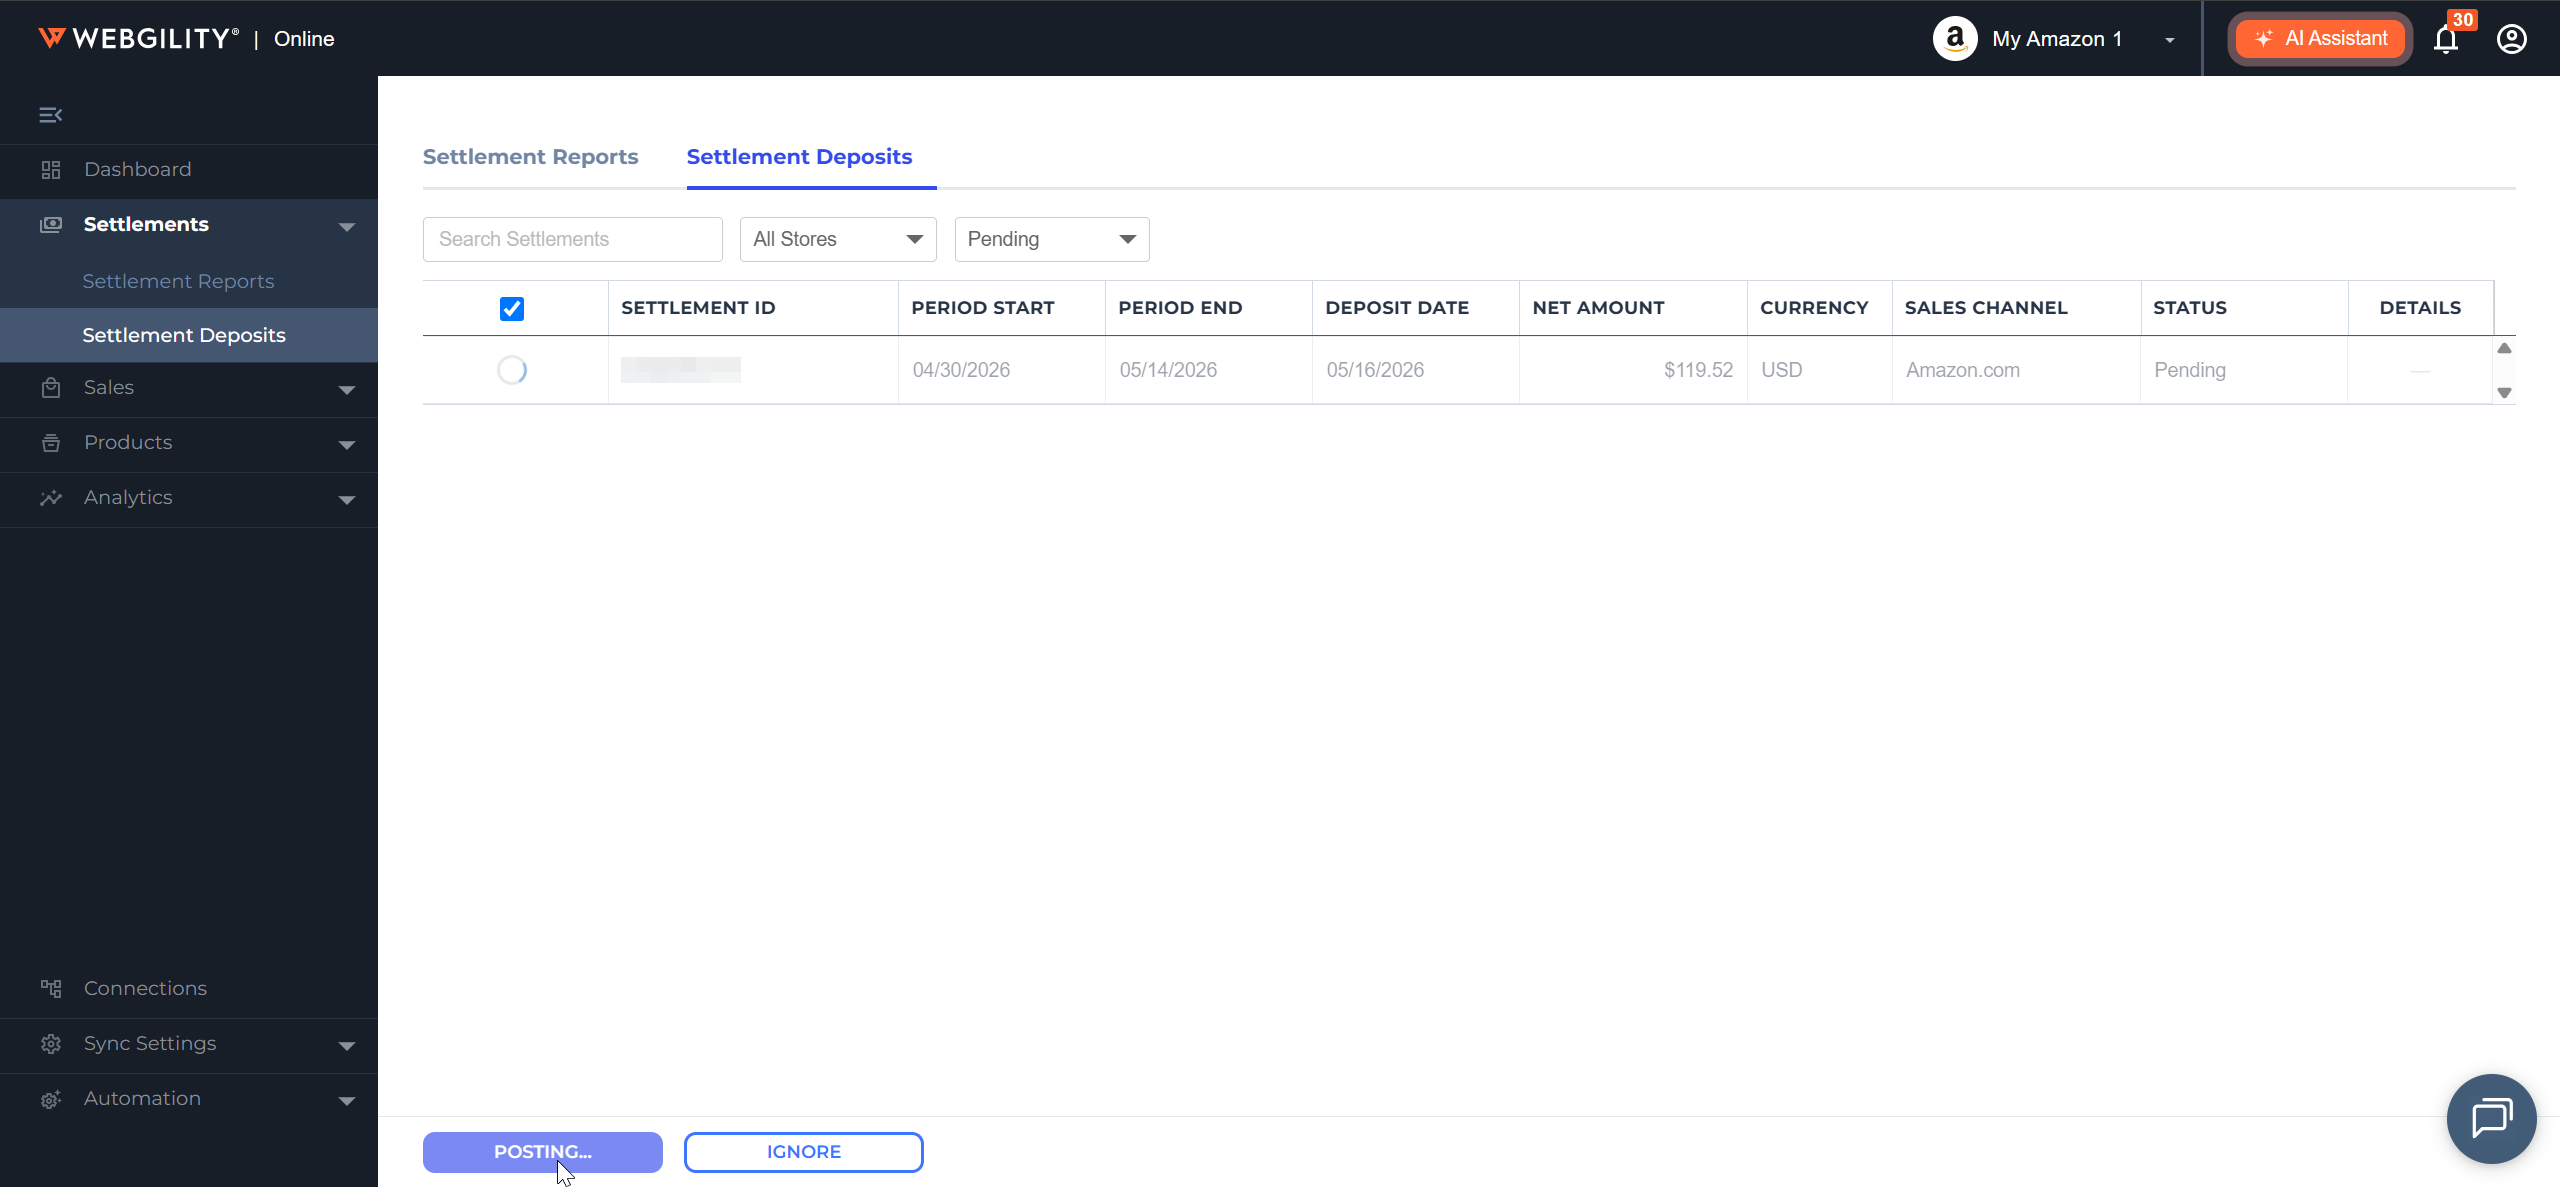
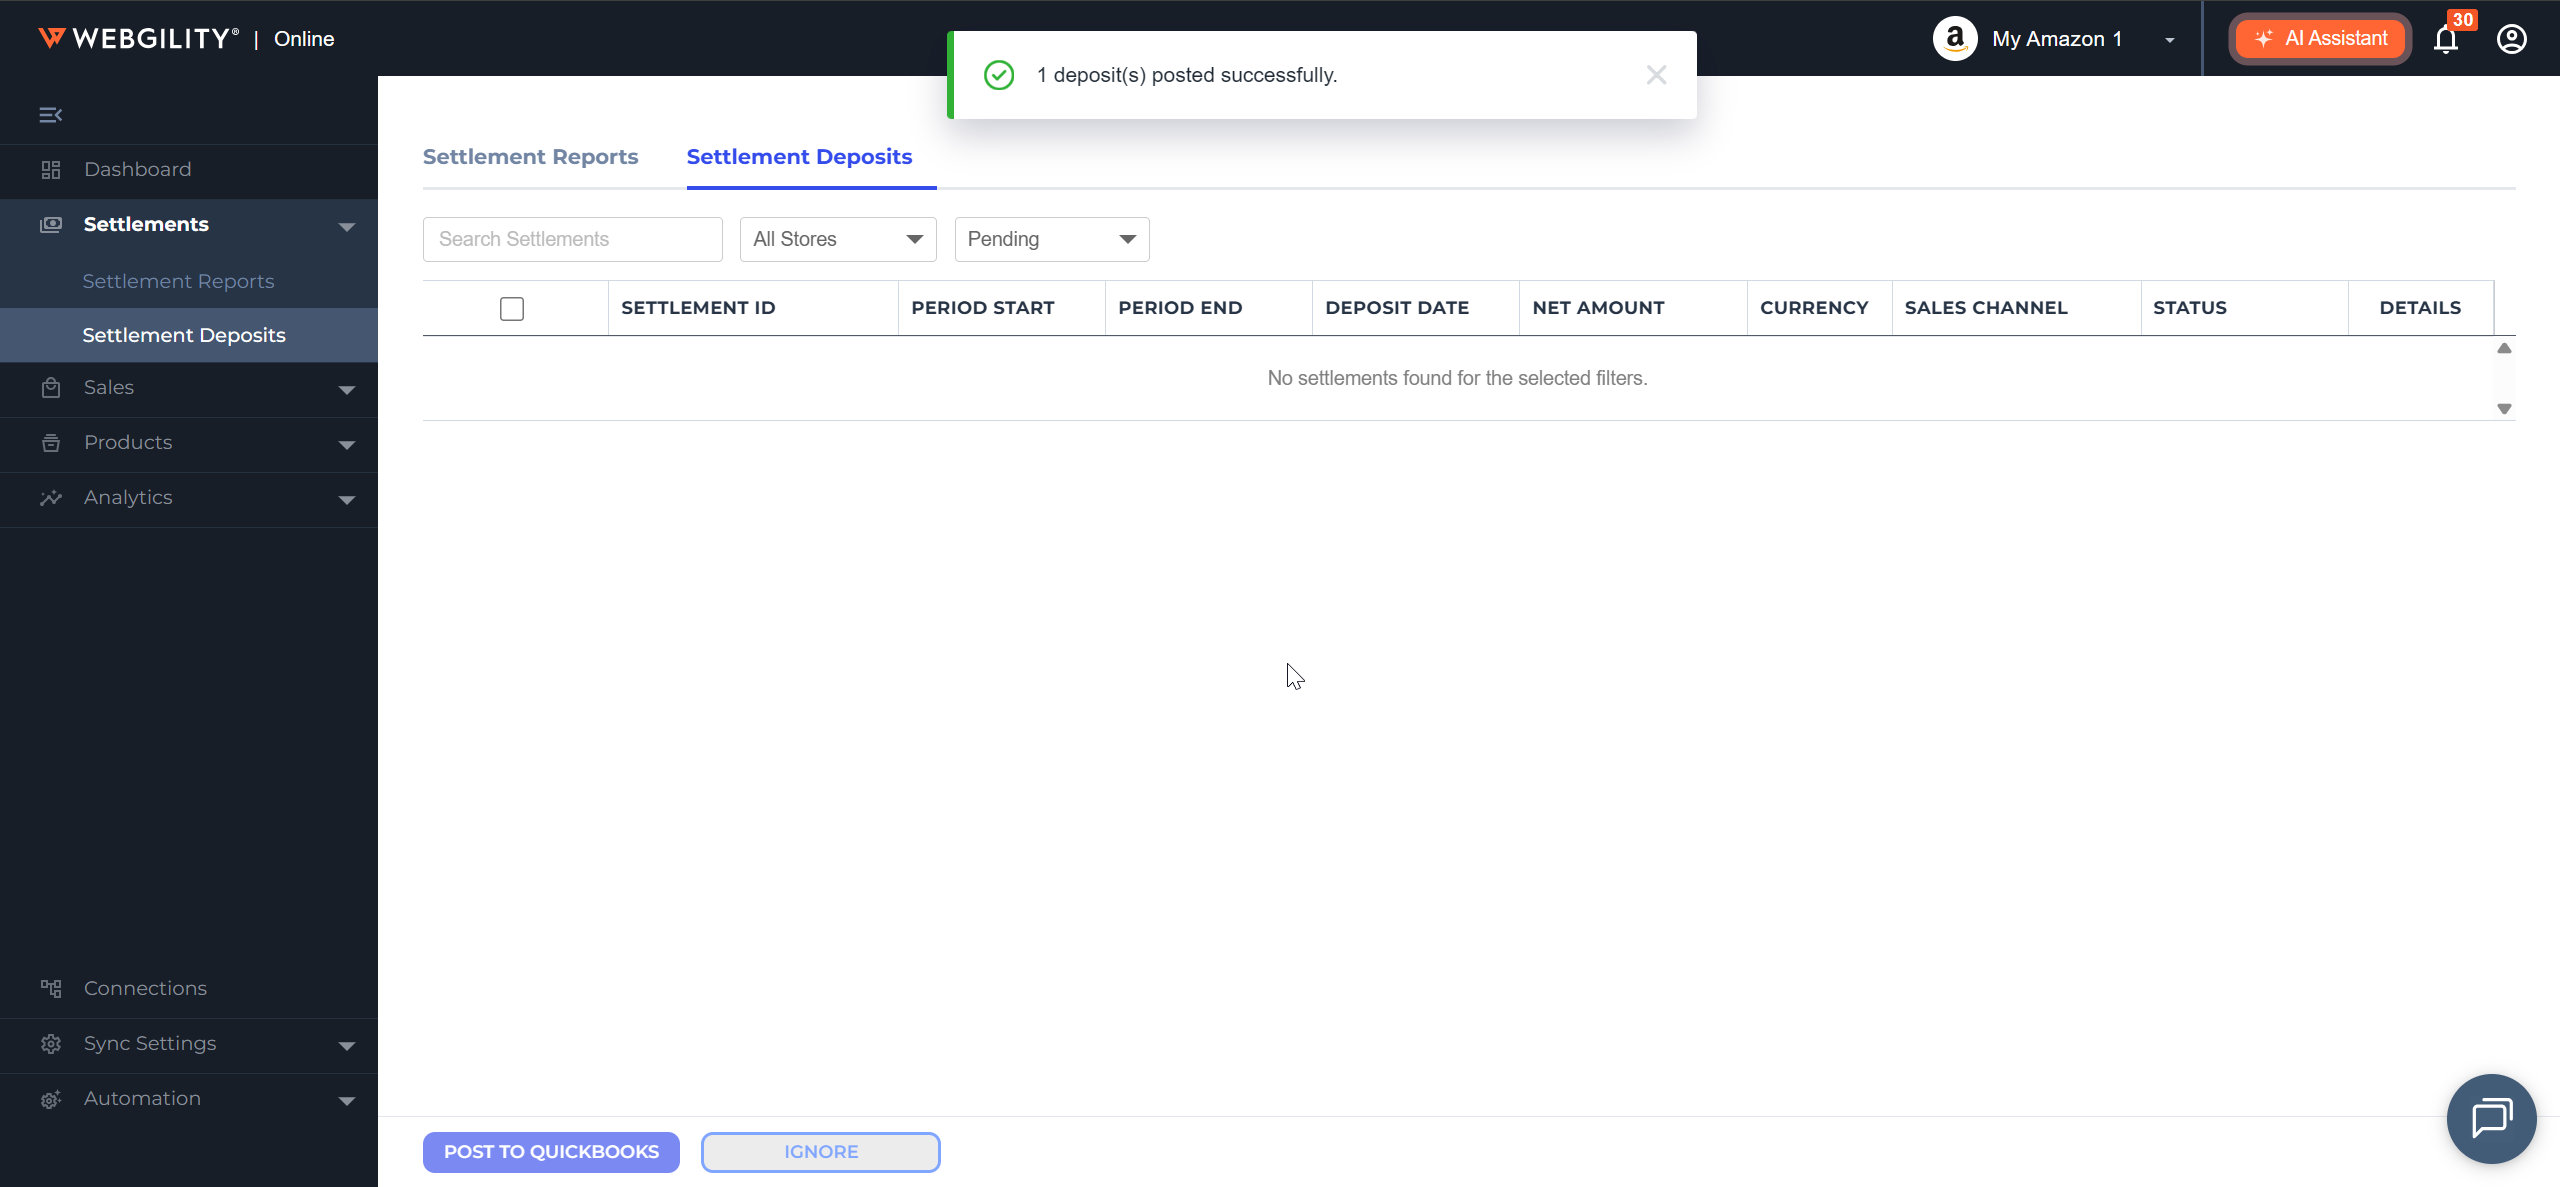
Step 7: Confirm it posted
Once posting completes, a confirmation message appears (for example, “1 deposit(s) posted successfully”) and the deposit no longer appears under the Pending filter.
Webgility Online creates a Transfer transaction in QuickBooks Online: Transfer Funds From and Transfer Funds To are set to the accounts you configured, the Transfer Amount matches the settlement's net amount, the Date matches the deposit date, and the memo records the Settlement ID for traceability.
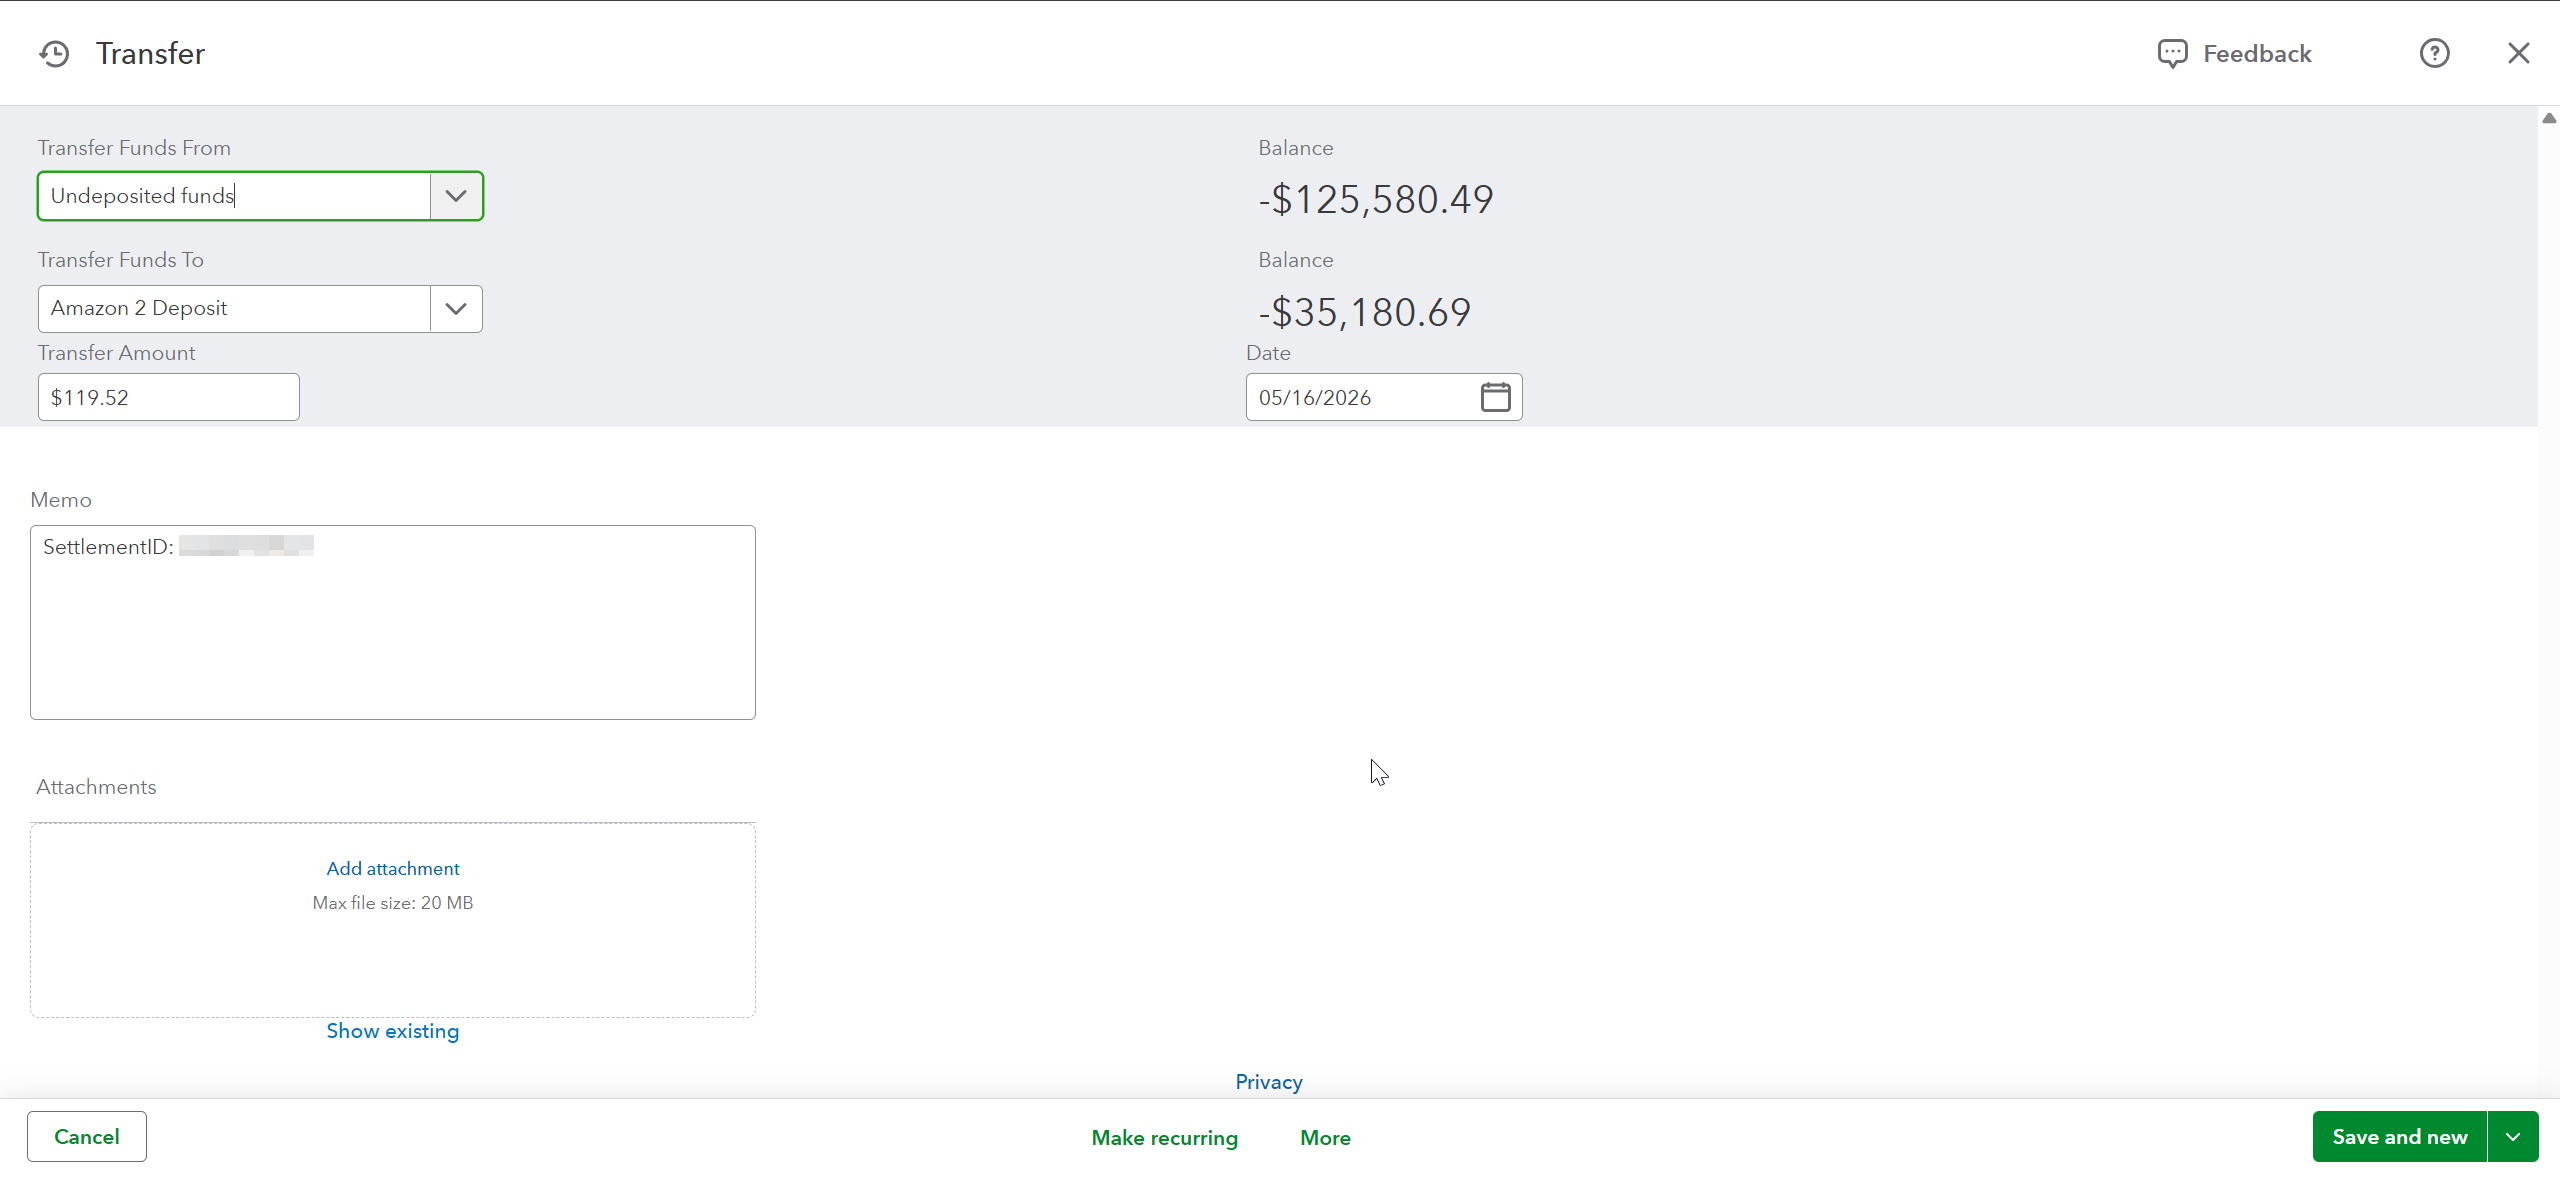
Note: Use IGNORE instead of Post if you don't want Webgility Online to post a particular deposit — it removes the deposit from your Pending list without creating a transaction.
Automate Deposit Posting (Optional)
Step 8: Open Scheduler Rules
Go to Automation → Scheduler Rules, and find the Expenses & Fees section for your Amazon store.
Step 9: Turn on automatic syncing
Turn on “Sync Settlement Deposit automatically” and click Save.
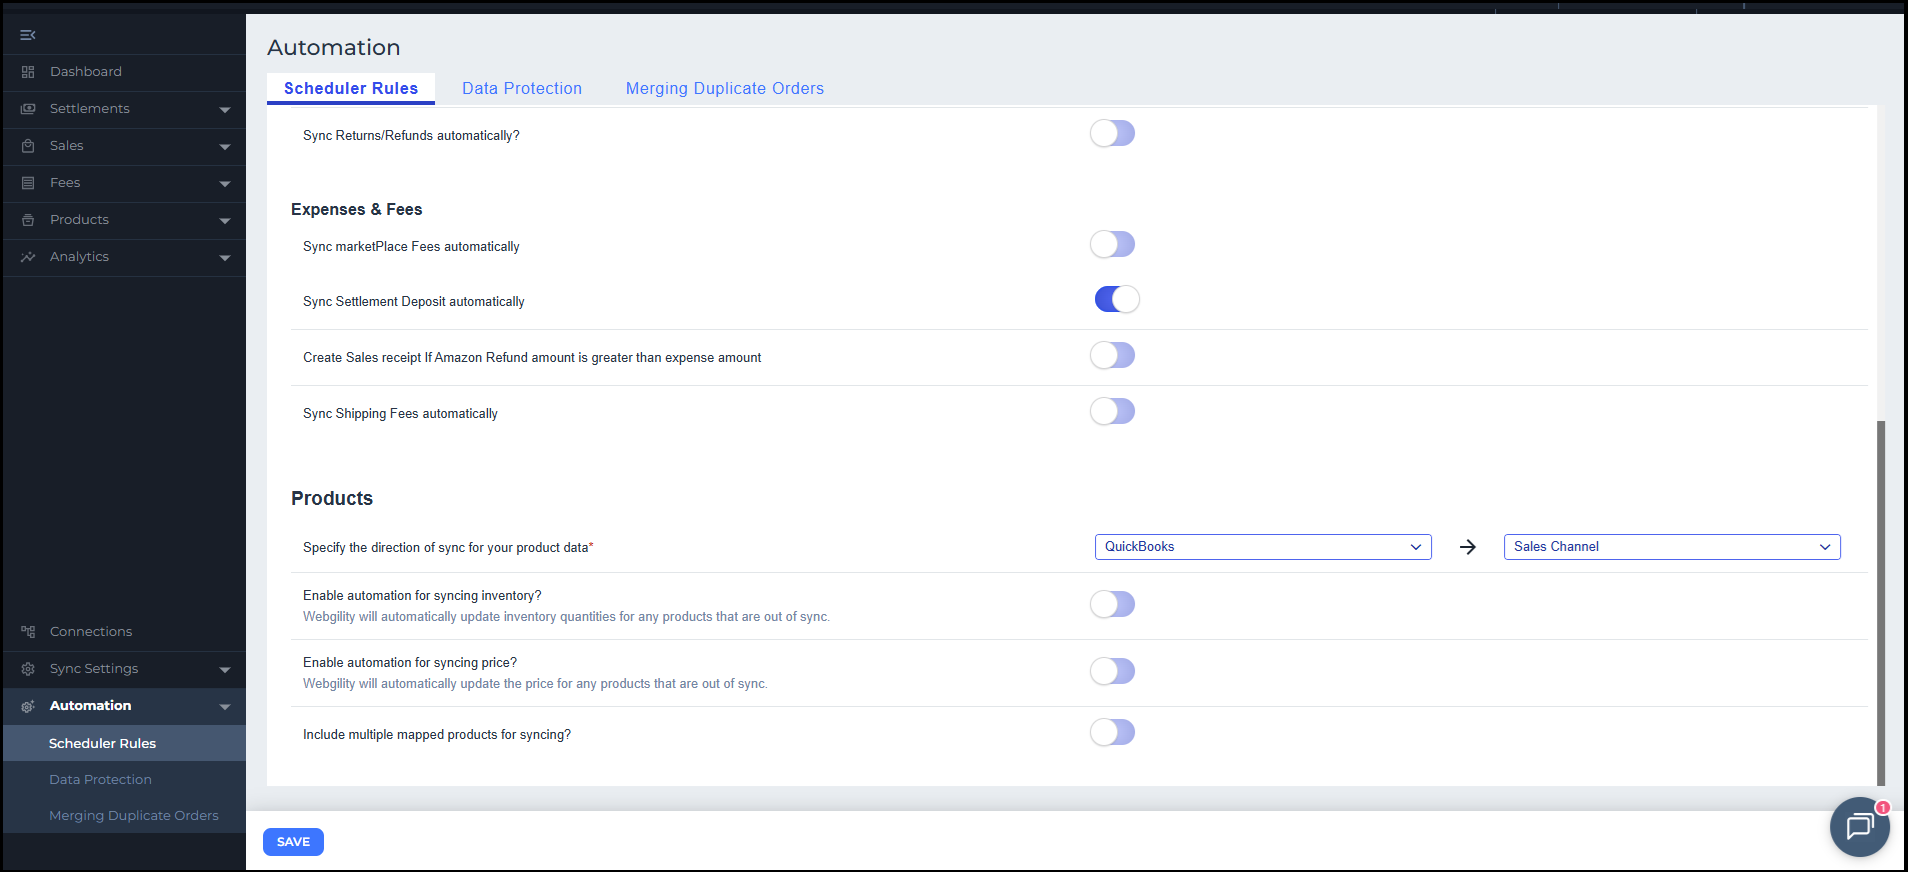
Once enabled, Webgility Online posts each pending settlement's net deposit automatically on your regular sync schedule, using the accounts you configured in the Deposits tab — no manual posting required.
Frequently Asked Questions
Is posting a deposit the same as posting my Amazon fees?
No, they're separate actions. Fees (referral, FBA, advertising, etc.) post as a Bill or Expense from the Settlement Reports screen, which is unrelated to this feature. The net deposit itself posts as a Transfer from the Settlement Deposits screen (or automatically, if enabled).
What if the deposit amount in QuickBooks doesn't match my bank statement?
Make sure all your Amazon orders, refunds, and fee postings use the same clearing account selected as “Select account to transfer deposits from.” Transactions posted to a different account will cause a mismatch during reconciliation.
What does the IGNORE button do?
It removes a deposit from your Pending list without posting a Transfer for it — use it for deposits you don't want Webgility Online to record.
Do I need QuickBooks Online for this feature?
Yes, this feature currently requires QuickBooks Online. QuickBooks Desktop is not supported.