
Overview
This article explains why QuickBooks Enterprise may fail to assign its own transaction numbers when orders are posted from Webgility Desktop, and how to correct the Transaction Numbering setting so QuickBooks generates numbers as expected. It also covers a related situation some customers encounter: transactions from a prior period appearing as open/unpaid invoices when they cannot be located in Webgility's active views — which are frequently just archived and already marked Paid.
Symptoms
- Orders post to QuickBooks, but QuickBooks does not assign its own sequential transaction number.
- The transaction number in QuickBooks matches the Online Order Number instead of following QuickBooks' native numbering.
- Separately, older transactions (e.g., from the previous month) appear as open/unpaid invoices, and cannot be found by searching the standard Orders tabs in Webgility.
Cause
Webgility Desktop's Transaction Numbering posting setting was configured to use the Online Order Number as the QuickBooks transaction number, rather than QuickBooks auto-numbering. Webgility's recommended default is to let QuickBooks assign its own numbers, and to keep the sales channel's order number in the memo field for traceability instead — reserving the transaction number field for QuickBooks' own sequence. When this setting is misconfigured, QuickBooks can't generate its own numbers because Webgility is overriding that field.
Resolution
Step 1: Locate the Transaction Numbering setting
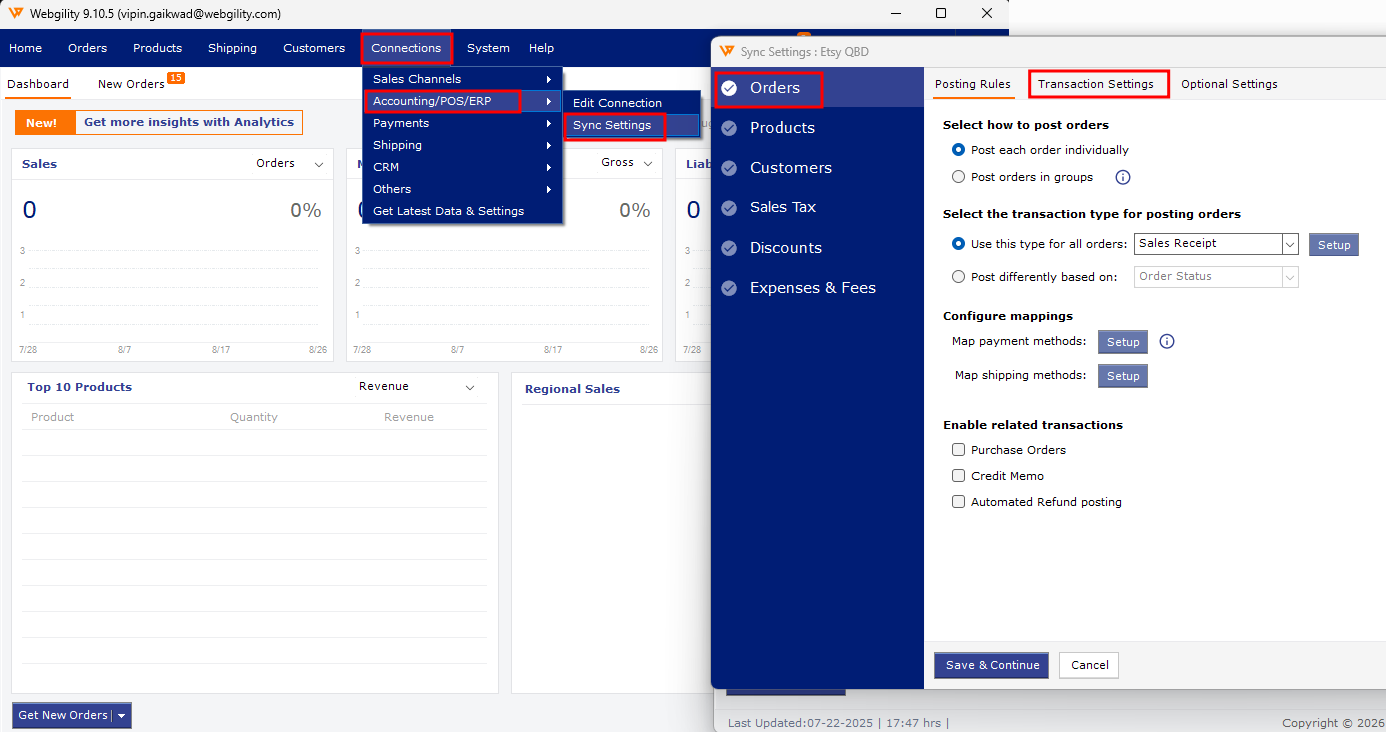
In Webgility Desktop, go to Connections → Accounting/POS/ERP → Sync Settings → Orders → Transaction Settings.
Step 2: Update the Transaction Numbering method
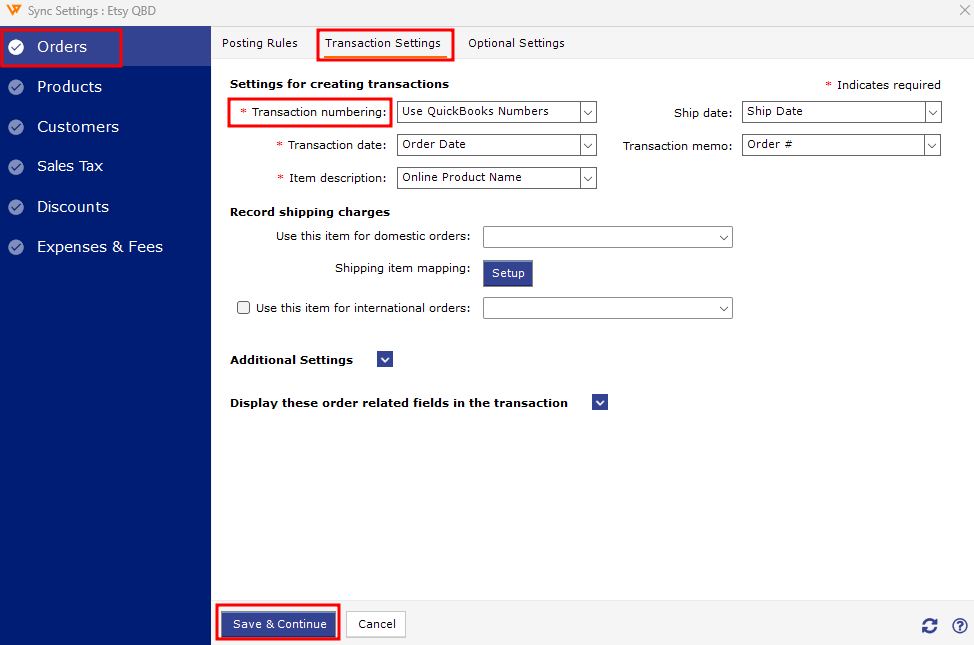
Change the Transaction Numbering setting from Online Order Number to Use QuickBooks Desktop Numbering (QuickBooks auto-numbering). Optionally, map the online order number to the memo field so it's still visible on each transaction for reference.
Step 3: Save and post a test transaction
Save the updated settings, then post a test order to QuickBooks Enterprise to confirm the change took effect.
Step 4: Verify the transaction number in QuickBooks
Open the posted transaction in QuickBooks Enterprise and confirm that QuickBooks has assigned its own sequential transaction number, rather than reusing the online order number.
Once verified, resume normal order posting — no further orders need to be reposted, as this setting only affects transactions posted going forward.