
Part of How to Connect Webgility i with Magento 2.
Part 2: Connect the store in Webgility i
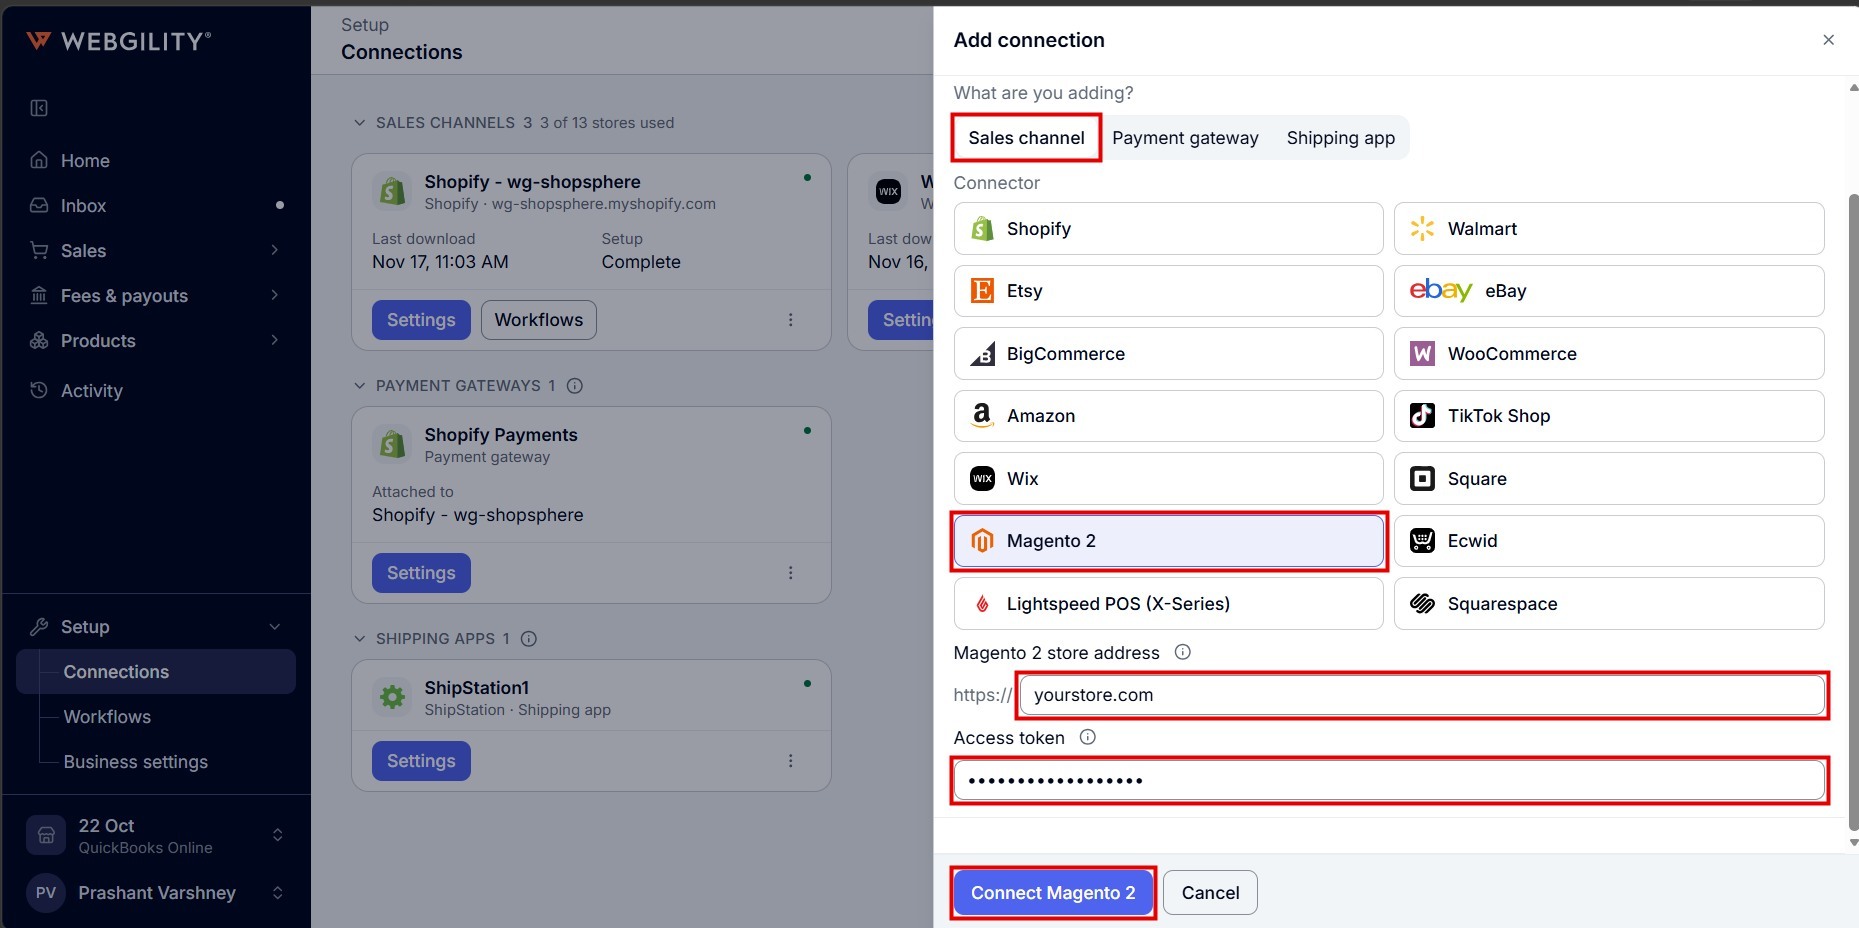
- Sign in to Webgility i, go to Setup > Connections and click Add connection. The Add connection panel opens on the right.
- Under What are you adding?, leave Sales channel selected. Under Connector, click Magento 2.
- In Magento 2 store address, enter the address of your store, such as yourstore.com or yourstore.com/shop. Webgility i adds https:// for you. Do not add a port.
- In Access token, paste the Access Token that you copied in Part 1.
- Click Connect Magento 2.
- The panel shows "Connecting your store" while Webgility i checks your store and the access token. Keep the page open.

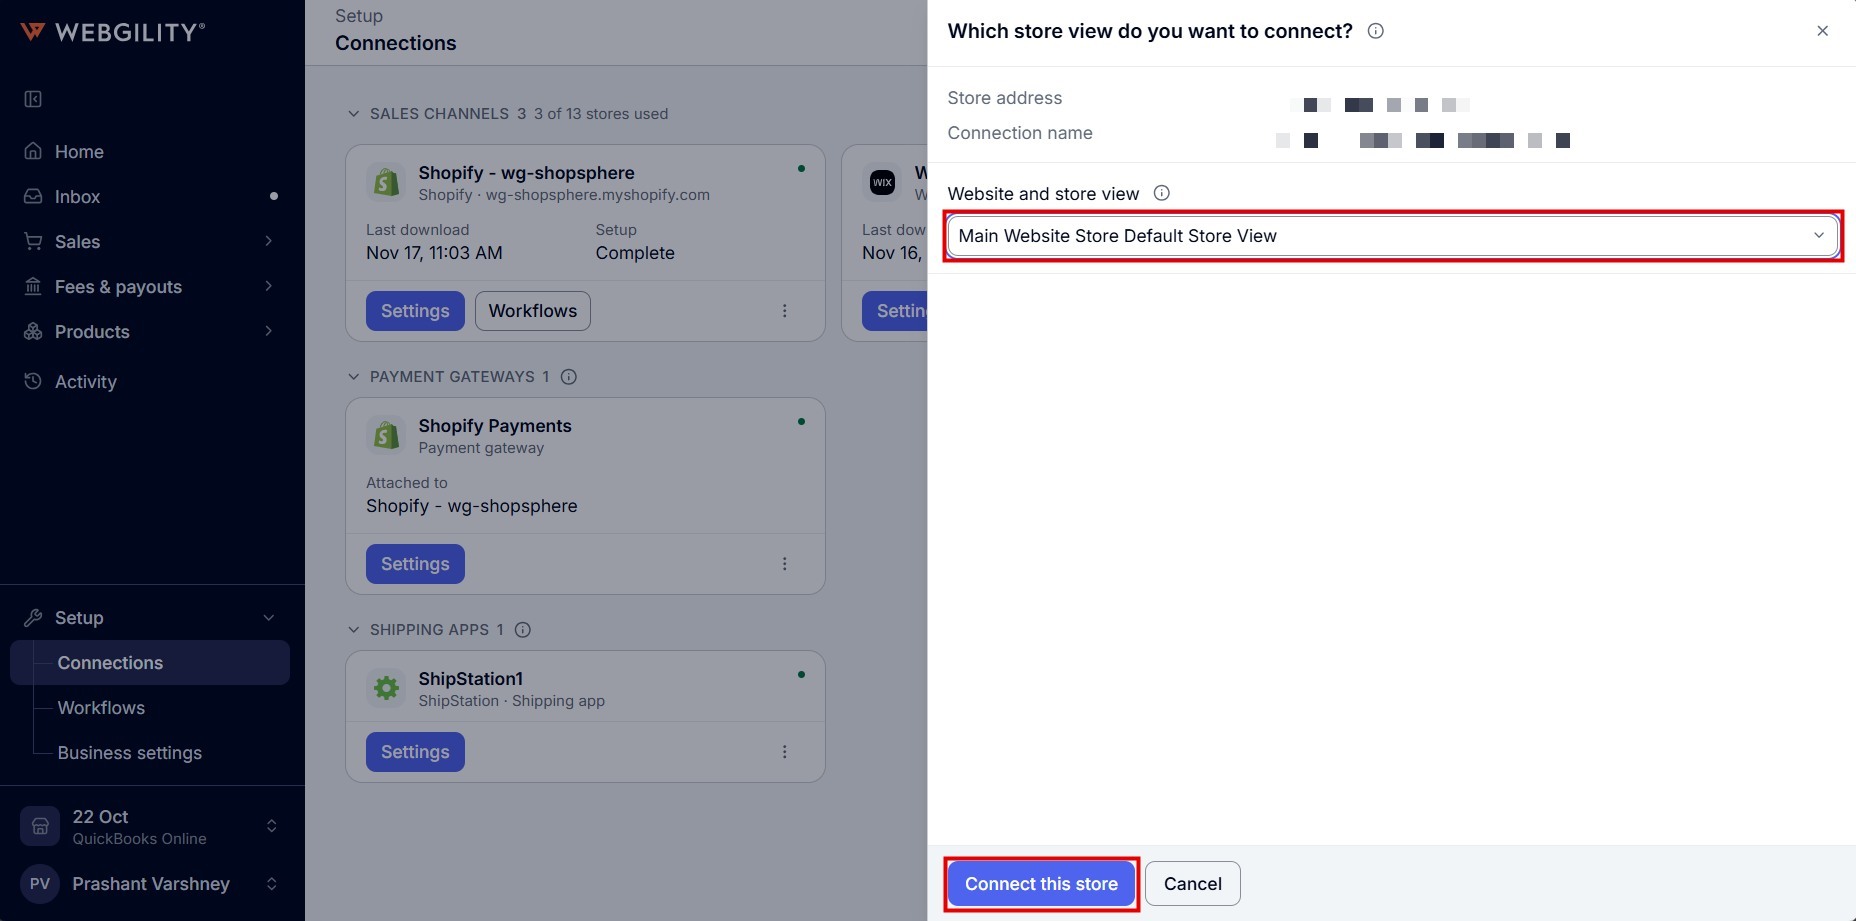
- If your store has more than one store view, the panel asks "Which store view do you want to connect?" It shows the Store address and the Connection name. In Website and store view, pick the store view whose orders you want to read, and click Connect this store. Webgility i saves nothing until you click Connect this store.
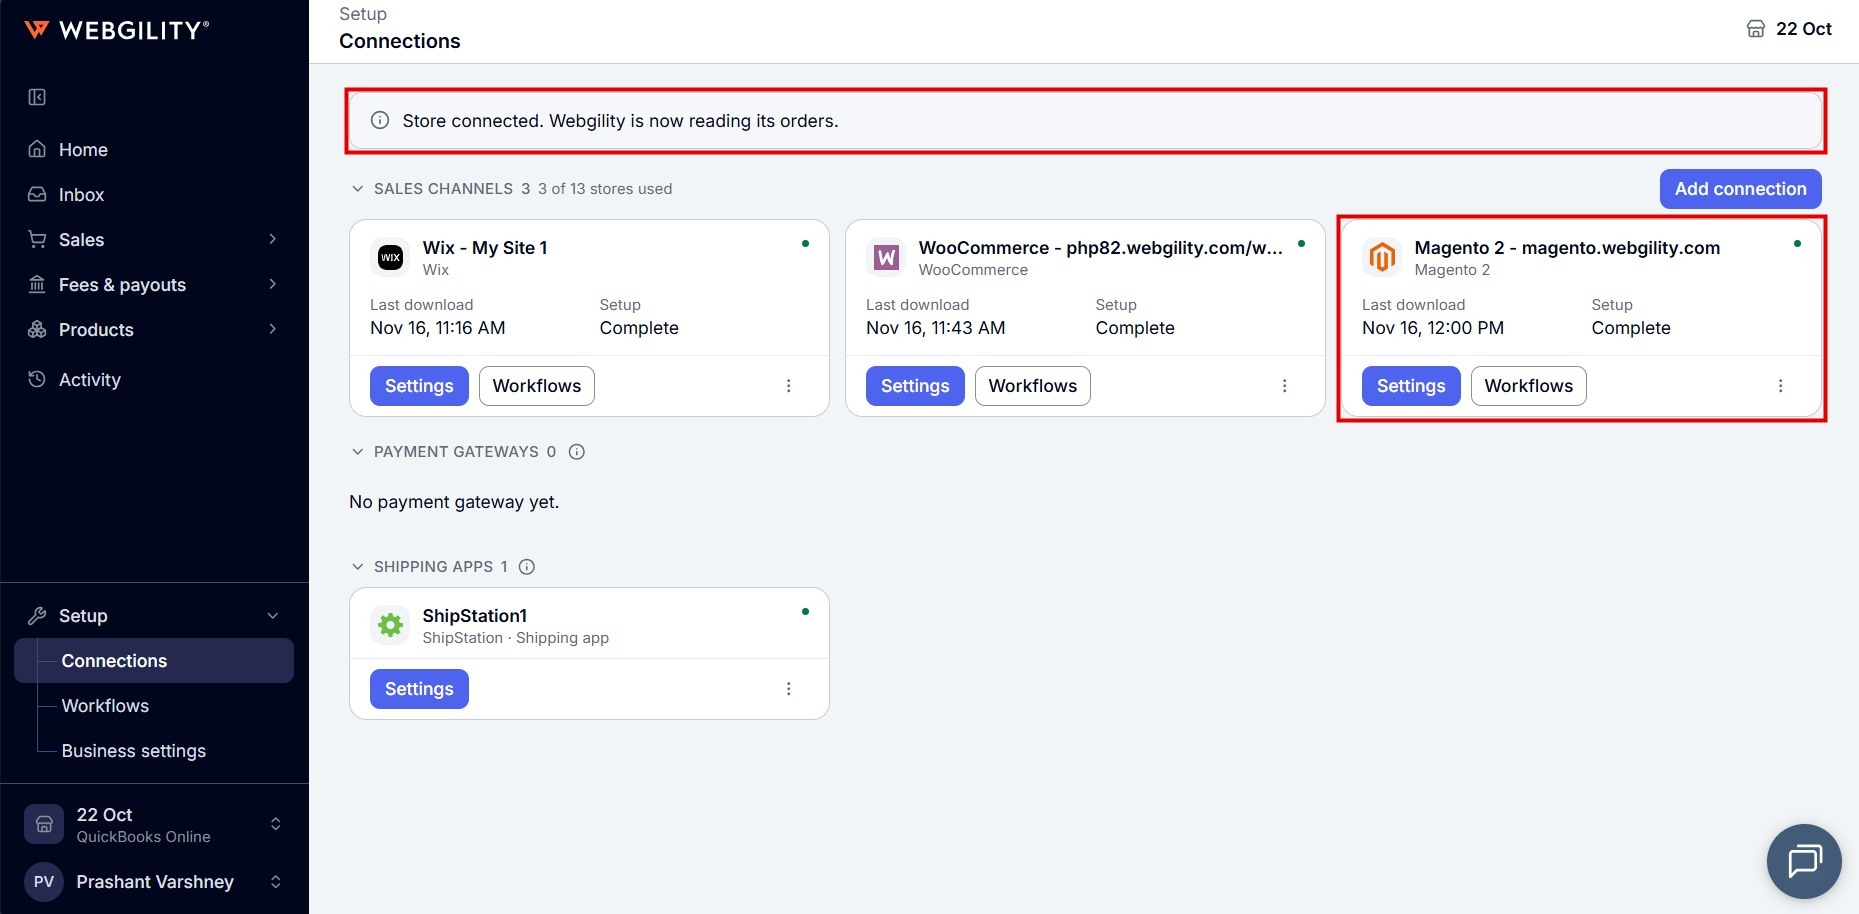
- When the connection is complete, the Connections page shows "Store connected. Webgility is now reading its orders." The store appears under Sales channels as Magento 2 followed by the address of your store.
Note: Each connection reads the orders of one store view. To connect another store view of the same store, add another connection with the same store address and access token, and pick the other store view.