Part of How to Connect Webgility i with Magento 2.
Part 1: Create the Webgility integration in Magento and copy its access token
- Sign in to your Magento 2 admin.
On Magento 2.4.4 or later, go to Stores > Configuration > Services > OAuth. Under Consumer Settings, set Allow OAuth Access Tokens to be used as standalone Bearer tokens to Yes, and click Save Config.
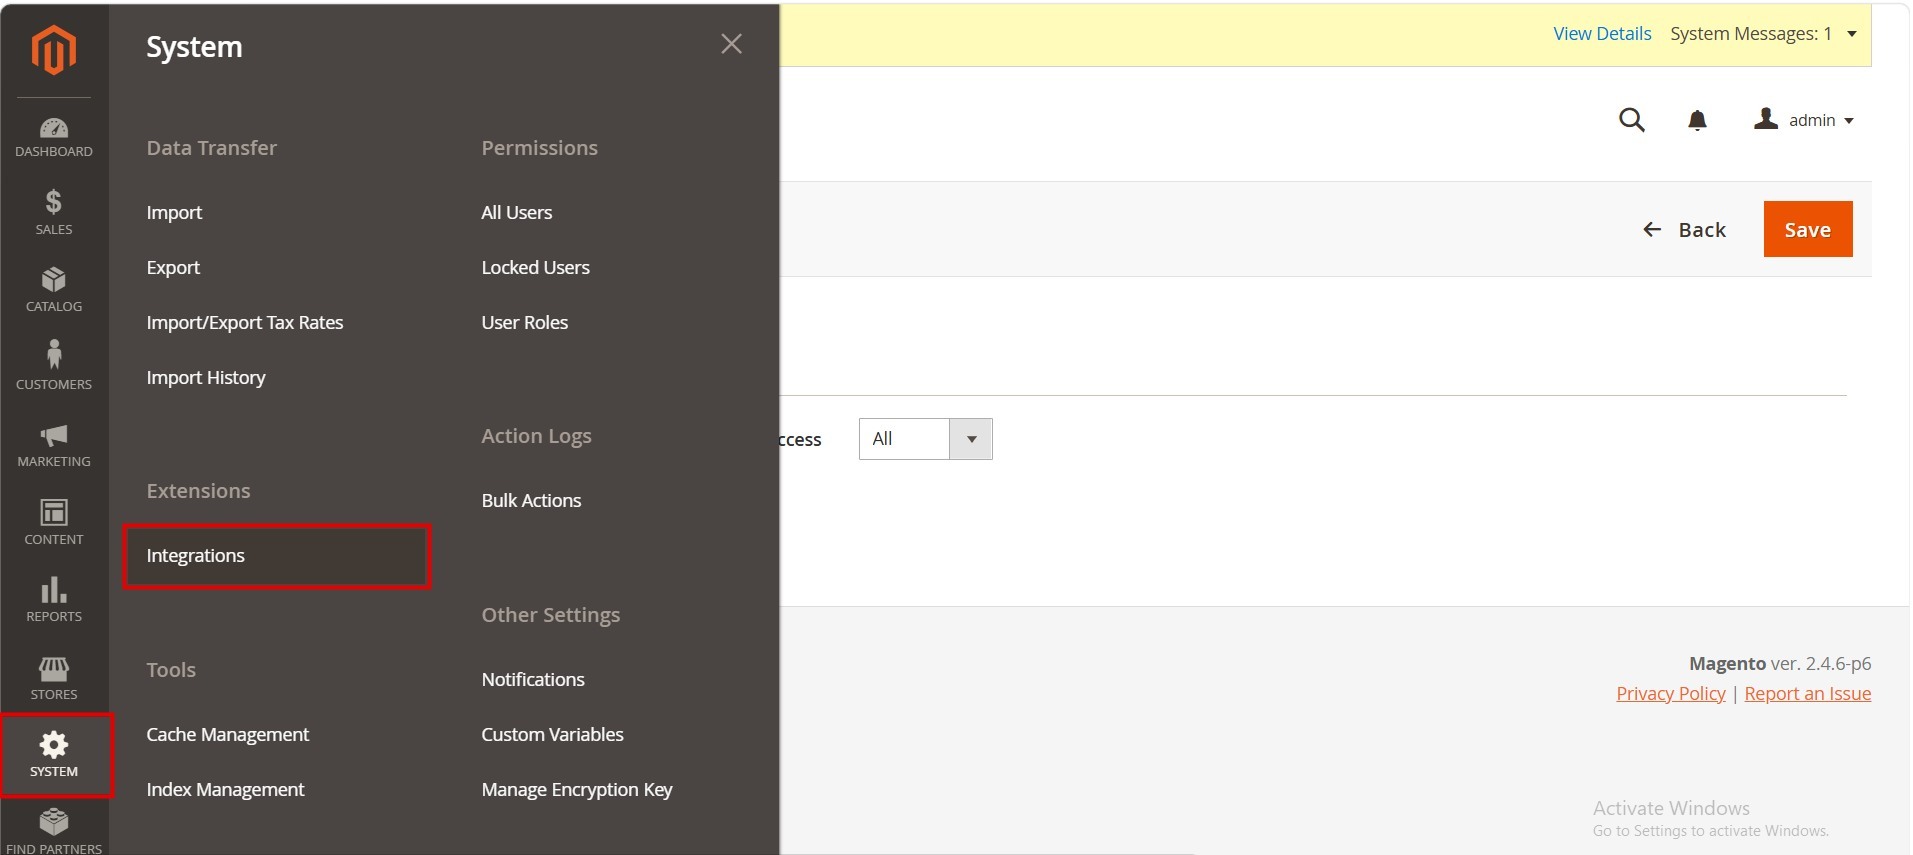
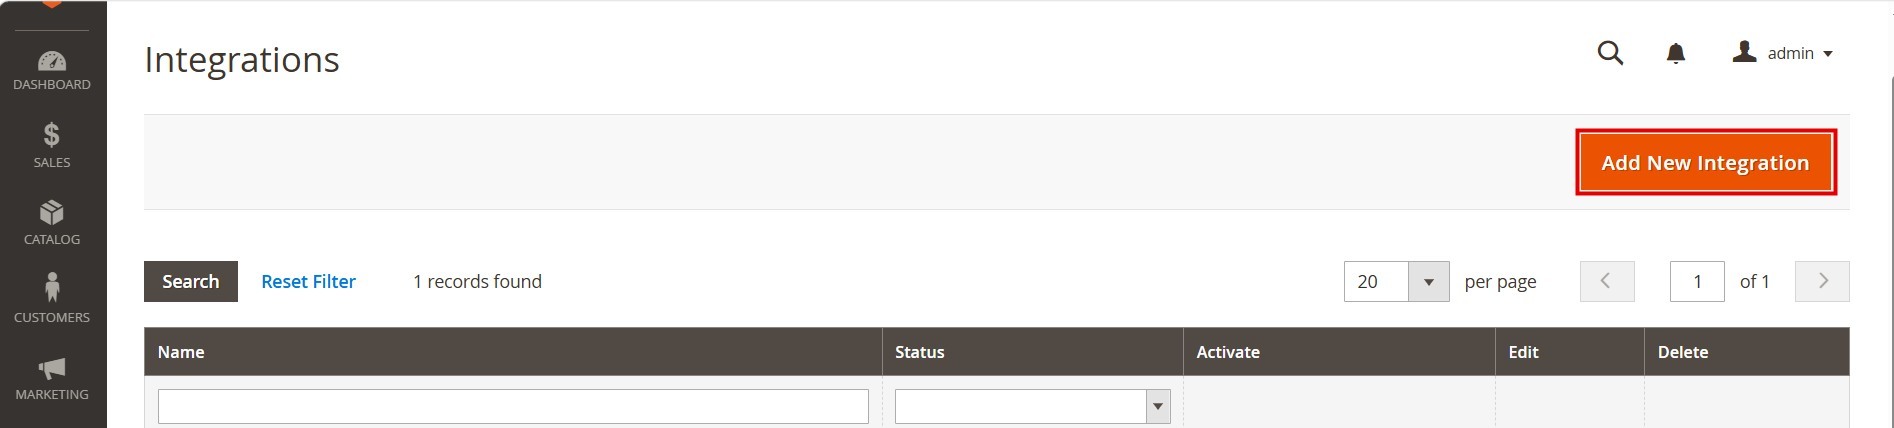
- In the left menu, click System, then under Extensions, click Integrations. On the Integrations page, click Add New Integration.
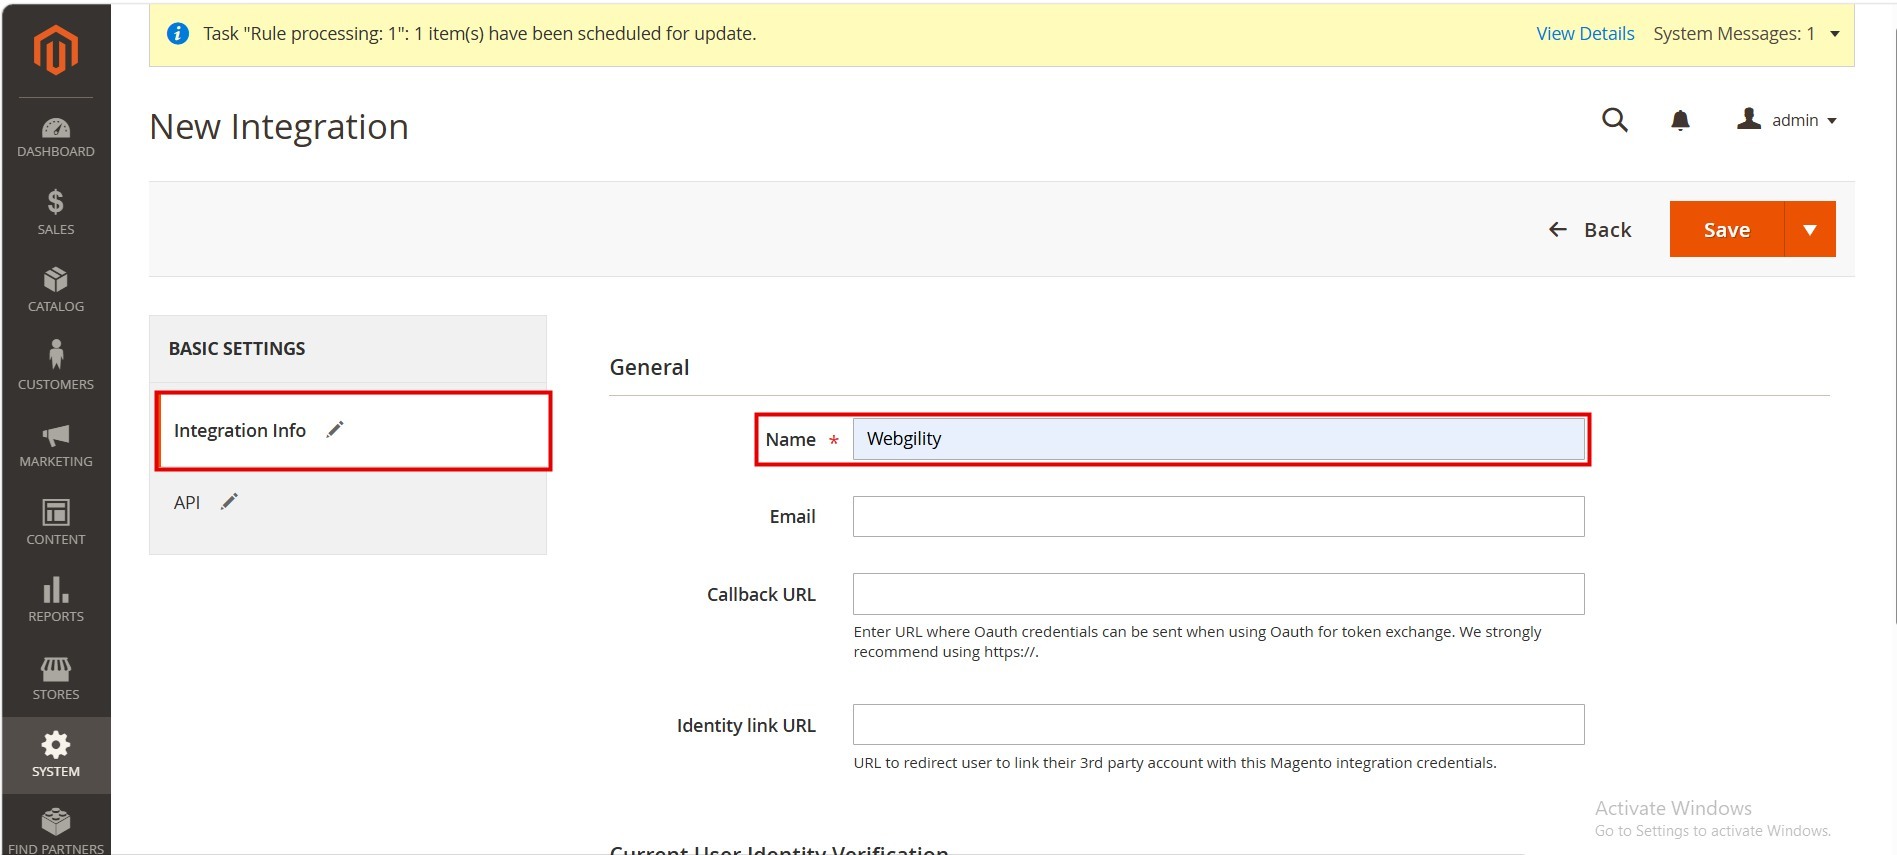
- On the Integration Info tab, in Name, enter a name such as Webgility. Enter your email address, and in Your Password, enter the password of your Magento admin account.
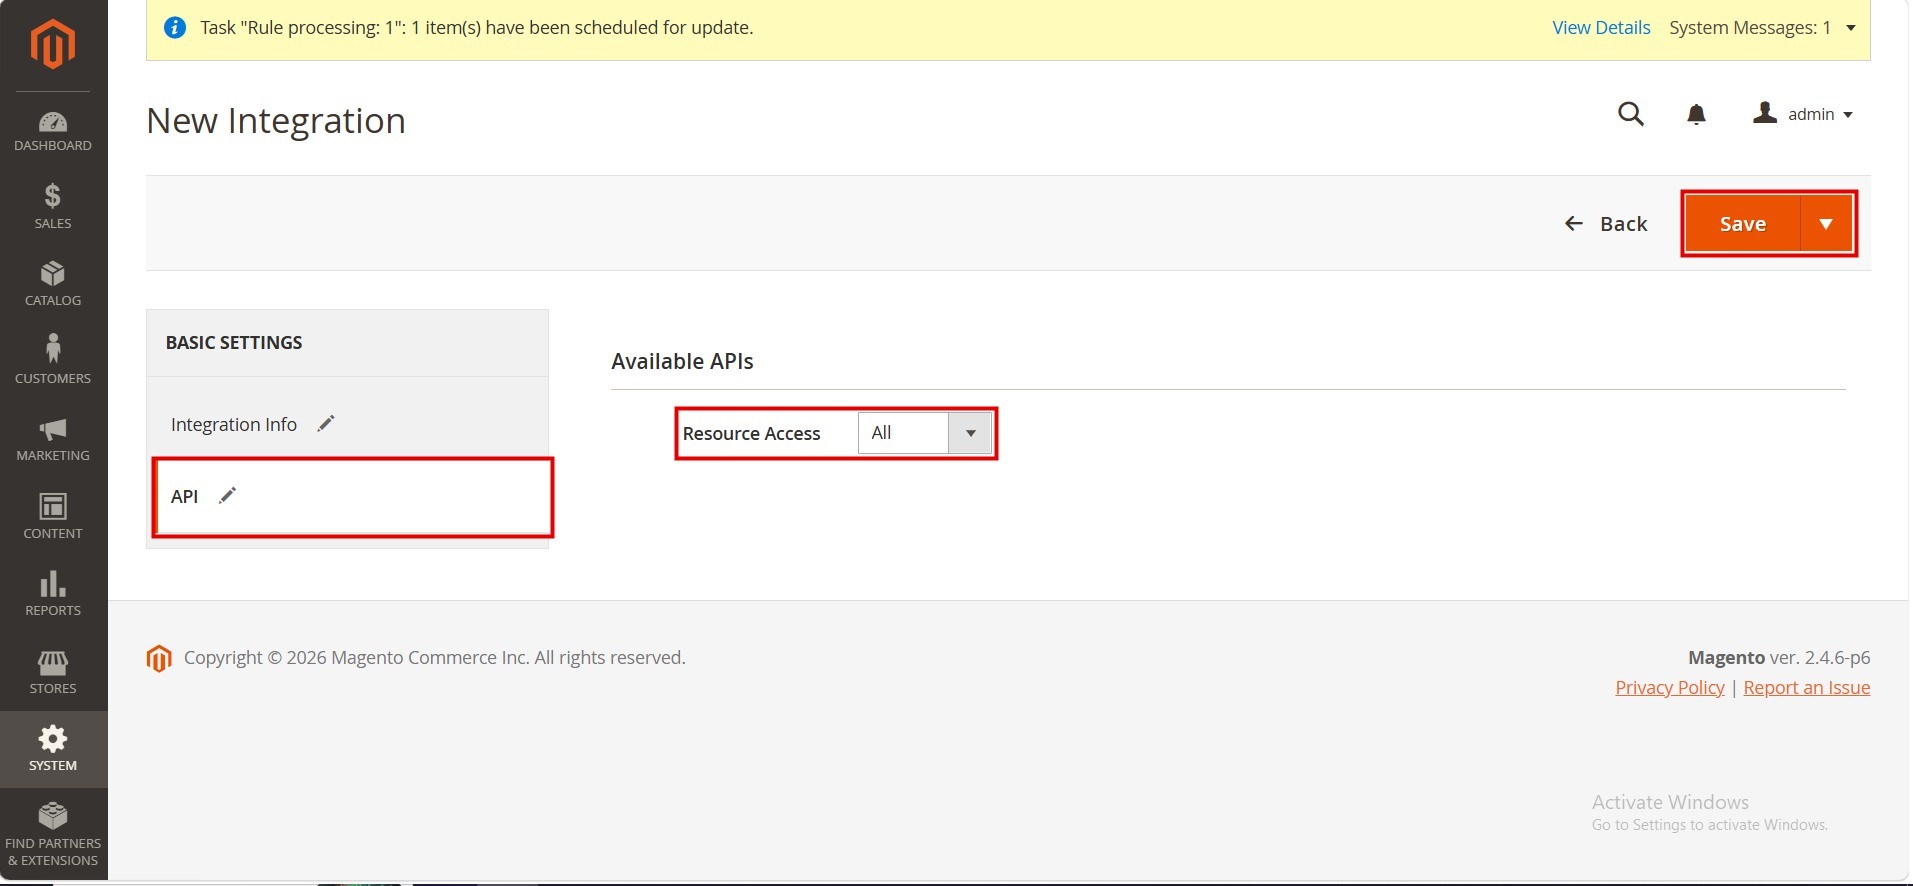
- Open the API tab. In Resource Access, select All, then click Save.
In the list of integrations, click Activate next to the Webgility integration, then click Allow.
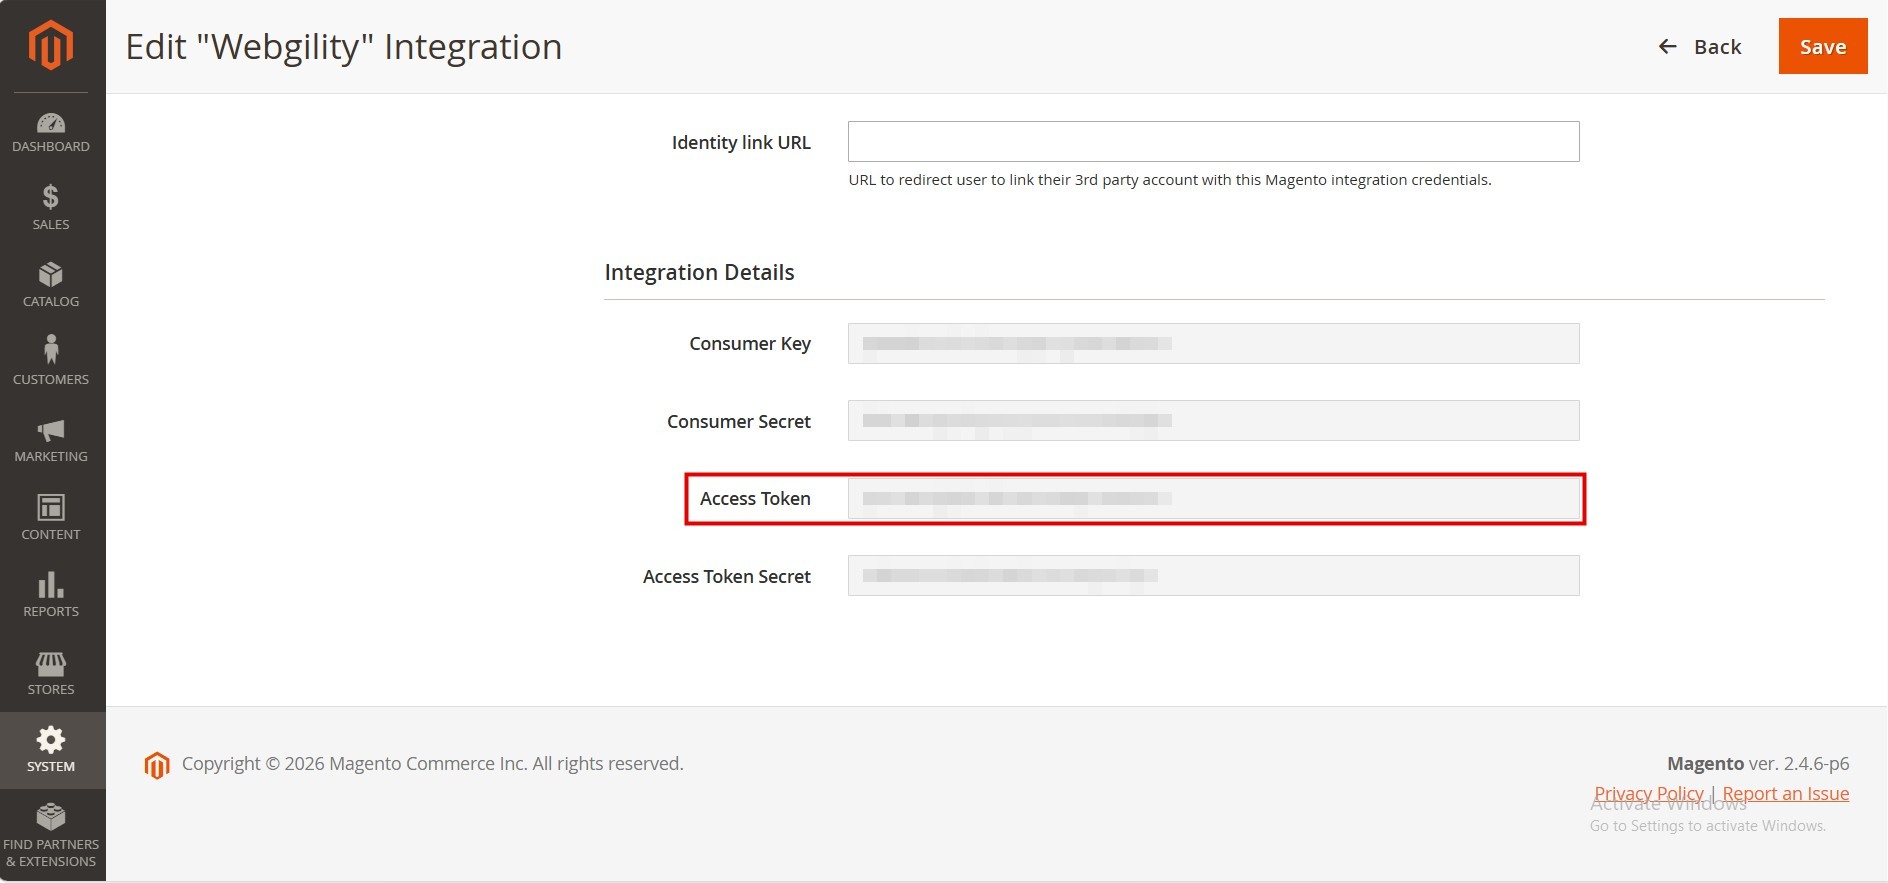
- Magento shows the integration tokens. Copy the Access Token and keep it somewhere safe, then click Done. To see the token again later, open System > Integrations, click Edit next to the Webgility integration, and look under Integration Details.