
Overview
You can send shipping tracking IDs from Webgility Desktop into a specific custom field on your QuickBooks sales form so that every posted invoice or sales receipt carries the tracking number alongside the order details.
When This Applies
Use these steps when shipping labels created in Webgility Desktop post to QuickBooks but the tracking ID does not appear on the sales form. The tracking data is being generated correctly — it just needs to be mapped to the custom transaction field QuickBooks is set up to receive.
How It Works
QuickBooks sales forms (invoices and sales receipts) include custom transaction fields that your QuickBooks template is already configured to show. Webgility Desktop can route tracking numbers into one of those custom fields during posting, as long as you tell it which Webgility value to send and which QuickBooks field to send it to.
Steps to Map Tracking IDs to a Custom QuickBooks Field
Step 1: In Webgility Desktop, open Connections > Accounting/POS/ERP > Sync Settings. The Posting Settings window opens with Orders selected in the left sidebar and the Posting Rules tab active across the top.
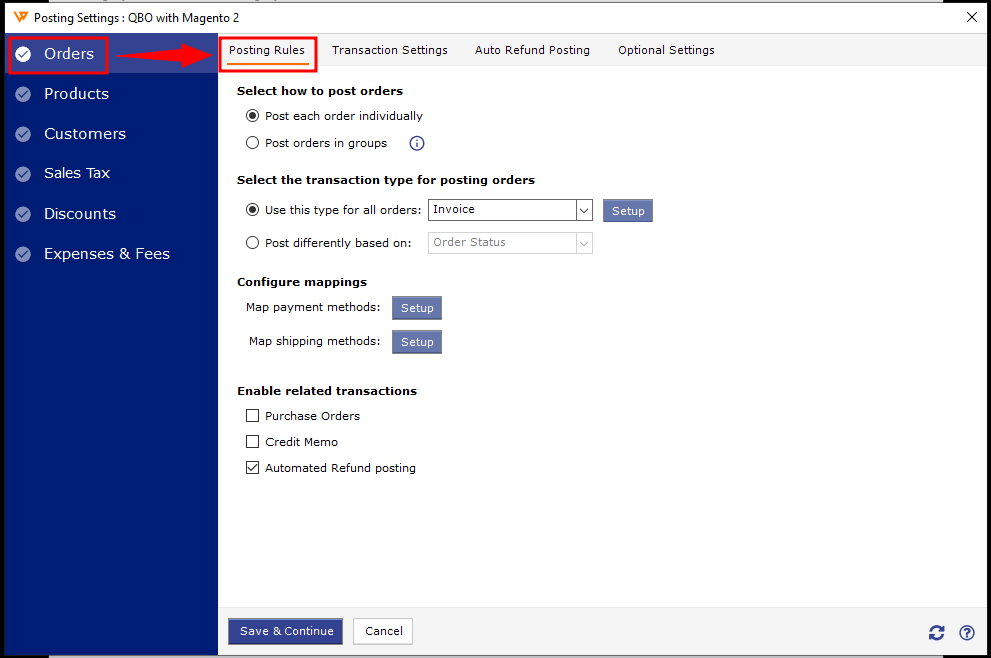
Step 2: At the top of the Posting Settings window, click the Transaction Settings tab (sibling of Posting Rules).
Step 3: Scroll to the Additional Fields section.
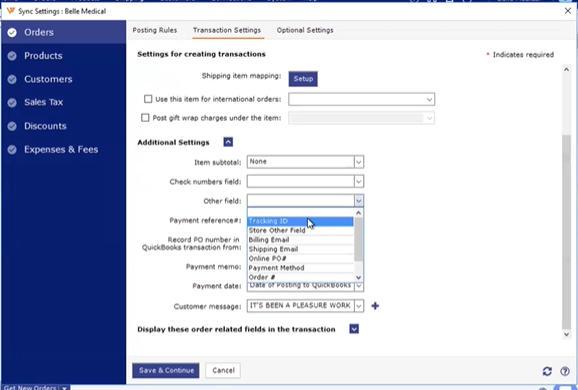
Step 4: In the Other Field dropdown, select Tracking ID.
Step 5: Click Save & Continue, then post one test order to QuickBooks to confirm the tracking ID now appears on the sales form.
Important Note
Note: The Additional Fields mapping is per-sales-channel. If you connect more than one store to Webgility Desktop, repeat these steps for every store so that tracking IDs post consistently across all channels.
Key Recommendation
Confirm which custom field your QuickBooks sales form template uses before you select the Webgility value. If the template is pointing to a different field name, open the template in QuickBooks and align it with the field you choose here, so the tracking number lands where your bookkeeping and shipping team expect to see it.
Further Assistance
If the tracking ID still does not appear on the posted sales form after you save these settings and re-post an order, contact Support with the sales channel name, the order number you tested, and a screenshot of the Transaction Settings tab so we can confirm the mapping end-to-end.