
You are in the right place if
Shopify POS orders paid with Cash or Check are posting to QuickBooks Desktop, but the payment method field on the resulting sales receipt or invoice comes through blank. Card orders from the same Shopify channel post with the payment method filled in correctly. On the Sync Settings screen, the Payment Method Mapping list is missing rows for Cash and Check, or those rows are unmapped.
Why this happens
Webgility posts a payment method to QuickBooks only when the sales-channel payment name is mapped to a QuickBooks payment method on the Payment Method Mapping table. Shopify POS reports Cash and Check as their own payment names, and if those names have not been added to the mapping table Webgility has no target payment method to send to QuickBooks — so QuickBooks accepts the order but the payment method field stays blank. Adding the two rows tells Webgility which QuickBooks payment method to use for each.
What to do
Step 1: Open Webgility Desktop and go to Connections > Accounting/POS/ERP. Click Sync Settings on the QuickBooks connection your Shopify POS channel posts to. The Sync Settings screen opens with a tab list across the top.
Step 2: Click the Payment Method Mapping tab (called Payment Mapping in some layouts). The full walk-through with screenshots of this table is in Map Payment Method with QuickBooks. On the table, look for rows with Sales Channel Payment Method equal to Cash and Check. If those rows are missing, click Add to create them; if they exist with a blank QuickBooks Payment Method, select that cell to open the dropdown.
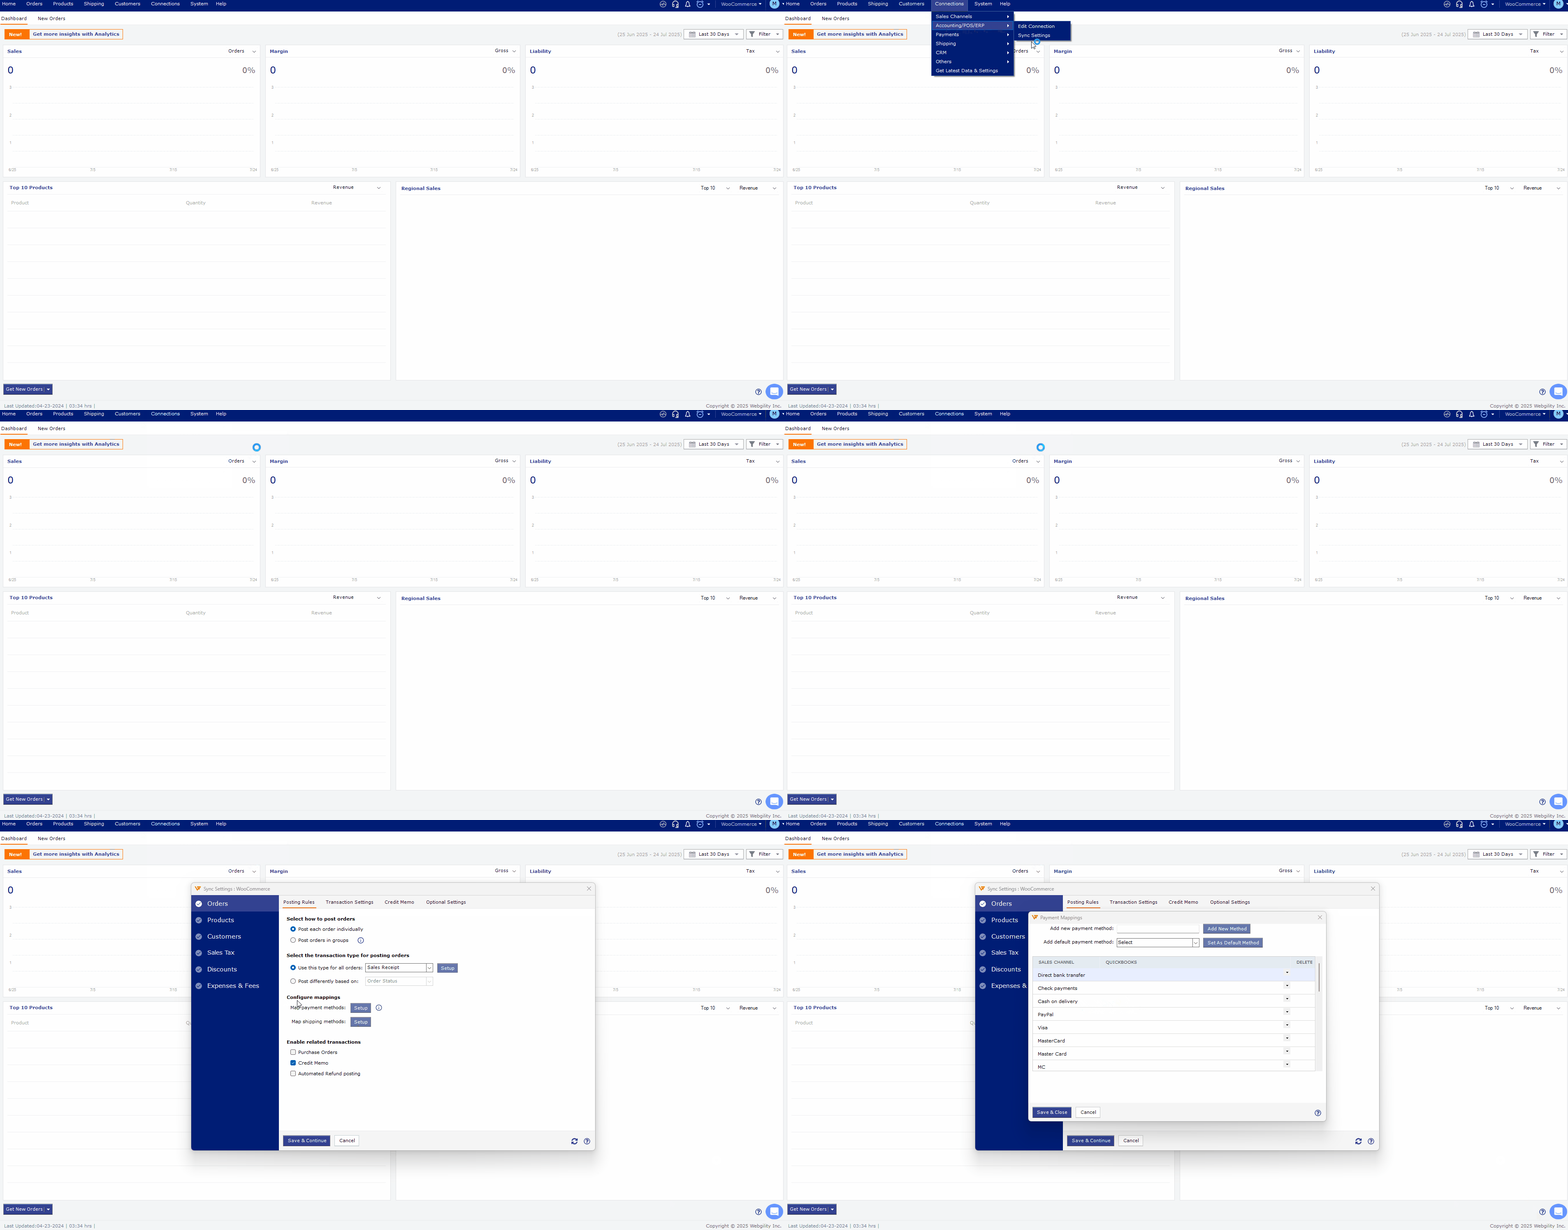
Step 3: In the QuickBooks Payment Method column, pick the matching QuickBooks payment method for each row — usually Cash for the Cash row and Check for the Check row. Both are standard entries in QuickBooks Desktop's Payment Method list; if either is not there, add it in QuickBooks under Lists > Customer & Vendor Profile Lists > Payment Method List first, then come back and pick it.
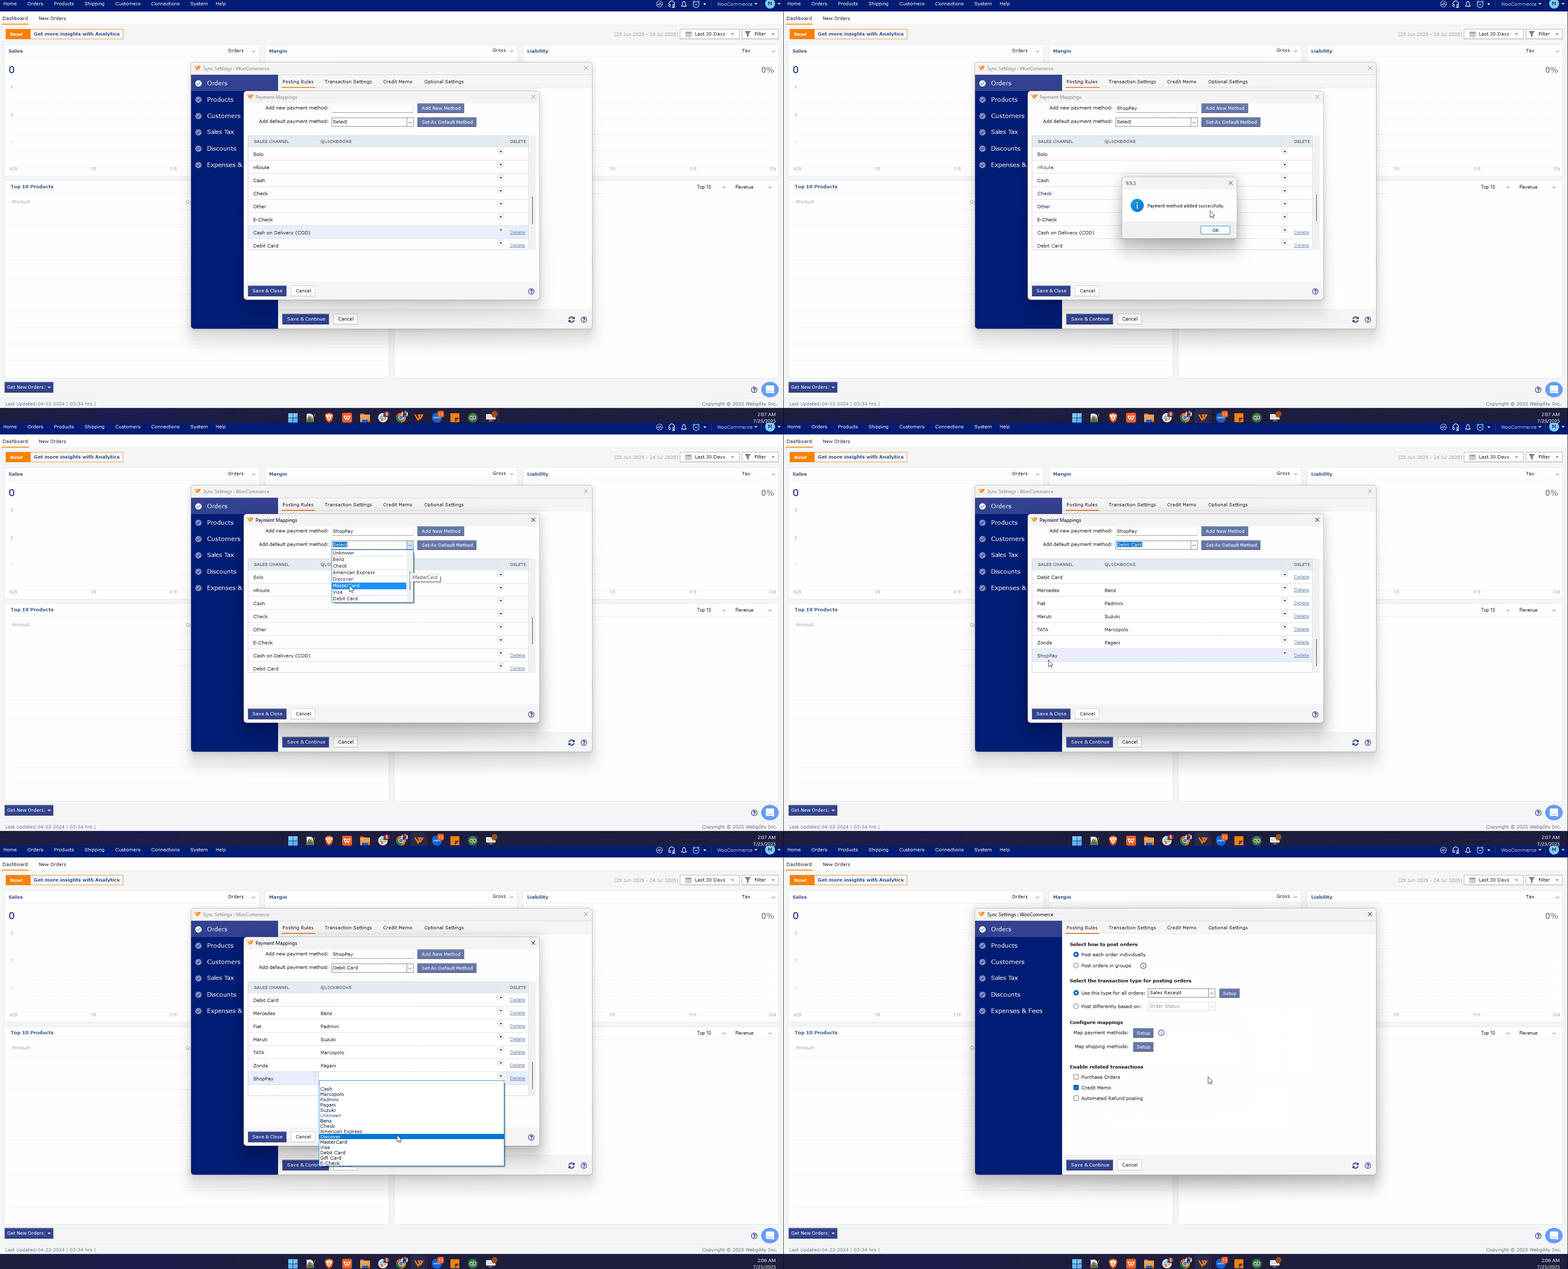
Step 4: Click Save at the bottom of the Sync Settings screen. Webgility confirms the sync settings were saved, and the mapping applies to every order Webgility posts after this point.
Step 5: Test the change by posting a Shopify POS order paid with Cash — a small test order is fine — and open the resulting sales receipt or invoice in QuickBooks. The Payment Method field on the receipt now shows Cash. Repeat with a Check-paid order to confirm both mappings work.
Good to know. Payment method names on the mapping table are matched exactly, so Shopify POS values like Cash and Store credit are separate rows and each needs its own mapping. Card payments arrive under channel-specific names such as shopify_payments, and those usually map to a single Credit Card row on the QuickBooks side. If a POS order comes in with a payment name you have not seen before, add a new mapping row for it the same way — the change applies to future orders only, so orders posted before you saved the mapping keep their blank payment method until you unsync and repost them.
Still need help?
If Cash and Check rows are mapped and saved but Shopify POS orders still post with blank payment methods, share the affected order number, a screenshot of the Sync Settings > Payment Method Mapping tab, and one sample sales receipt from QuickBooks with Webgility Support. Support can then check whether the incoming Shopify payload uses a different payment-name string than the one on the mapping row.