
Step 1: Download the Latest Webgility Version
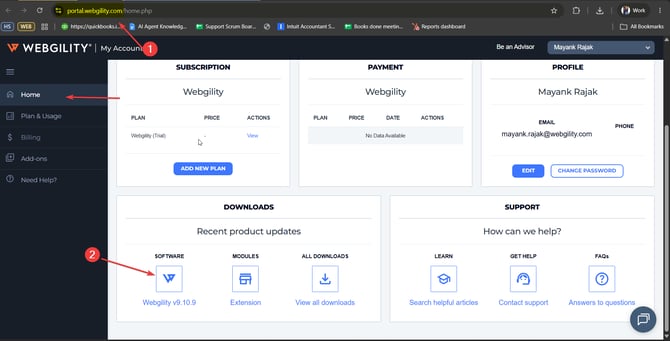
- Go to portal.webgility.com
- In the Home Tab scroll down to the Downloads section.
- Download the latest Webgility Destkop installer.
Step 2: Install the Update on All the Webgility Desktop workstations:
- Open the installer usually the default location is Downloads. and follow the on-screen prompts to update the application.
- Configuration settings will be preserved during the upgrade process.
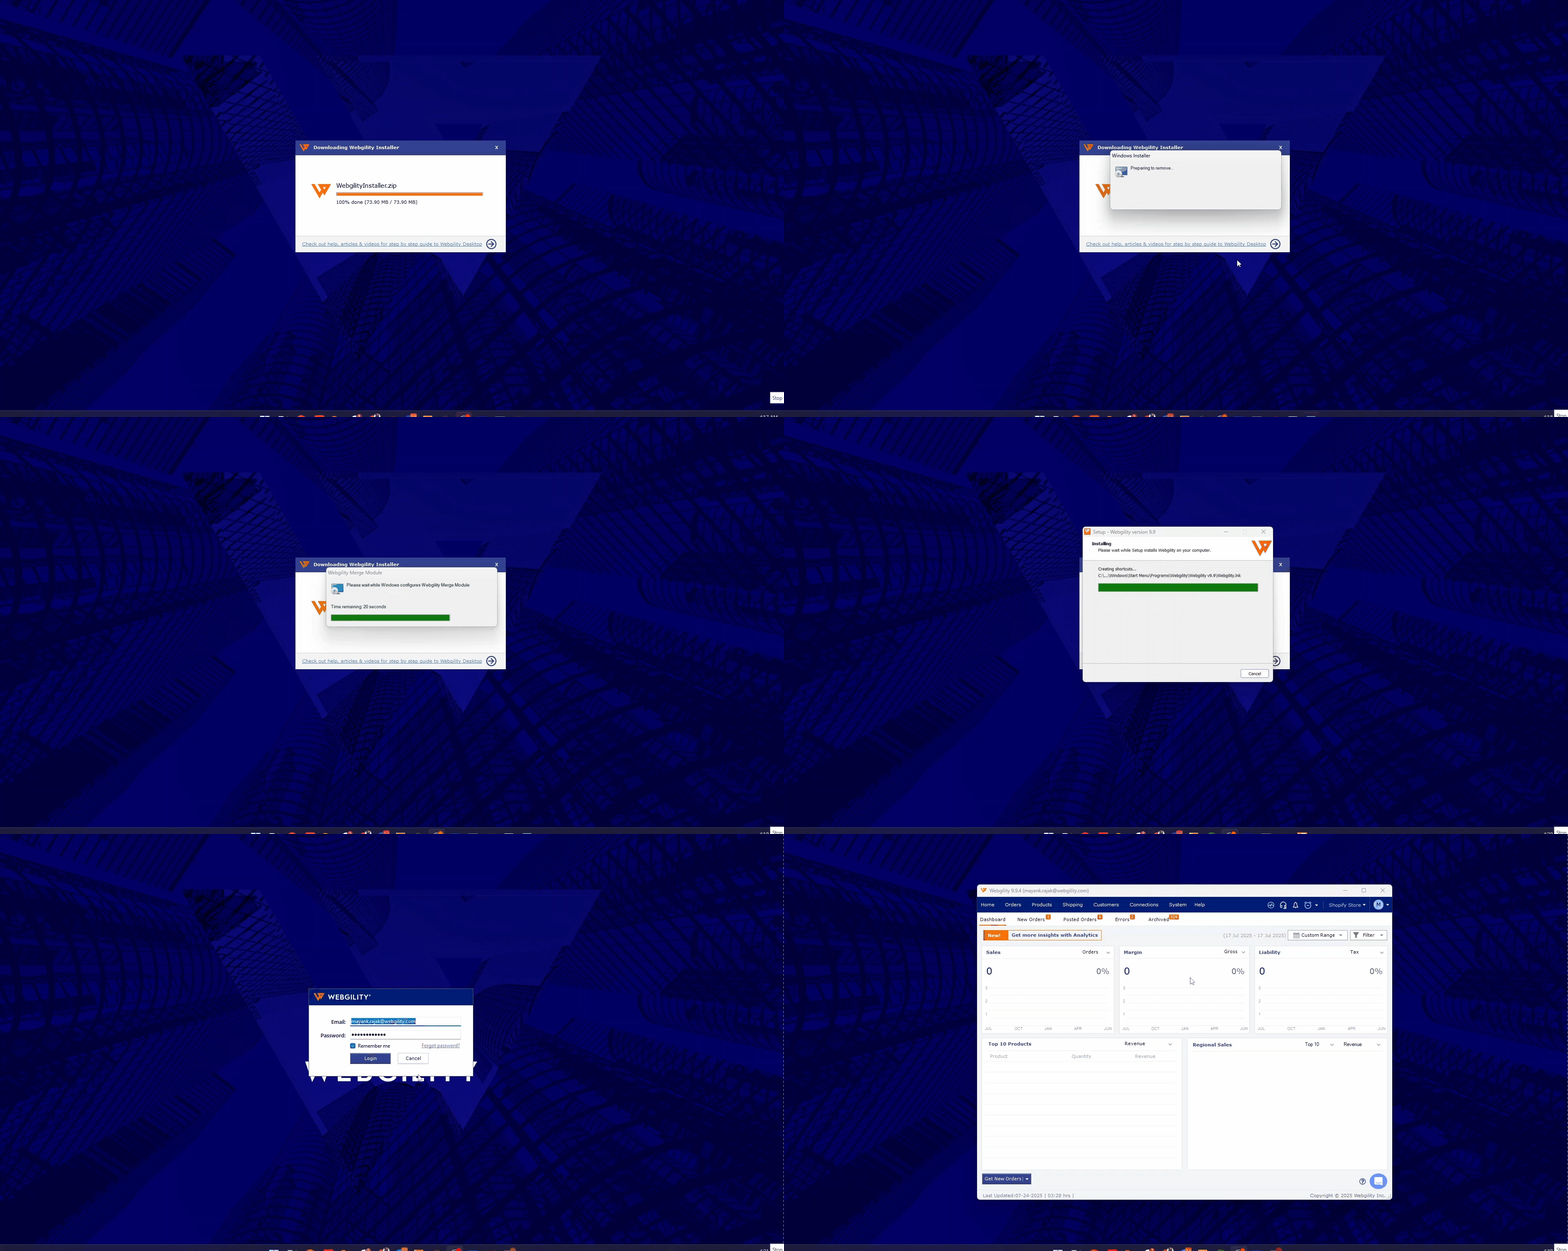
- Update Webgility Desktop on any additional computers too, we need to make sure that all the Webgility users are on the same version.
Step 3: Post-Update Verification & Reauthorize Shopify Sales Channel.
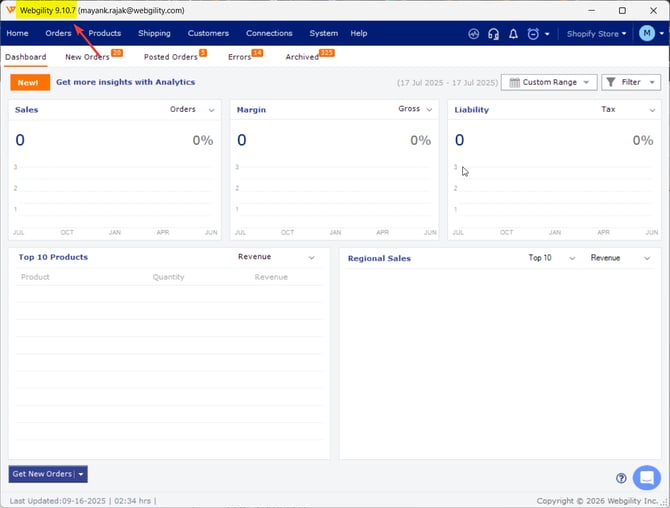
- Login to Webgility Desktop, on the upper right hand-side of the Window you will see the current version of the application.
- Once the version has been verified, in Webgility navigate to Connections, go to Sales Channels, then Manage Sales Channels and click on the Edit icon for Shopify.
Note you may also do the same steps to reauthorize any other connected Sales Channel in Webgility - The user will be re-directed to the Shopify, login with Admin or Owner Credentials in order to re-auhtorize Webgility Desktop with Shopify.
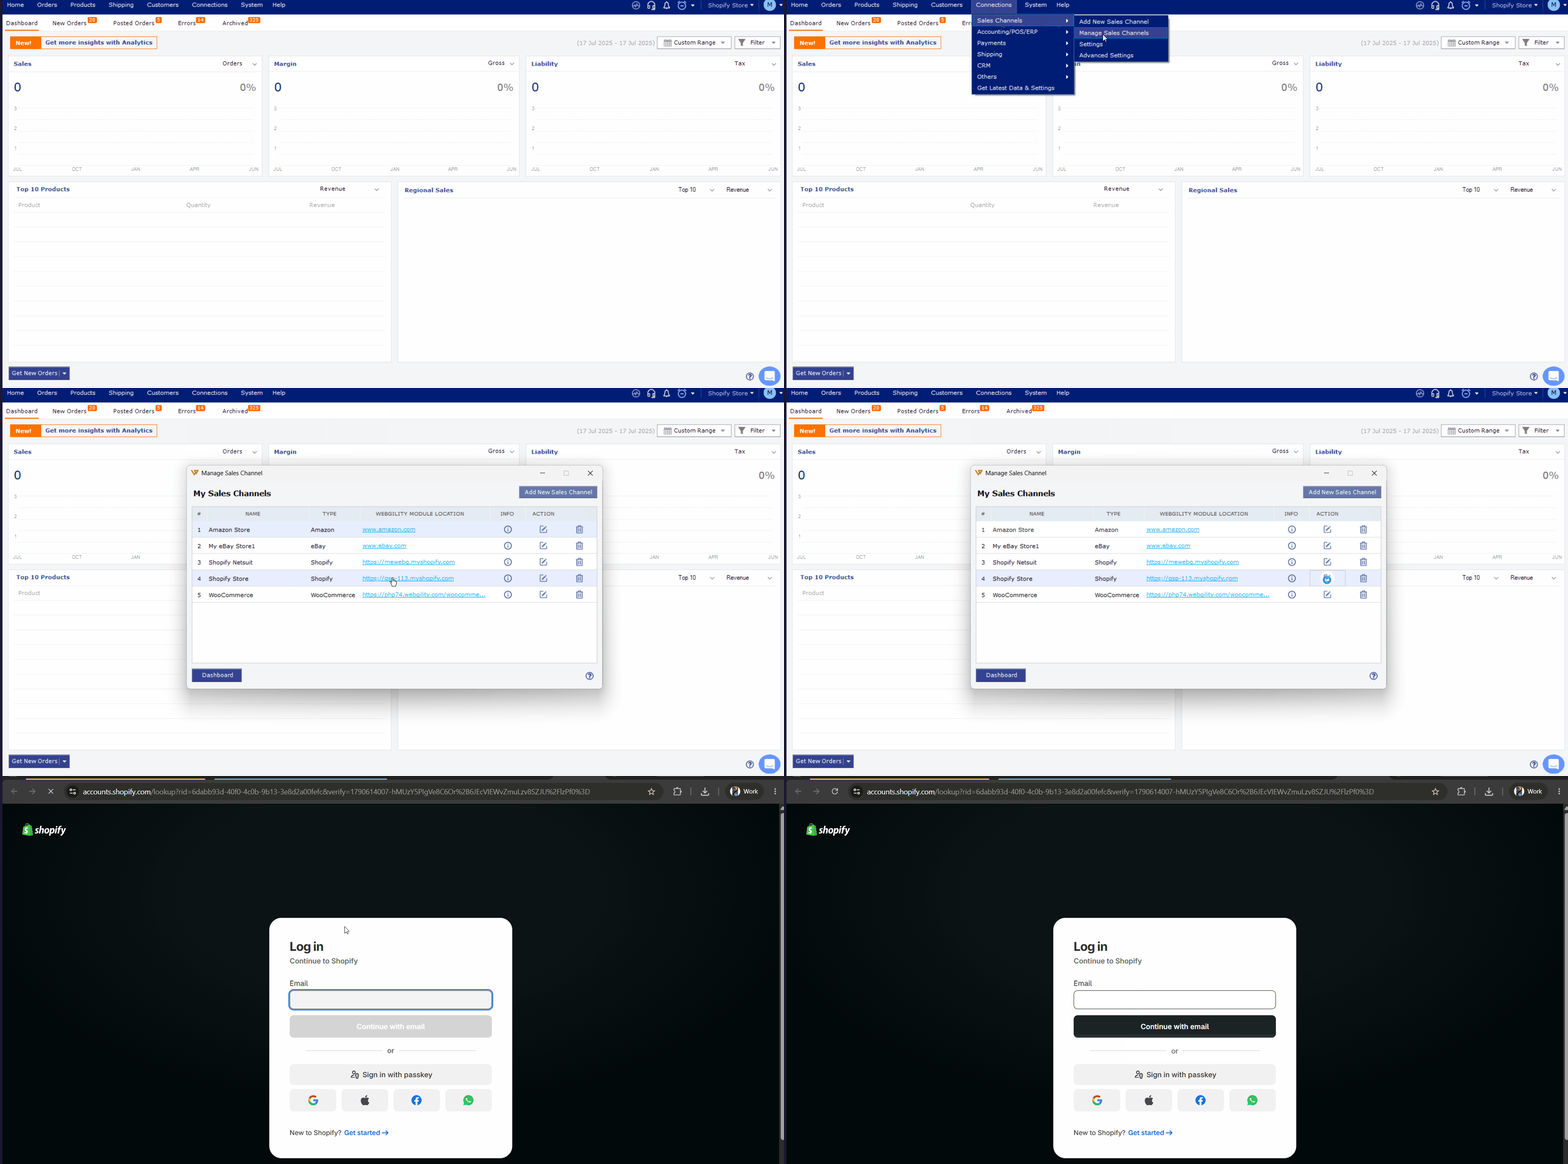
- Once connected, go back to Webgility, click OK for the Succesfully Connected prompt, click on Next verify your Store Details and click on Save Sales Channel.
Step 5: Verify Downloading & Posting Functionality
- Go to the New Orders Tab and click on Get New Orders
- Once the orders are not downloaded, select an order & click on Post to QuicKBooks.
- If we get a prompt in Quickbooks it's because of the QB certificate, select any of the following options & click on Okay.
Yes, whenever this QuickBooks company file is open
Yes, always, allow access even if QuickBooks is not running
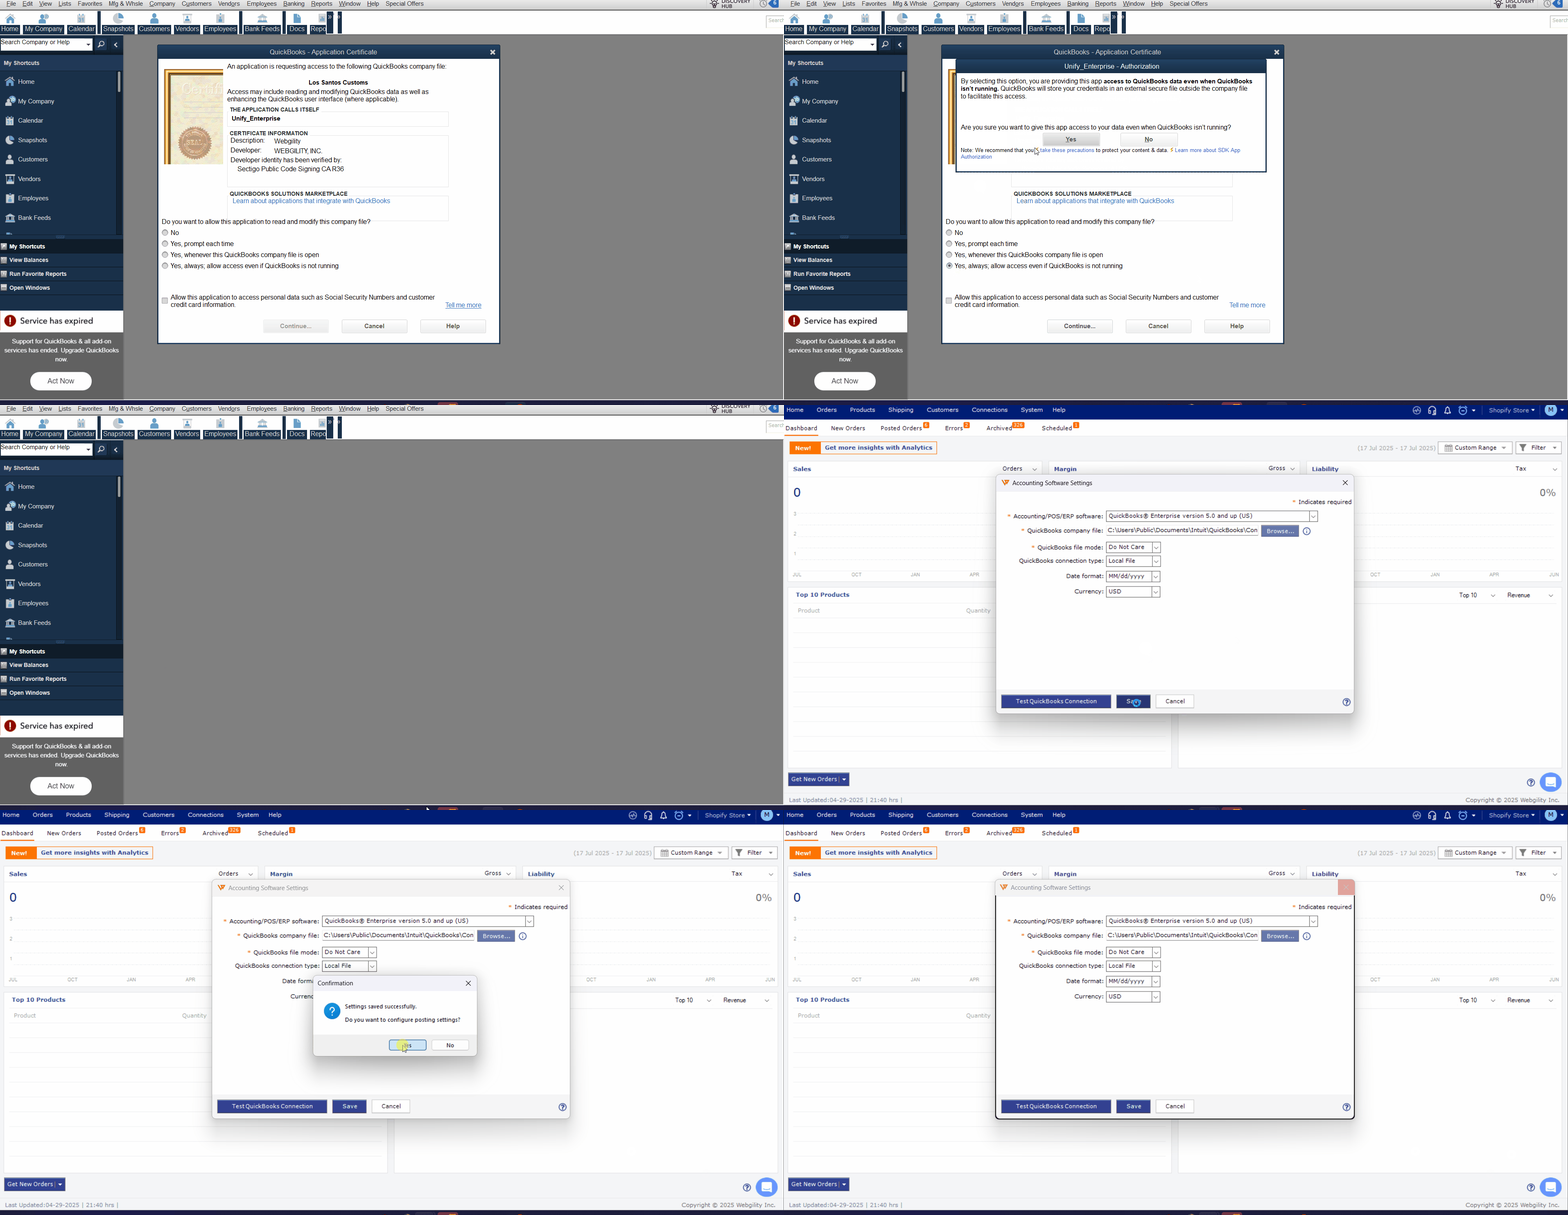
- This will re-auhtorize the QB for Webgility Desktop.
Step 4: Verify Scheduler Functionality
- Run the Webgility Scheduler on the primary machine (the one hosting the SQL database).
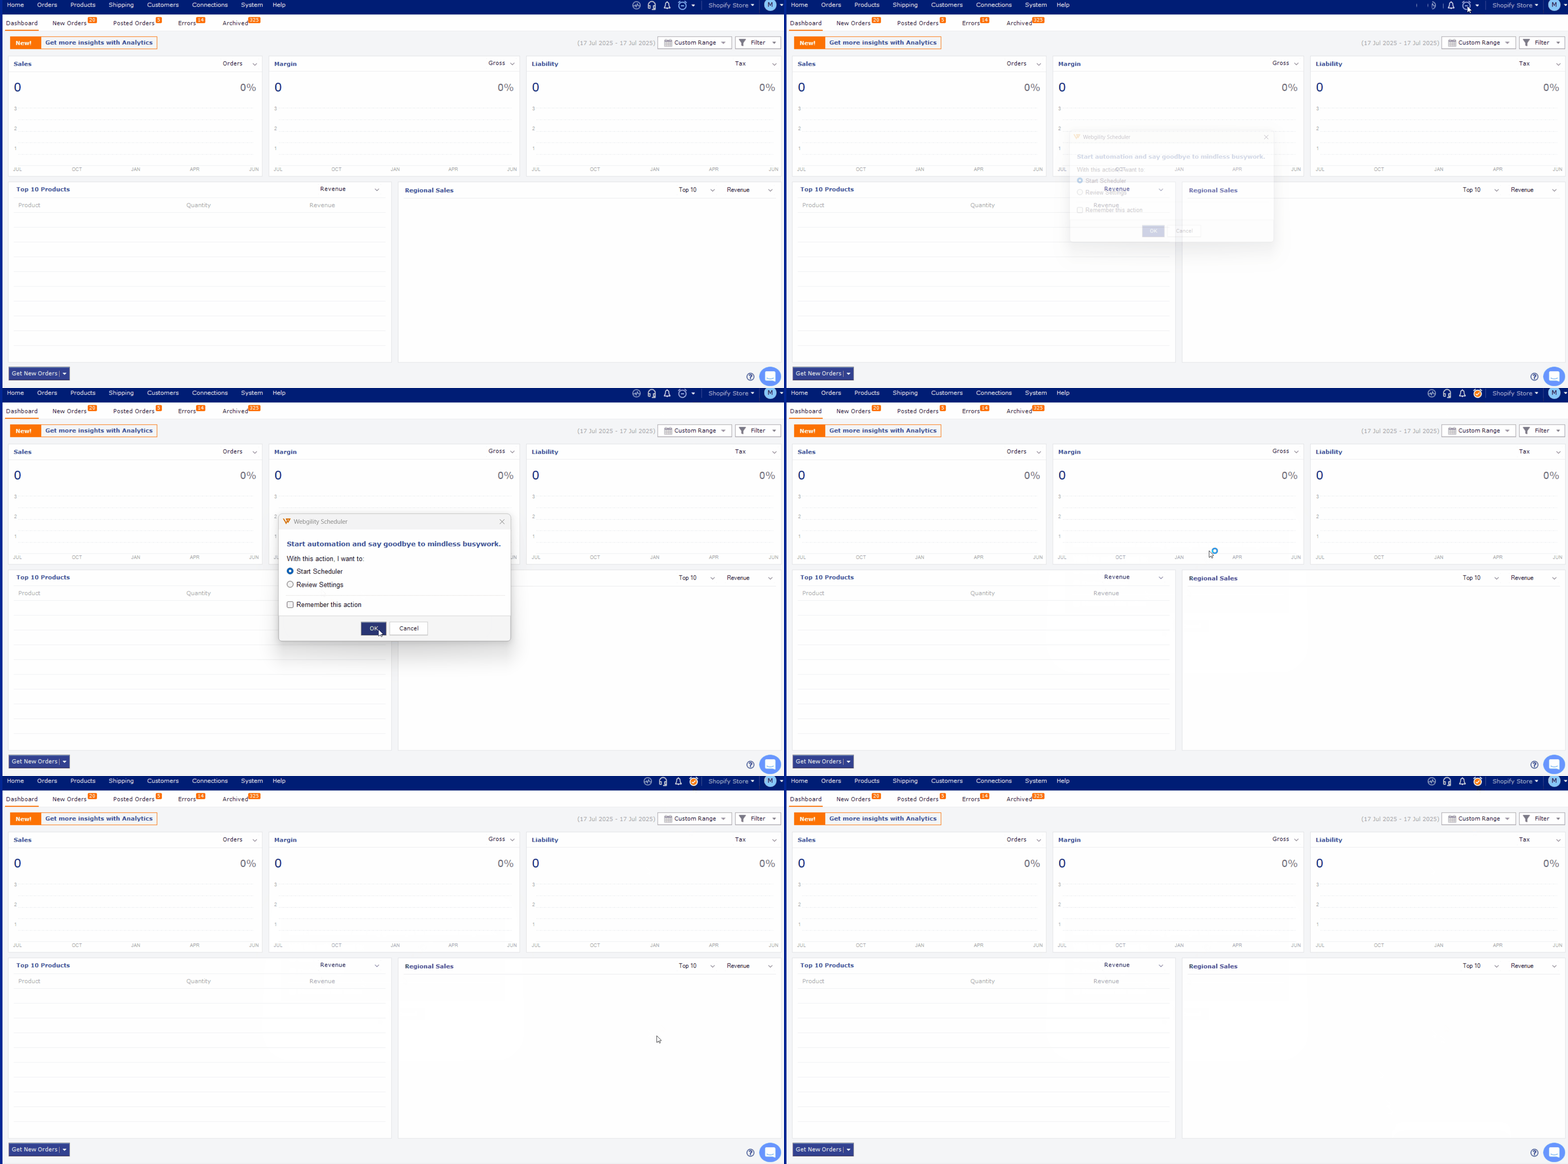
- Confirm that scheduled tasks are running as expected without any errors.
Feel free to reach out to support@webgility.com