
Why is the actual payment date important?
Recording the correct payment date helps ensure that your accounting records accurately reflect when payments were received.
This is especially useful for businesses that:
- Offer payment terms to B2B customers.
- Allow customers to pay invoices after an order is placed.
- Receive payments several days after the original order date.
- Need accurate payment dates for bookkeeping and reconciliation.
How to configure the actual payment date
Follow these steps in Webgility Online:
- Log in to Webgility Online.
- Navigate to Settings.
- Open the Invoice settings.
- Locate Record payment in QuickBooks as.
- Select Each Payment as Received from Sales Channel.
- Locate Set the Payment Date.
- Select Payment Date.
- Save your settings.
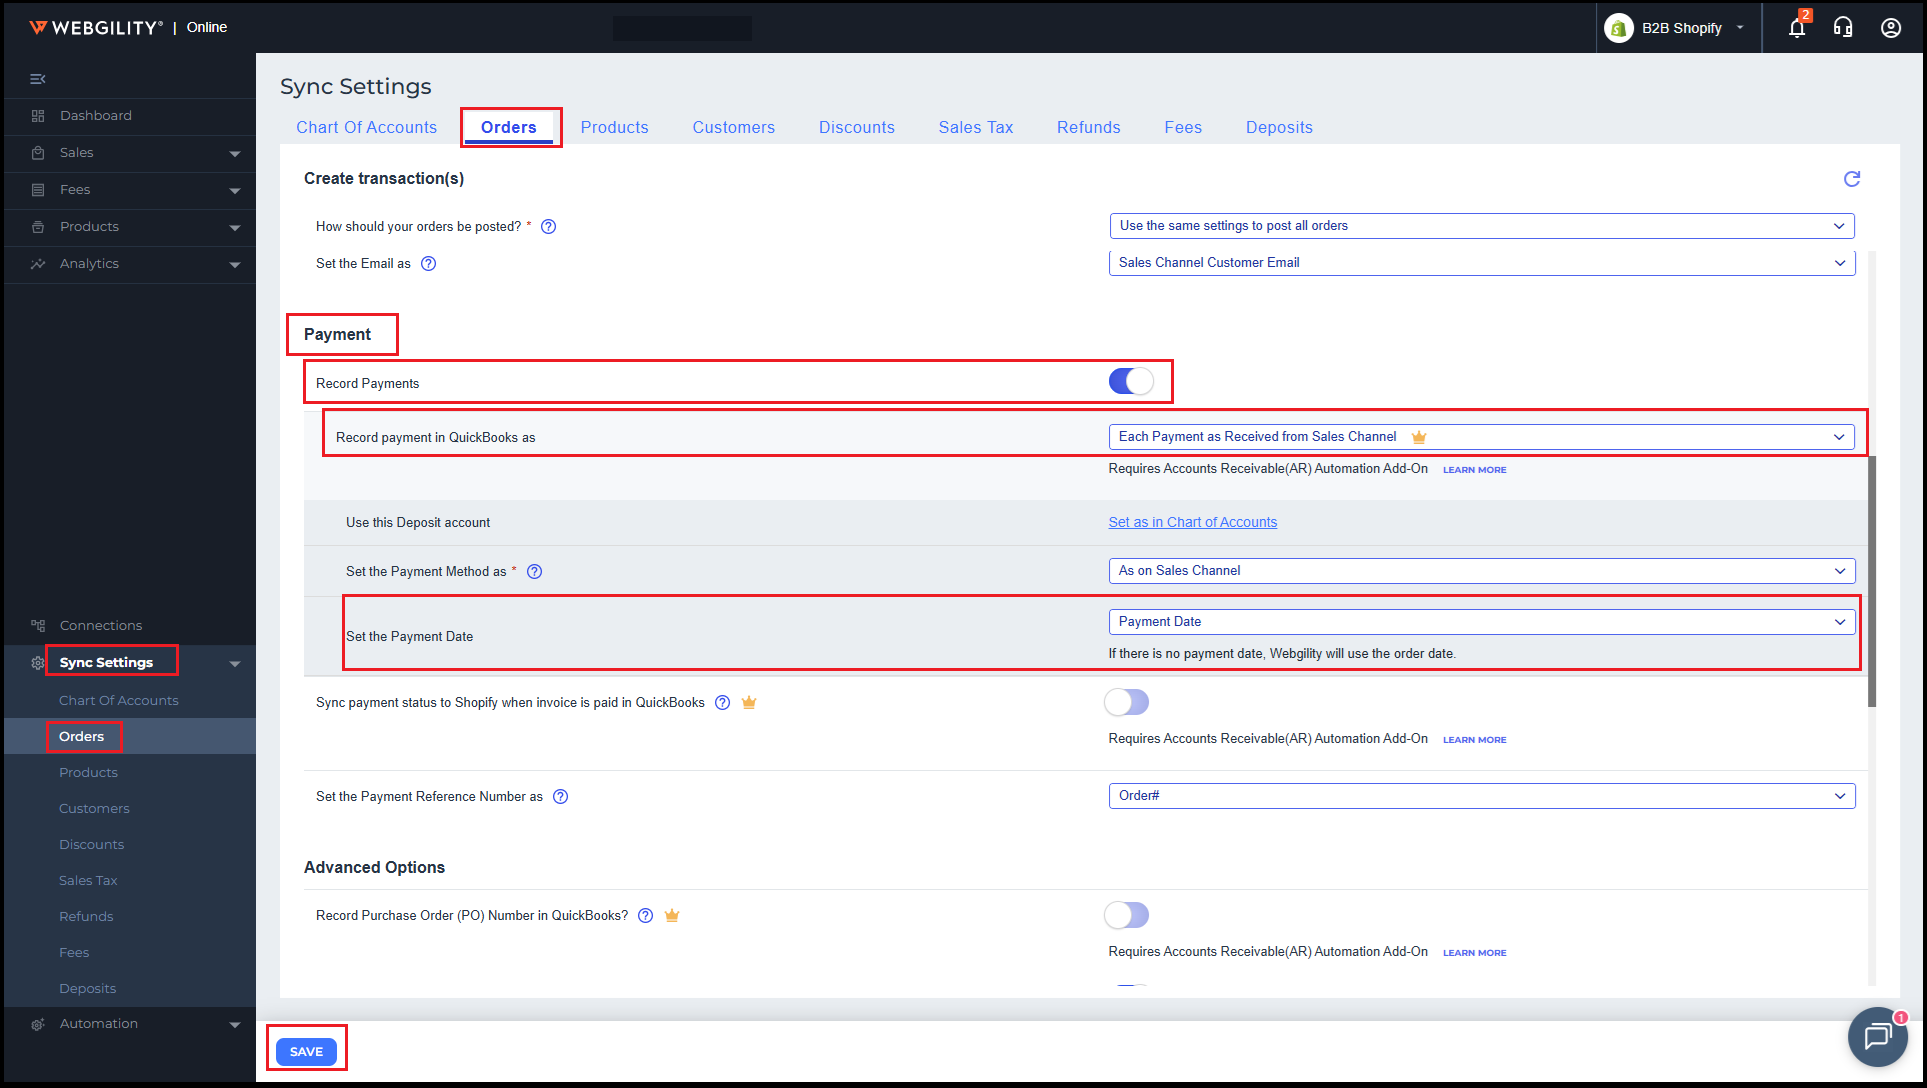
Once configured, Webgility Online will use the payment date received from your sales channel when synchronizing invoice payments with QuickBooks Online.
Example: How payment dates are recorded
Consider a B2B customer who places an order on November 1 but pays the invoice on November 10.
| Transaction | Date |
|---|---|
| Original order date | November 1 |
| Actual payment received | November 10 |
| Payment date recorded in QuickBooks | November 10 |
With the Payment Date option selected, the payment will be recorded using November 10 rather than the original order date.
This helps keep your QuickBooks records aligned with the actual payment activity in your sales channel.
Note: This setting applies to invoice payment synchronization between Shopify and QuickBooks Online. Make sure your sales channel provides the actual payment date so Webgility Online can use it when recording the payment.