
To post invoices to QuickBooks with your own QuickBooks invoice numbers, set Transaction numbering to Use QuickBooks Numbers in the store's Sync Settings. This article explains the setting, shows where to change it, and shows what a posted invoice looks like before and after.
By default, Webgility can post each transaction using the number from the online store. If your invoices in QuickBooks show a long online order number (or a PO number) in the Invoice # field instead of the next number in your QuickBooks sequence, this setting is the cause.
Before you begin
- The change applies per store, so repeat the steps for each store connection that needs QuickBooks numbering.
- Orders that are already posted keep the number they were posted with. To renumber one, undo its sync and post it again after saving the setting (see Notes below).
- Keep QuickBooks open and your company file available while you test.
Steps
- In Webgility Desktop, go to Connections > Accounting/POS/ERP and open Sync Settings for the store you want to change.
- In the left menu, select Orders, then open the Transaction Settings tab.
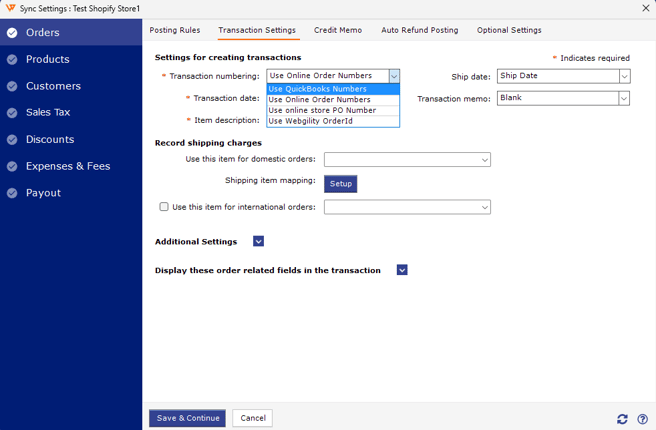
- Under Settings for creating transactions, open the Transaction numbering drop-down. It offers four options:
- Use QuickBooks Numbers: the transaction gets the next number from your QuickBooks sequence.
- Use Online Order Numbers: the online store's order number becomes the transaction number (the option in use in the screenshot below).
- Use online store PO Number: the store's PO number becomes the transaction number.
- Use Webgility OrderId: Webgility's own order ID becomes the transaction number.
- Select Use QuickBooks Numbers.
- Click Save & Continue.
What changes in QuickBooks
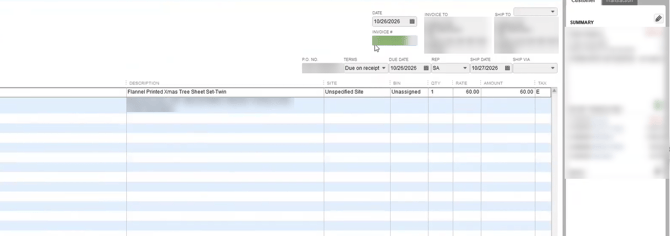
With Use Online Order Numbers, the Invoice # field in QuickBooks holds the long online order number. The same number also appears in the P.O. No. field. Customer details are blurred in this example.
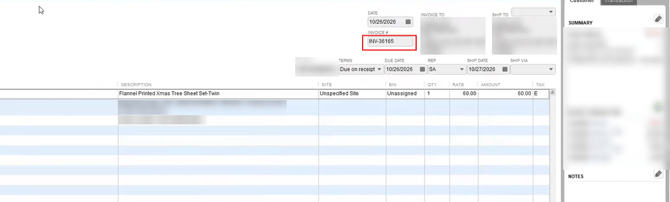
After you switch to Use QuickBooks Numbers and post the order again, Invoice # shows the next number in your QuickBooks sequence (INV-36165 here). The online order number is still carried on the transaction, in the P.O. No. field and in an Online OrderID line in the item description, so you can match the invoice to the store order.
Notes and troubleshooting
- The new number doesn't appear on an existing invoice. The setting only affects transactions posted after you save it. To renumber an order that was already posted, undo its sync in Webgility and post it again.
- To test safely, pick one recent order, undo its sync, post it again, and open the invoice in QuickBooks to confirm the Invoice # field.
- The numbers still look wrong. Confirm you changed the Sync Settings of the store the order came from, since each store connection has its own setting.
- Switching back. Select Use Online Order Numbers (or another option) in the same drop-down and click Save & Continue.
If you require any further assistance, please feel free to reach out to Webgility Support. We'll be happy to help!