
Part 1: Download the installer and setup files
Step 1. Open the SQL Server downloads page
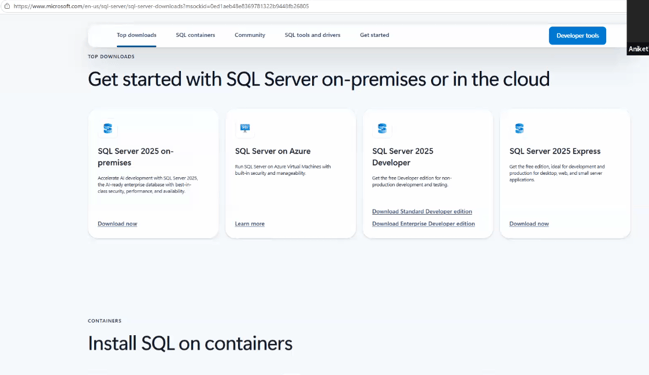
In a browser, go to the SQL Server downloads page. Under Get started with SQL Server on-premises or in the cloud, find the SQL Server 2025 Express card (the free edition for desktop, web and small server applications) and click Download now.
Step 2. Choose the Custom installation type
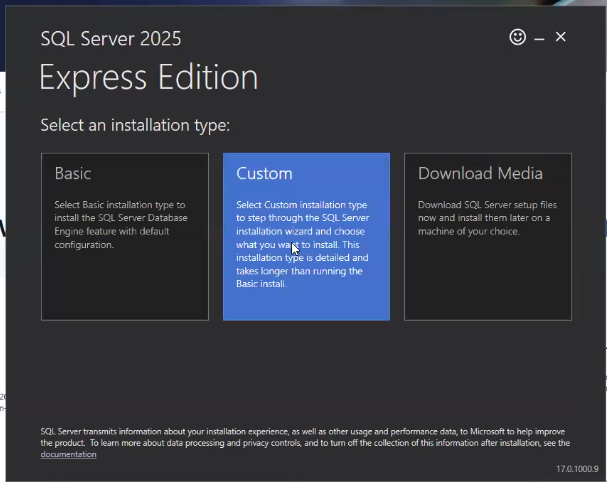
Run the downloaded installer. The SQL Server 2025 Express Edition window asks you to select an installation type:
- Basic installs the Database Engine with default settings.
- Custom steps through the full installation wizard so you can choose features, the instance name and authentication. It takes longer.
- Download Media only downloads the setup files to install later or on another machine.
Select Custom. This guide needs the wizard because it sets a named instance and Mixed Mode authentication.
Step 3. Set the media download location
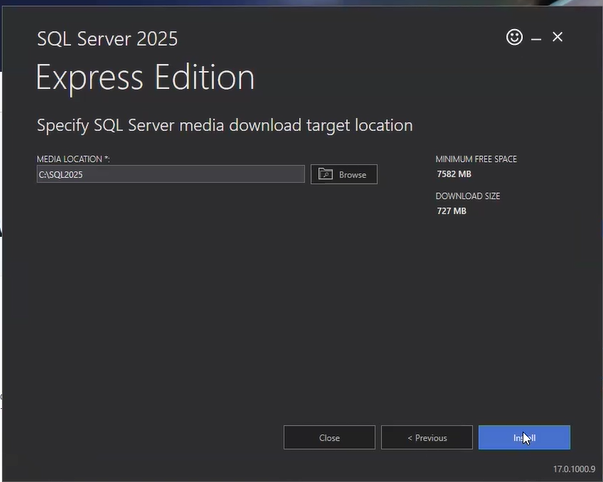
The installer asks where to save the setup files. The default is C:\SQL2025. Keep it, or click Browse to pick another folder. The right-hand panel shows a minimum free space of 7,582 MB and a download size of 727 MB. Click Install to start the download.
Step 4. Wait for the download
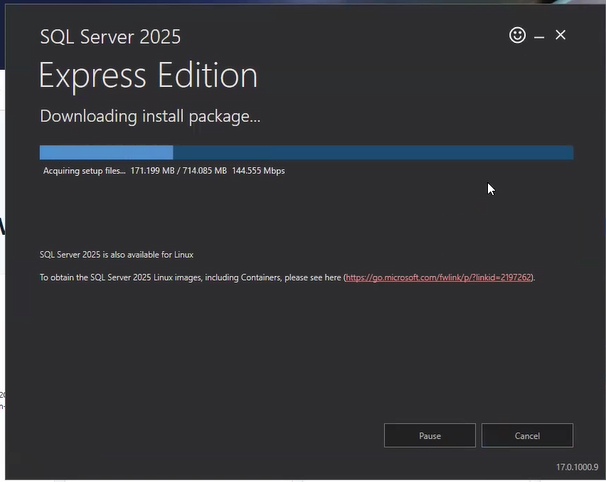
The Downloading install package screen shows progress and speed (in the example, 171 MB of 714 MB at 144 Mbps). Do not close the window. Pause and Cancel are available if you need them.
Step 5. Confirm the download finished
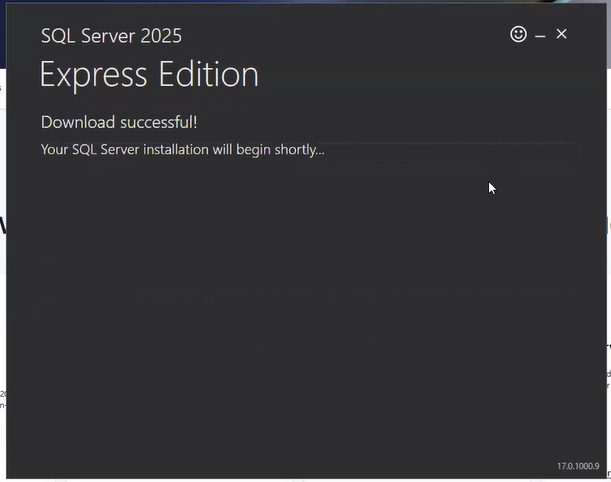
When the screen reads Download successful! and says the installation will begin shortly, wait. The SQL Server Installation Center opens by itself.
Part 2: Start Setup and choose features
Step 6. Launch the new standalone installation
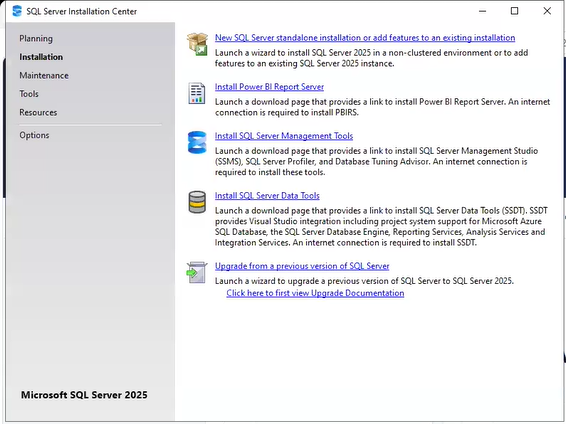
In the SQL Server Installation Center, open the Installation tab and click New SQL Server standalone installation or add features to an existing installation. The other links on this page install Power BI Report Server, SQL Server Management Studio (SSMS) and SQL Server Data Tools, or upgrade an older version. They are not needed for this installation. SSMS can be installed afterwards if you want a graphical management tool.
Step 7. Wait while Setup starts
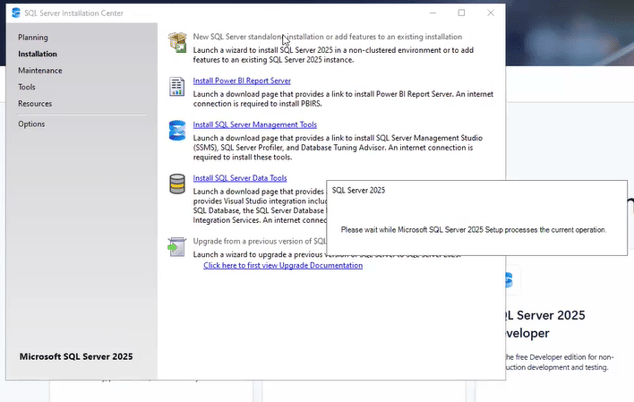
A small dialog reads Please wait while Microsoft SQL Server 2025 Setup processes the current operation. Leave it alone. The Setup wizard opens when it finishes.
Step 8. Let Setup prepare its files
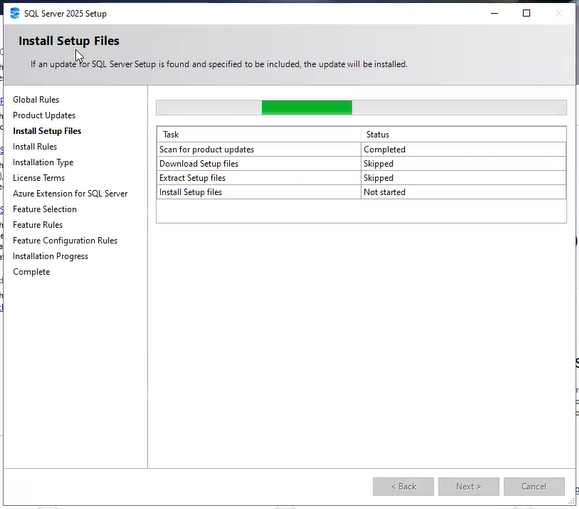
The Install Setup Files page lists its tasks. In the example, Scan for product updates shows Completed, Download Setup files and Extract Setup files show Skipped (the files were already downloaded in Part 1), and Install Setup files runs next. The Back, Next and Cancel buttons stay grey until the tasks finish. Setup then runs its rule checks automatically. If a rule fails, fix the issue it names before continuing.
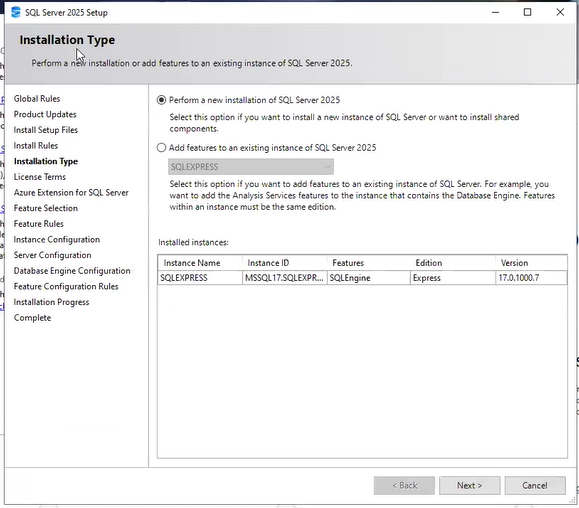
Step 9. Select a new installation
On Installation Type, keep Perform a new installation of SQL Server 2025 selected. The Installed instances table lists instances already on the machine; in the example, an existing SQLEXPRESS instance (Express, version 17.0.1000.7). Click Next.
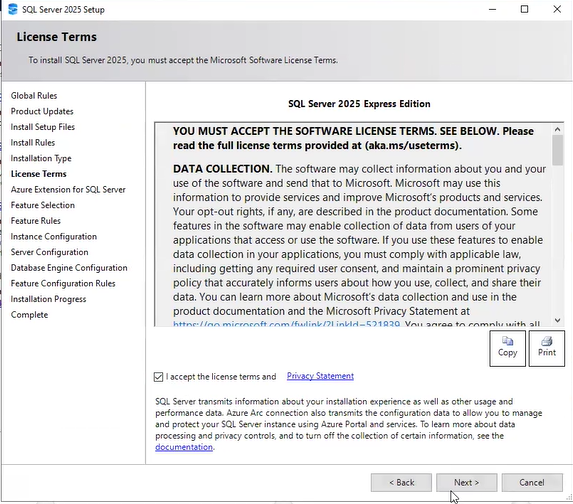
Step 10. Accept the license terms
Read the SQL Server 2025 Express Edition license terms, tick I accept the license terms and Privacy Statement, and click Next.
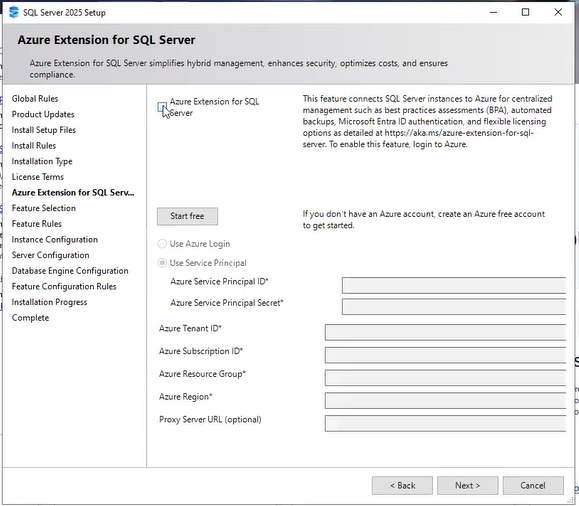
Step 11. Skip the Azure extension
The Azure Extension for SQL Server page connects the instance to Azure for centralized management, backups and licensing. It needs an Azure service principal, tenant, subscription, resource group and region. For a standard local installation, leave Azure Extension for SQL Server unticked, leave every field blank and click Next.
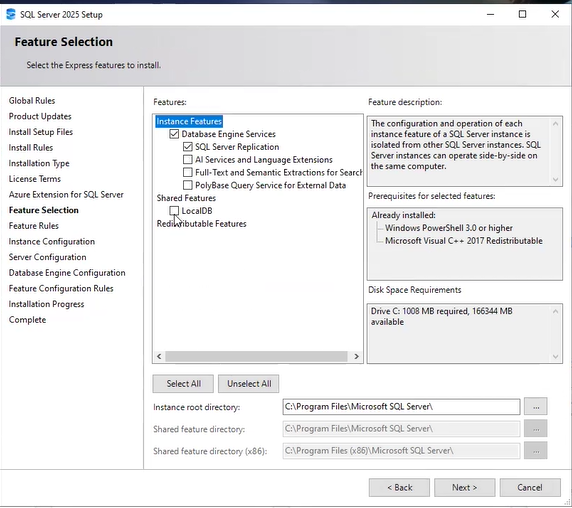
Step 12. Select the features
On Feature Selection, tick only what you need:
- Database Engine Services: ticked (required).
- SQL Server Replication: ticked.
- AI Services and Language Extensions, Full-Text and Semantic Extractions for Search, PolyBase Query Service for External Data: unticked.
- LocalDB (under Shared Features): unticked.
Keep the Instance root directory at C:\Program Files\Microsoft SQL Server\. The right-hand panels confirm the prerequisites (Windows PowerShell 3.0 or higher and Visual C++ 2017 Redistributable) are already installed and that drive C: needs about 1,008 MB. Click Next. Setup runs its feature rules, then opens Instance Configuration.
Part 3: Configure the instance, services and authentication
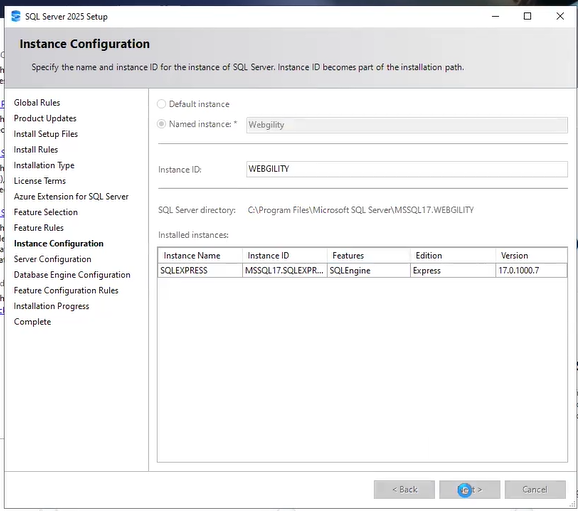
Step 13. Name the instance
On Instance Configuration, select Named instance and type the instance name (the example uses Webgility). Instance ID fills in automatically in capitals (WEBGILITY) and becomes part of the install path, shown as C:\Program Files\Microsoft SQL Server\MSSQL17.WEBGILITY. The Installed instances table again lists any instances already on the machine. Applications will later connect to this instance as <ServerName>\Webgility. Click Next.
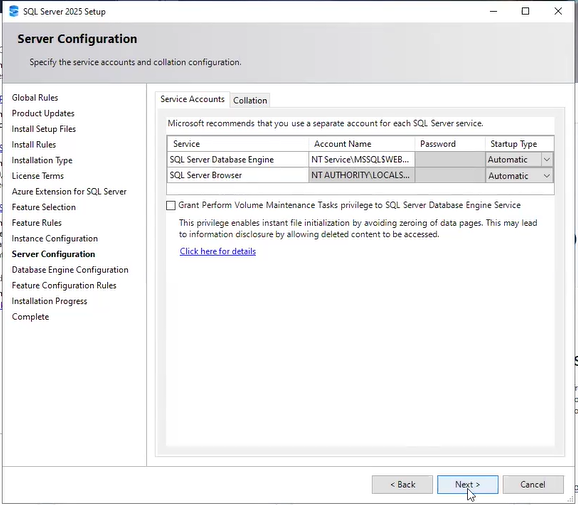
Step 14. Review the service accounts
On Server Configuration, the Service Accounts tab shows the defaults, which can stay as they are:
|
Service |
Account name |
Startup type |
|---|---|---|
|
SQL Server Database Engine |
|
Automatic |
|
SQL Server Browser |
|
Automatic |
Leave Grant Perform Volume Maintenance Tasks privilege to SQL Server Database Engine Service unticked. The Collation tab can stay at its default. Keep SQL Server Browser on Automatic: it lets other computers find a named instance. Click Next.
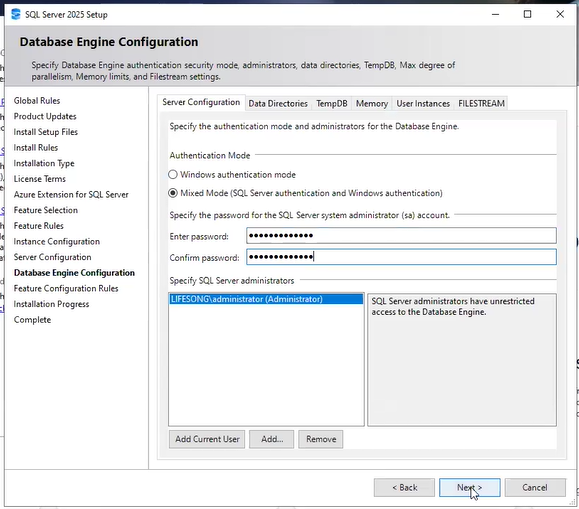
Step 15. Set Mixed Mode authentication and the sa password
On Database Engine Configuration, stay on the Server Configuration tab and:
- Under Authentication Mode, select Mixed Mode (SQL Server authentication and Windows authentication).
- Type the password Webgility2011 for the
sa(system administrator) account in Enter password, then repeat it in Confirm password. SQL Server rejects weak passwords, so use at least eight characters mixing upper case, lower case, numbers and symbols. - Under Specify SQL Server administrators, click Add Current User so the Windows account you are signed in with is an administrator. It appears in the list.
- Leave the Data Directories, TempDB, Memory, User Instances and FILESTREAM tabs at their defaults, then click Next.
Record the credentials (username sa and the password) in your password manager before you click Next. You cannot recover the password from SQL Server later.
Part 4: Install, finish and verify
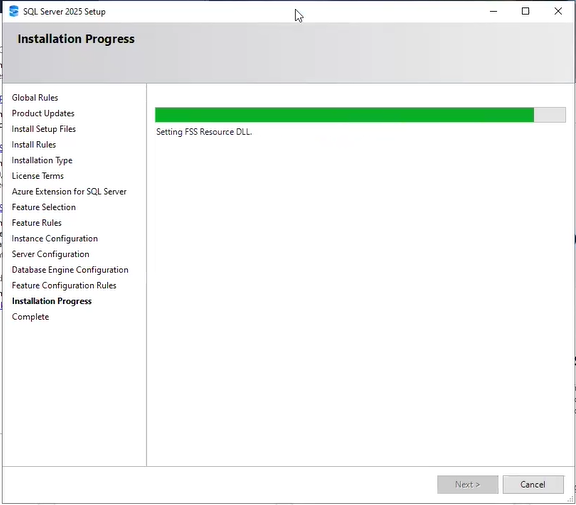
Step 16. Wait for the installation to run
Setup runs the feature configuration rules and then starts copying and configuring files. The Installation Progress page shows a green bar and the current action (for example, Setting FSS Resource DLL). This takes several minutes. Do not click Cancel or restart the machine while it runs.
Step 17. Confirm that Setup completed
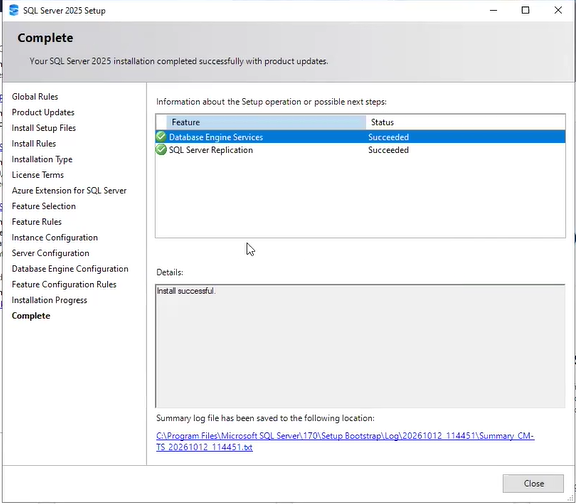
When the Complete page reads Your SQL Server 2025 installation completed successfully with product updates, check that Database Engine Services and SQL Server Replication both show Succeeded and that the details box says Install successful. The page also links to the summary log, saved under C:\Program Files\Microsoft SQL Server\170\Setup Bootstrap\Log\<timestamp>\. Keep that file for troubleshooting. Click Close.
Verify the instance
- Press the Windows key, type Services and open it. Confirm that SQL Server (WEBGILITY) and SQL Server Browser show a status of Running.
- Connect to the instance with
saand the password(Webgility2011) from Step 15. From a Command Prompt, for example:sqlcmd -S .\Webgility -U sa -P <password>. In SSMS, enter the server name<ServerName>\Webgilityand choose SQL Server Authentication. - Give the connection details (server and instance name,
sa, password) to whichever application will use the database.
Troubleshooting
- A setup rule fails: open the rule's result, read the message and fix it (a pending restart is the usual cause), then click Re-run.
- Not enough disk space: free space on the media location drive (7,582 MB) and on drive C: (about 1,008 MB), then restart the installer.
- Instance name already in use: choose a different name in Step 13, or select the existing instance only if you intend to add features to it.
- Another computer cannot connect: make sure SQL Server Browser is running and TCP/IP is enabled for the instance in SQL Server Configuration Manager, then restart the SQL Server service. Also allow the connection through Windows Firewall.
- Forgot the sa password: it cannot be read back. A Windows administrator who was added in Step 15 can connect with Windows authentication and reset it.
If you require any further assistance, please feel free to reach out to Webgility Support. We'll be happy to help!