
When you’ll see this
Webgility Desktop shows the Select or Install SQL Server prompt when it can sign you in but cannot find your Webgility database. This commonly happens when:
- You’re setting up Webgility Desktop on a new computer.
- SQL Server or the Webgility database was removed, moved, or is unreachable.
- The database needs to be rebuilt after the “Please upgrade your Webgility Database” or “incorrect database” message.
Before you begin
- Make sure you’re signed in to Windows with an administrator account.
- Keep a stable internet connection — the SQL Server installer is downloaded during setup.
- Have your Webgility login (email and password) ready.
Steps to set up your database
Step 1 — Choose how to set up your database
When the Select or Install SQL Server window appears, you’ll see two options:
- This is a new computer, install SQL Server and create Webgility database — choose this if you don’t already have SQL Server set up. Webgility will install it for you.
- Connect Webgility database to an existing SQL Server — choose this if SQL Server is already installed and you want to point Webgility to it.
Select the first option and click Continue.
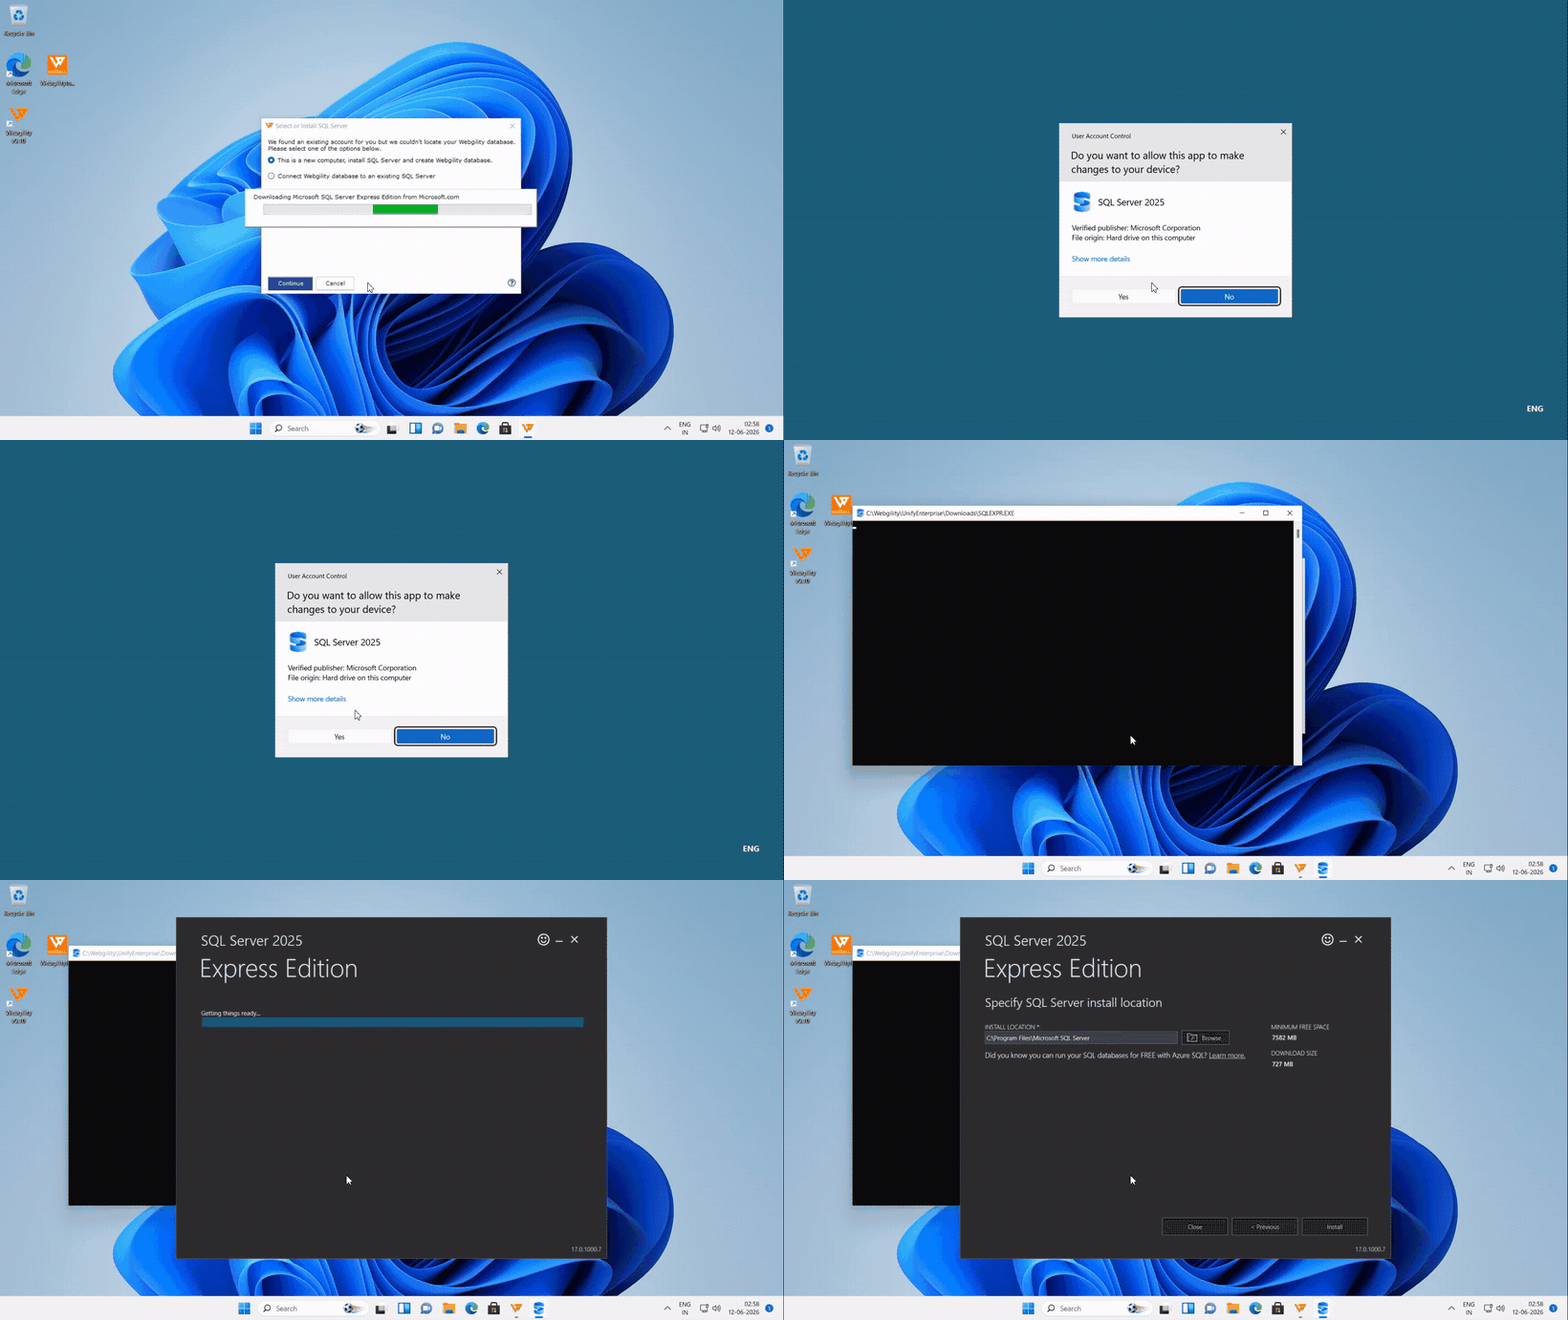
Step 2 — Install SQL Server 2025 Express Edition
Webgility downloads and installs SQL Server 2025 Express Edition automatically. You’ll see the download progress followed by installation — this can take several minutes depending on your connection. No input is needed during this step.
When it finishes, the installer shows “Installation has completed successfully!” with details such as Instance Name SQLEXPRESS and the SQL Server version. Click Close to return to Webgility.
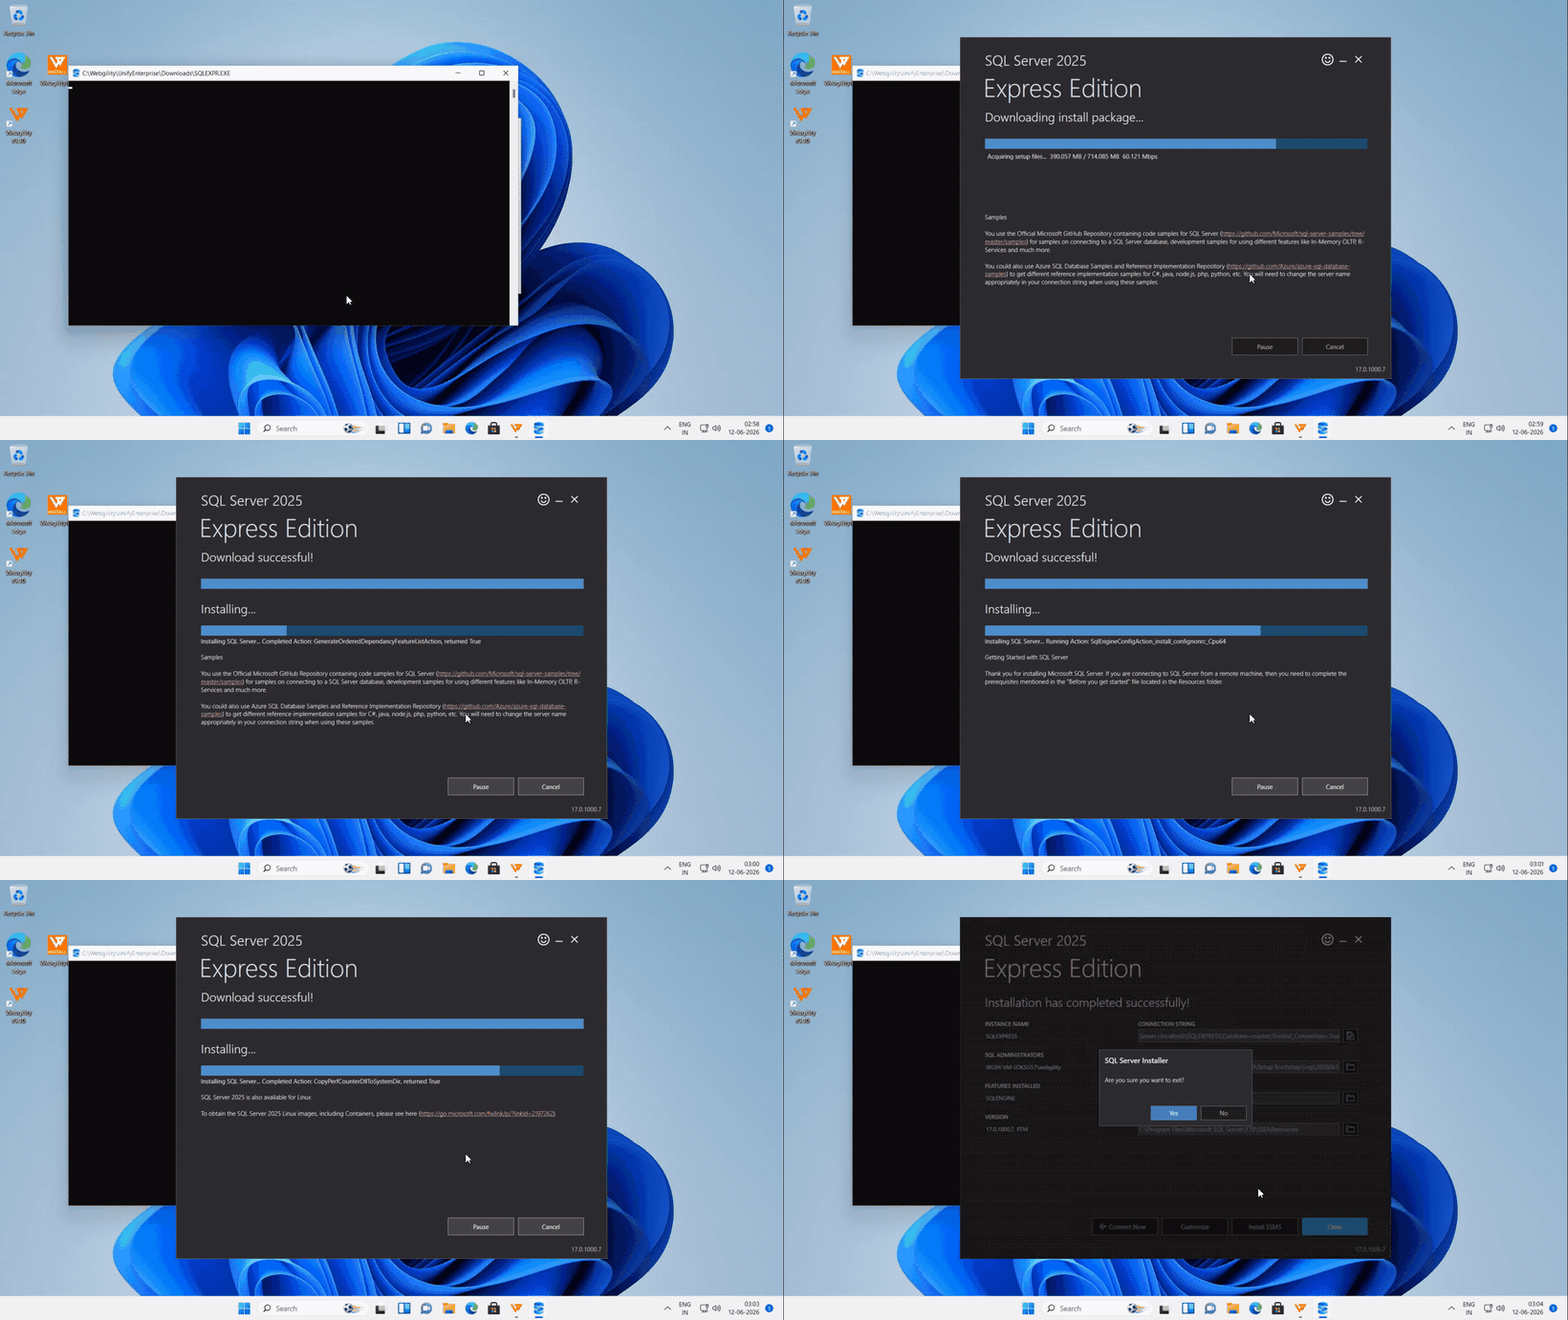
Step 3 — Webgility creates your database
After SQL Server is installed, Webgility automatically creates and configures your Webgility database. You’ll see a Processing… status while it sets things up. Let it finish — Webgility will open once the database is ready.
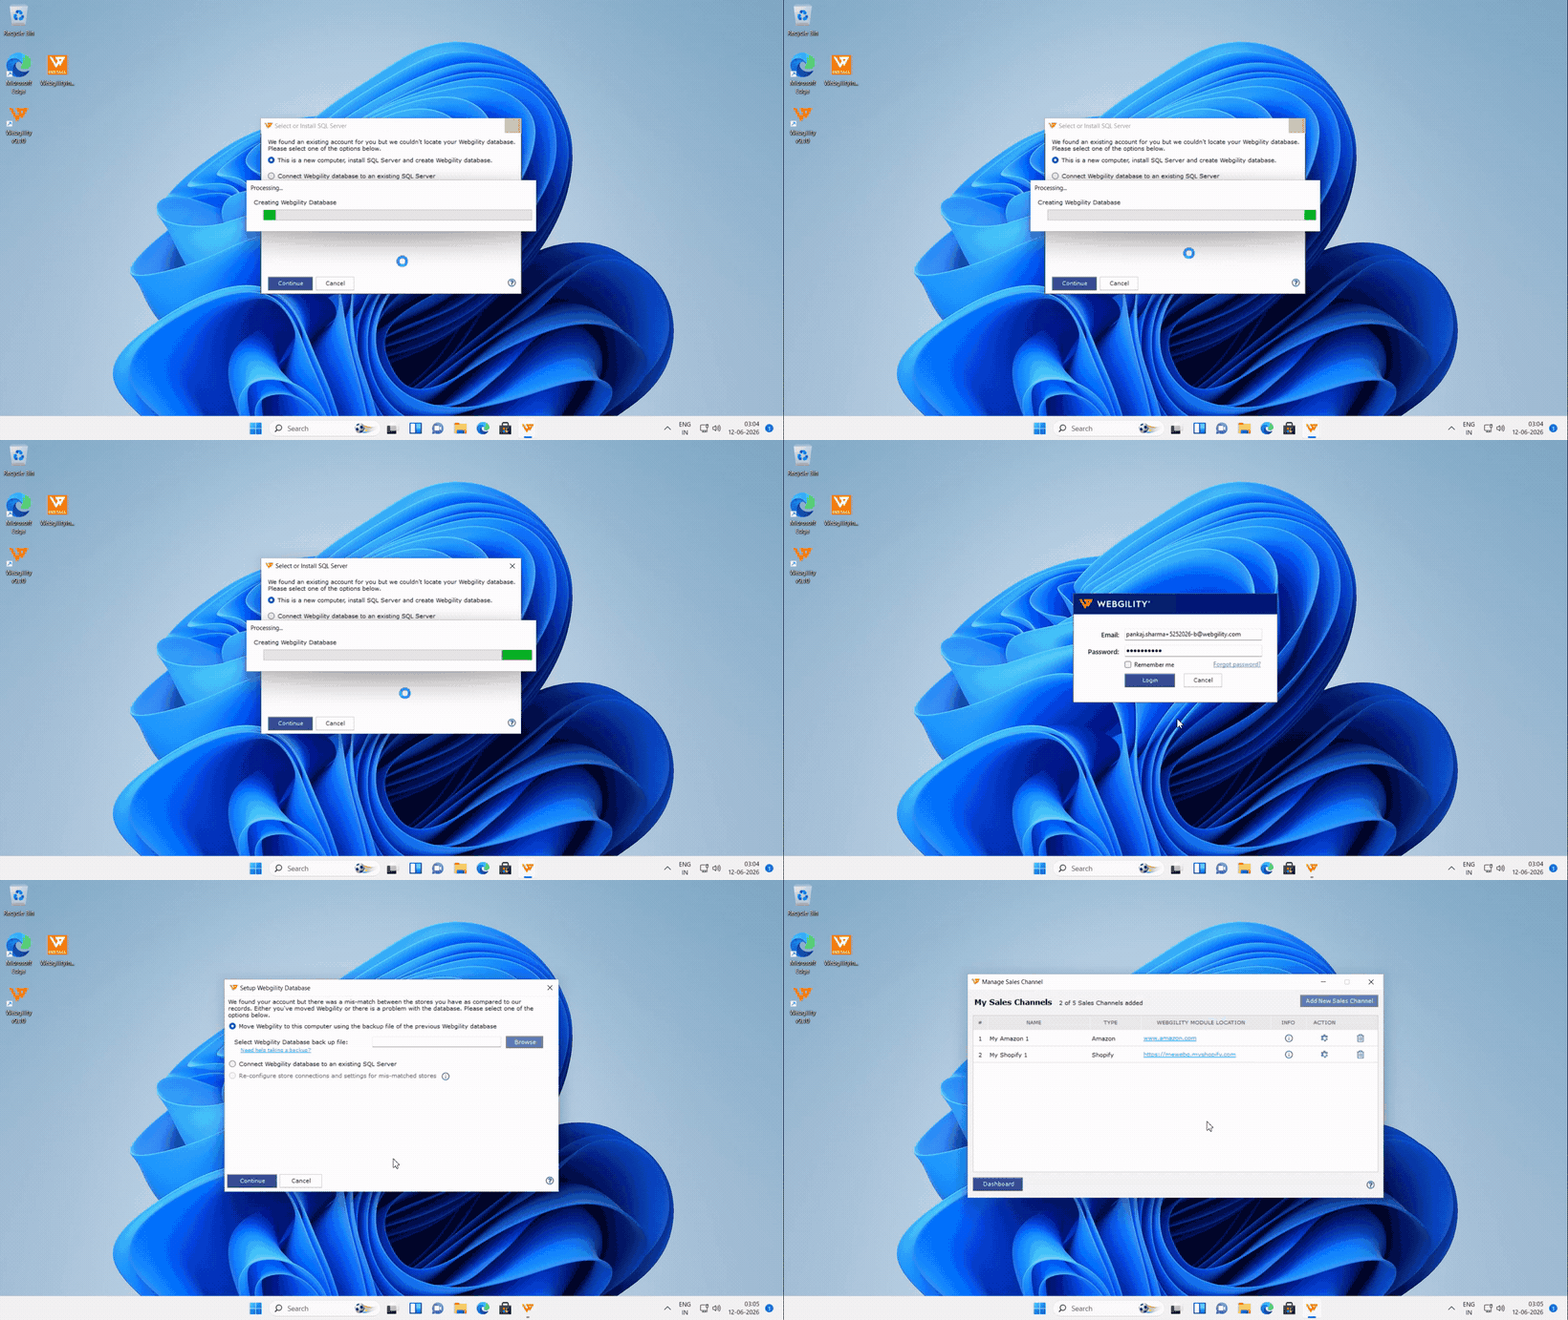
Note: If you selected Connect Webgility database to an existing SQL Server, you’ll be asked for the SQL Server instance (for example localhost\SQLEXPRESS) and an authentication method (Windows Authentication or SQL Server Authentication) instead of installing a new server.