Steps to follow:
Step 1: Add a New Sales Channel in Webgility
- Log in to your Webgility account.
- Navigate to the Connections section.
- Click on Sales Channel and select the option to Add a New Sales Channel.
- From the list of supported platforms, select Clover.
- Enter a recognizable name for your sales channel and click Continue.
Step 2: Enter Your Clover Merchant ID and Access Token
After clicking Continue, Webgility Desktop will prompt you to enter your Clover Merchant ID and Access Token. To access Clover Merchant ID:
- Log in to your Clover account here.
- Click on Settings in the top right corner.
- Scroll down and click View all settings in the left panel.
- In the Settings page, click on Merchant under "About Your Business".
- Copy the Merchant ID of the account you want to connect.
- Paste the Merchant ID into the Webgility Desktop application.
Get Your Clover Access Token
- Go back to Settings and click View all settings.
- Under Business Operations, click API Token.
- Click Create New Token.
- In the popup, enter a name for the token and select its permissions.
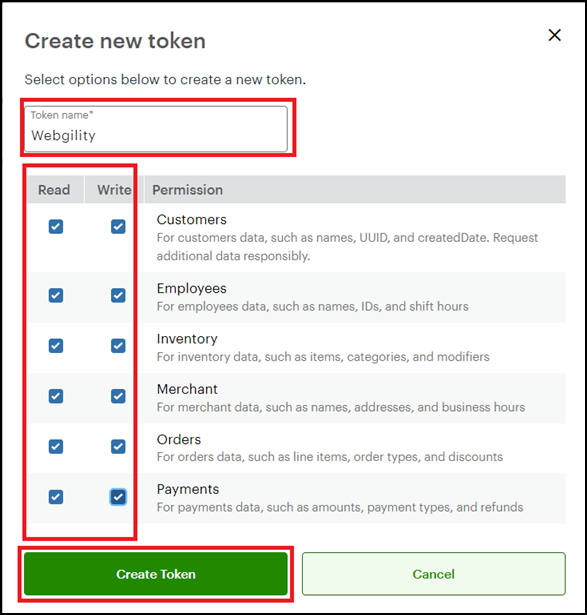
- Click Create Token.
- Click the eye icon to reveal the token.
- Click Copy and paste the token into the Webgility Desktop application.
Step 3: Complete the Connection
- Enter your Merchant ID and Access Token.
- Click Continue to establish the connection.
- Enter your business contact information (fields marked with a red asterisk (*) are required).
Once completed, Webgility Desktop will be successfully connected to your Clover POS, allowing you to sync sales data efficiently.