
Step 1: Enable Class Tracking in QuickBooks Desktop
- Open QuickBooks Desktop.
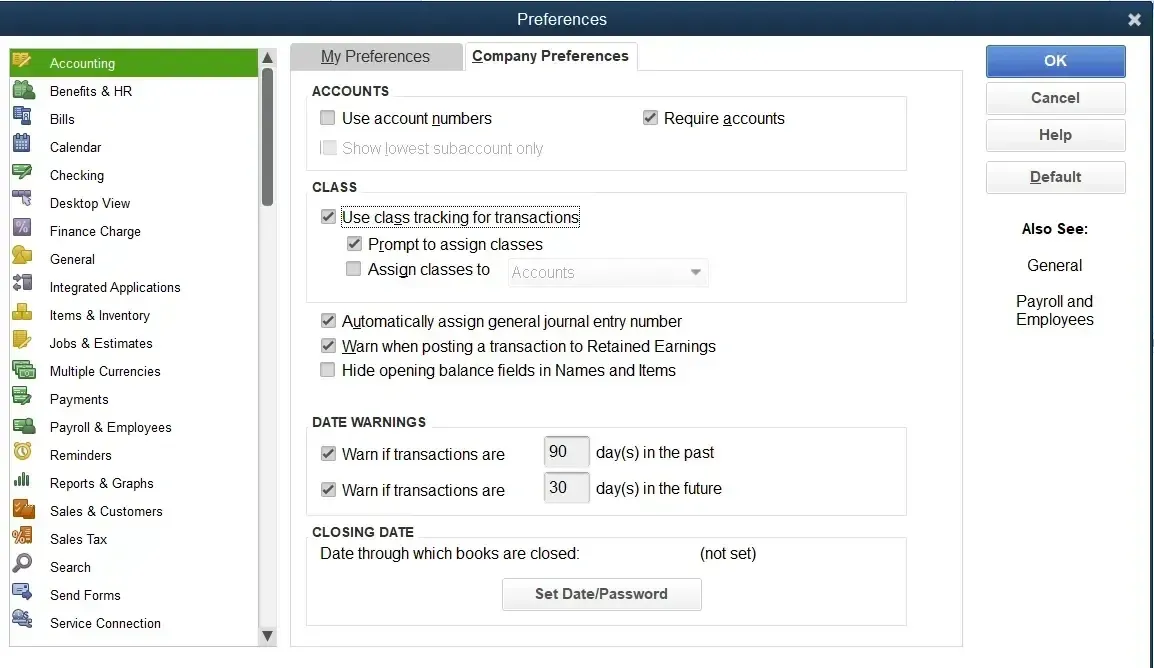
- Go to Edit > Preferences.
- Select Accounting > Company Preferences.
- Select Use class tracking for transactions.
- Click OK to save your changes.
Step 2: Create Transaction Classes in QuickBooks
Create the classes that you want to use before configuring them in Webgility.
- In QuickBooks Desktop, go to Lists > Class List.
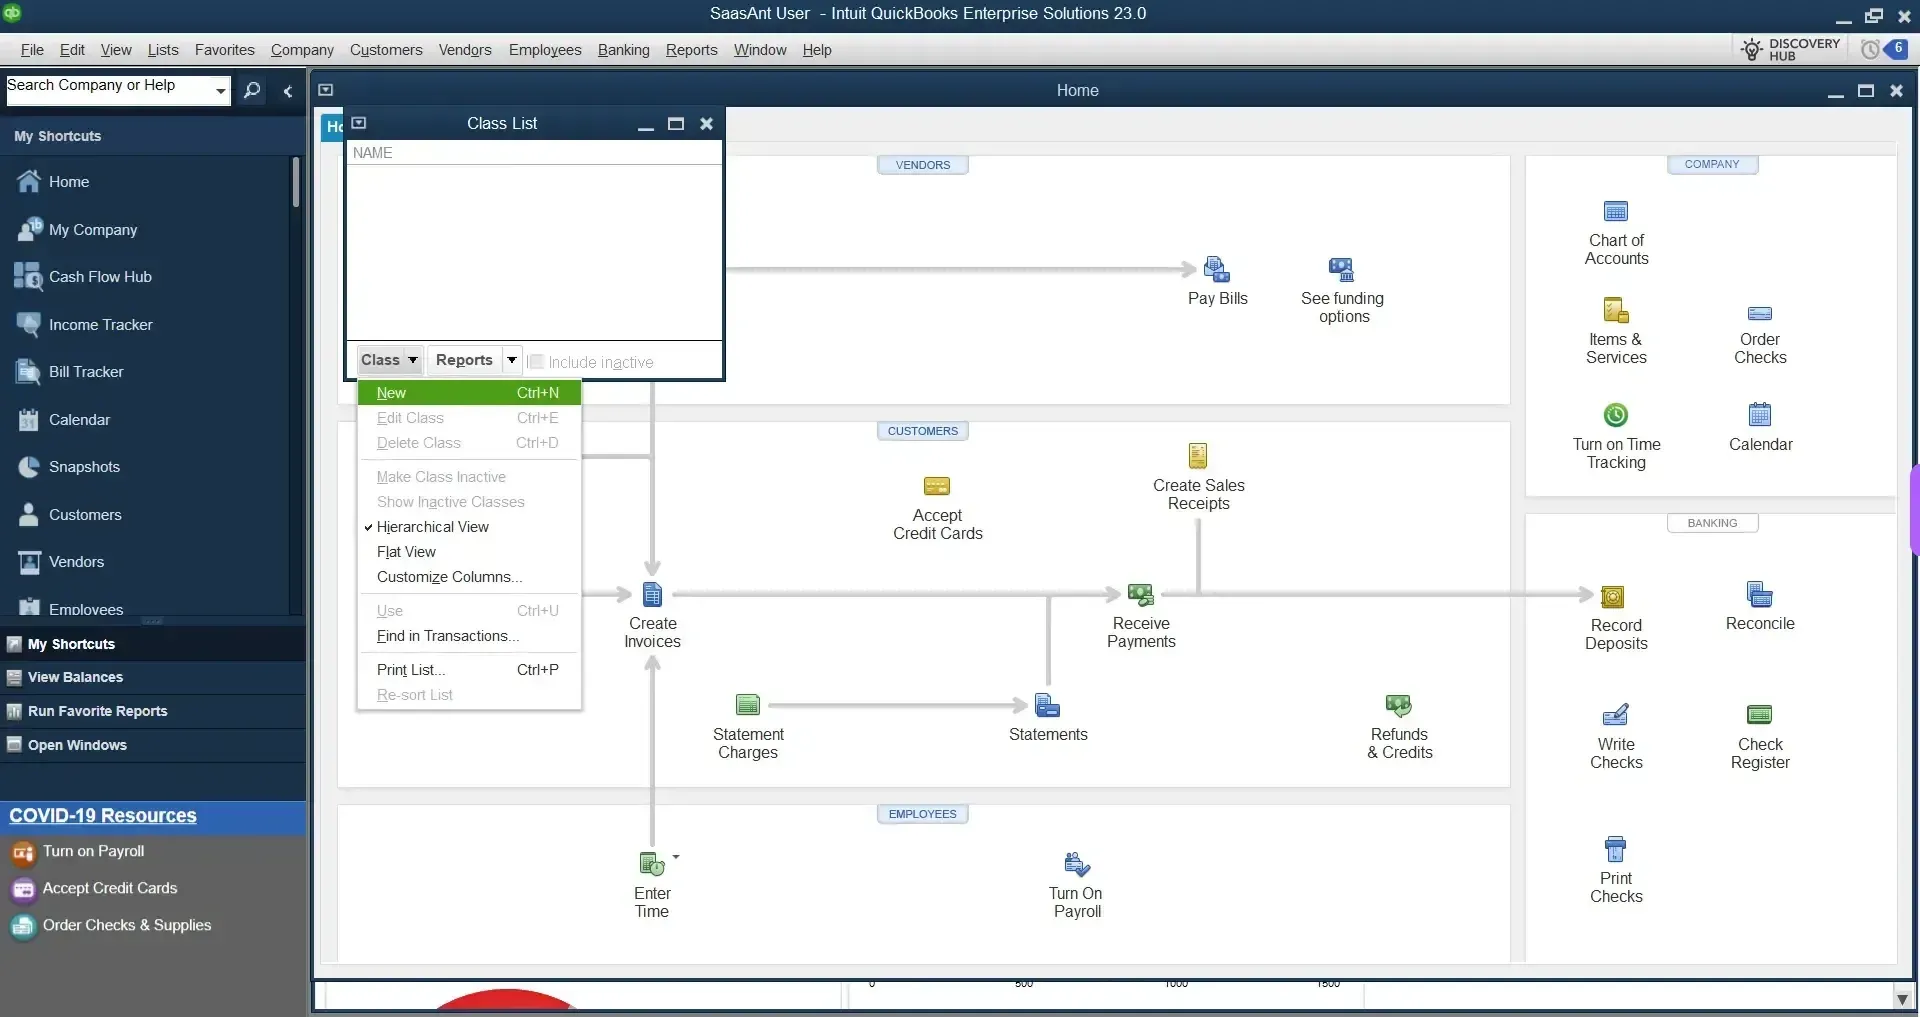
- Click the Class dropdown at the bottom-left.
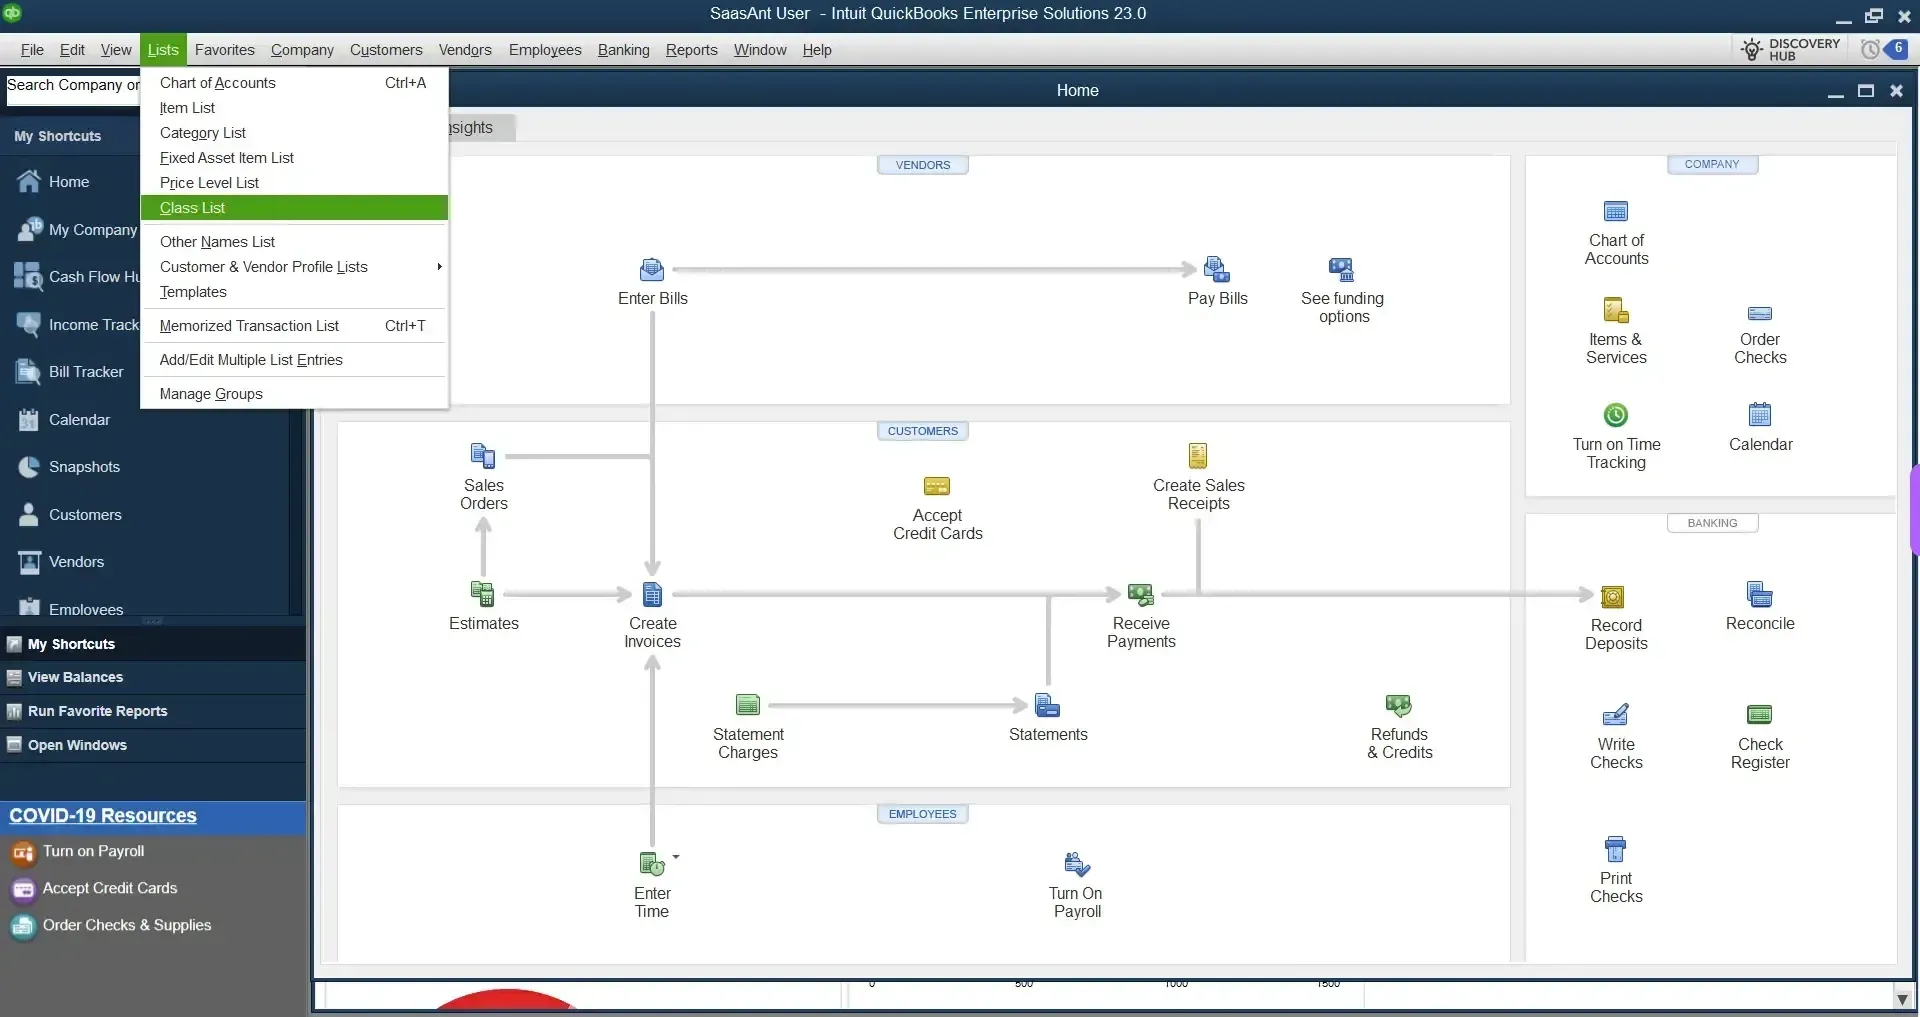
- Select New.
- Enter the class name.
If needed, select the option to make the class a subclass.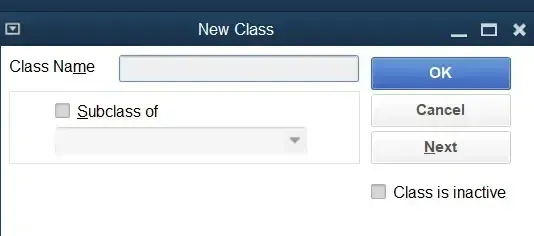
- Click OK.
Step 3: Download the Latest QuickBooks Data in Webgility
After creating a new class, download the latest QuickBooks data so the class becomes available in Webgility.
- Open Webgility Desktop.
- Go to Connections > Sales Channel > Advanced Settings.
- Under the Application tab, locate Last download date for QuickBooks Item.
- Click Clear.
- Click Save, then Close.
- Go to Connections > Get Latest Data & Settings.
- In the pop-up window, select Download Data under Download QuickBooks Data.
- Wait for the download to complete.
Step 4: Configure the Transaction Class in Webgility
Once the QuickBooks data has been downloaded:
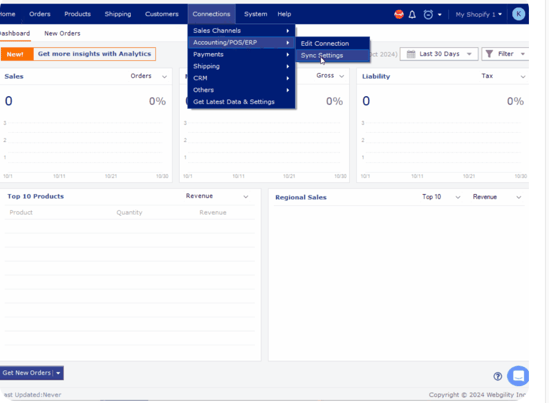
- Go to Connections > Accounting/POS/ERP > Sync Settings.
- Select Orders > Posting Rules.
- Locate Select transaction type for posting orders.
- Click Setup next to the transaction type you want to configure.
- Locate the Transaction Class dropdown.
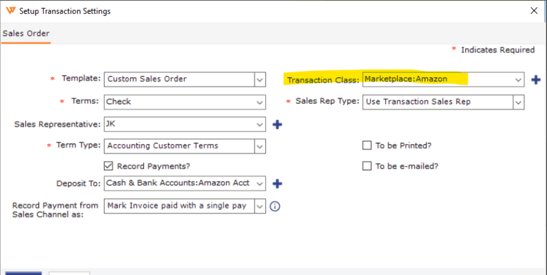
- Select the appropriate QuickBooks class.
- Click Save, then Save & Continue.
Step 5: Verify the Transaction Class
Test the configuration by posting a sample order.
- Post a sample order from Webgility to QuickBooks.
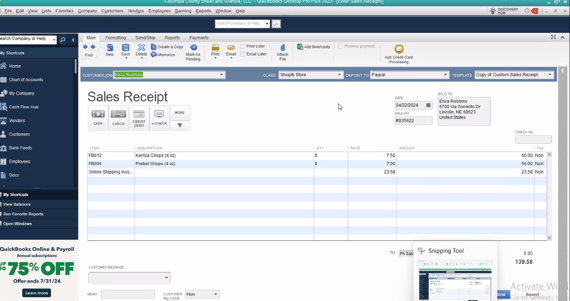
- Open the posted transaction in QuickBooks Desktop.
- Verify that the selected Transaction Class is applied correctly.
Troubleshooting
The new class does not appear in Webgility
If a newly created QuickBooks class is not available in the Transaction Class dropdown:
- Confirm that the class was successfully created in QuickBooks.
- Verify that Class Tracking is enabled.
- Run Connections > Get Latest Data & Settings again.
- Download the latest QuickBooks settings.
- Recheck the Transaction Class dropdown in Webgility.
Still having trouble?
If the issue continues after following these steps, contact Webgility Support