
Why is this important?
Businesses may categorize shipping costs differently depending on their accounting practices.
For example:
- Some businesses record shipping fees under regular Expense accounts.
- Others track shipping costs under Cost of Goods Sold (COGS) to include them in the cost of fulfilling customer orders.
Previously, customers using the second approach could not select their preferred COGS account in Webgility Online.
You can now choose the appropriate account based on how you manage shipping expenses in QuickBooks.
How to Select a Cost of Goods Sold Account
Follow these steps to configure your shipping fee account:
- Log in to Webgility Online.
- Navigate to Sync Settings.
- Open the Fees > Settings for Posting Shipping Fees
- Locate Set the Expense Account as.
- Open the account selection list.
- Select your preferred Cost of Goods Sold (COGS) account.
- Save your changes.
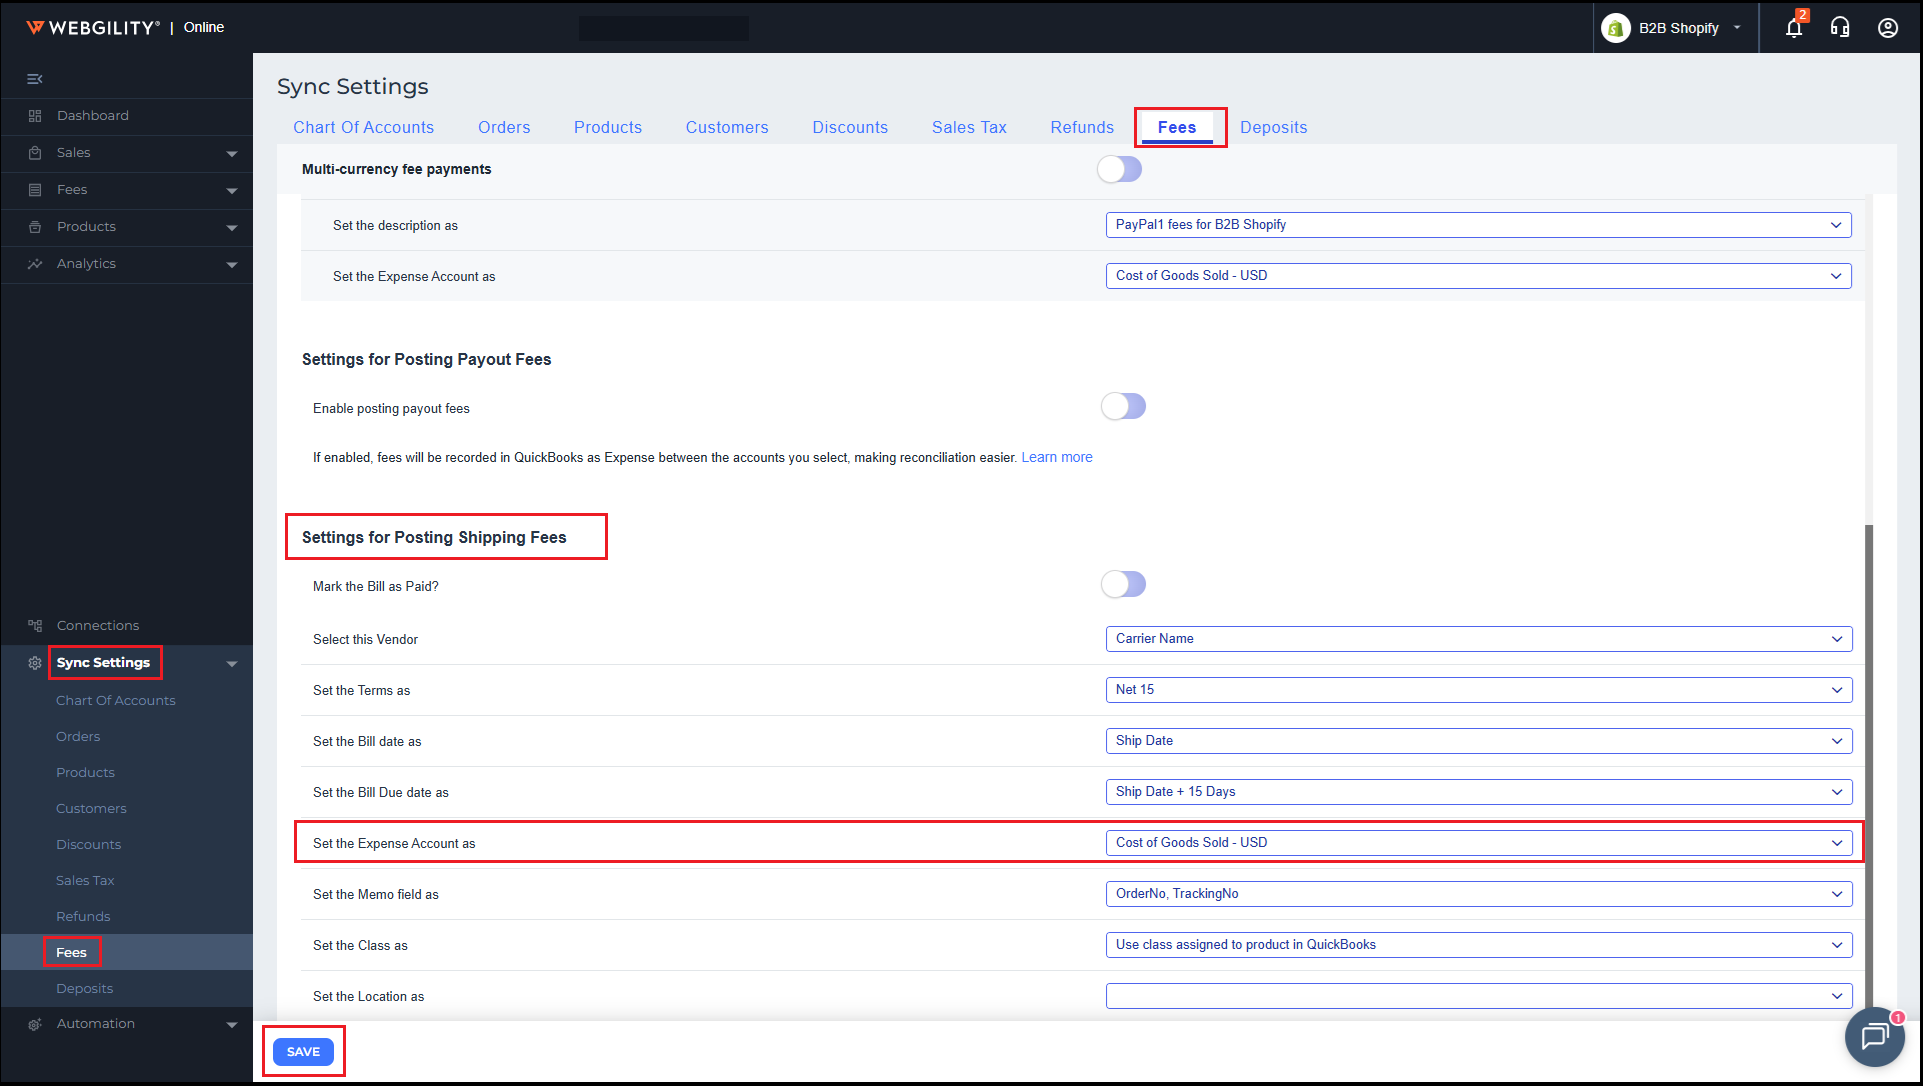
Once configured, Webgility Online will use the selected account when recording applicable shipping fees in QuickBooks.
Which Account Should You Choose?
The appropriate account depends on your accounting preferences and how you want shipping costs to appear in your financial records.
- Expense Account: Choose this if you record shipping costs as regular business expenses.
- Cost of Goods Sold Account: Choose this if you track shipping costs as part of the cost associated with selling and fulfilling products.
If you are unsure which account to use, consult your accountant before changing your existing account mapping.