
Overview
In this scenario, Webgility Desktop can post orders to QuickBooks successfully, but an add-on user cannot retrieve tracking IDs from QuickBooks and post them back to the sales channel. The same action works when using the primary user.
This can occur when the QuickBooks primary user associated with the Webgility connection has changed.
Follow the steps below to refresh the QuickBooks connection and test tracking retrieval.
Steps to Resolve the Issue
Step 1: Create a Webgility database backup
Before making changes to the QuickBooks connection, create a current Webgility Desktop database backup.
For instructions, see How to Create a Database Backup and Restore It.
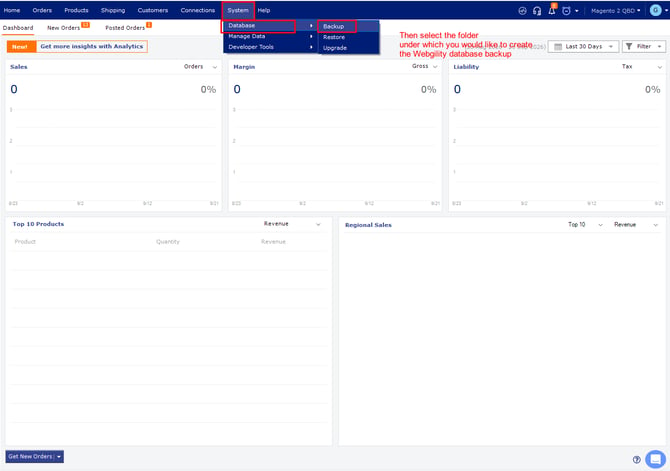 Step 2: Sign in to QuickBooks as the current primary user
Open QuickBooks Desktop and sign in using the current QuickBooks primary user.
Make sure QuickBooks is in Single-User Mode before updating the Webgility connection.
Step 3: Regenerate the Webgility QuickBooks connection
In Webgility Desktop:
- Go to Connections > Accounting/POS/ERP.
- Click Edit Connection for your QuickBooks Desktop connection.
- Follow the prompts to test the QuickBooks connection.
- When the Application Certificate appears in QuickBooks, approve the connection using the QuickBooks Admin account and select Yes, always; allow access even if QuickBooks is not running.
For detailed instructions, see Regenerate QuickBooks Certificate.
Step 4: Verify add-on user permissions
Make sure the affected add-on user has access to the Shipping module and the required sales channel.
The add-on user must have the appropriate shipping permissions to retrieve tracking IDs.
For instructions, see Managing User Access and Permissions in Webgility Desktop.
Step 5: Test tracking ID retrieval
Sign in to Webgility Desktop using the affected add-on user and test tracking retrieval on a shipped order.
To manually retrieve the tracking ID:
- Open the Posted Orders tab.
- Select the order.
- Click More Actions > Retrieve Tracking ID.
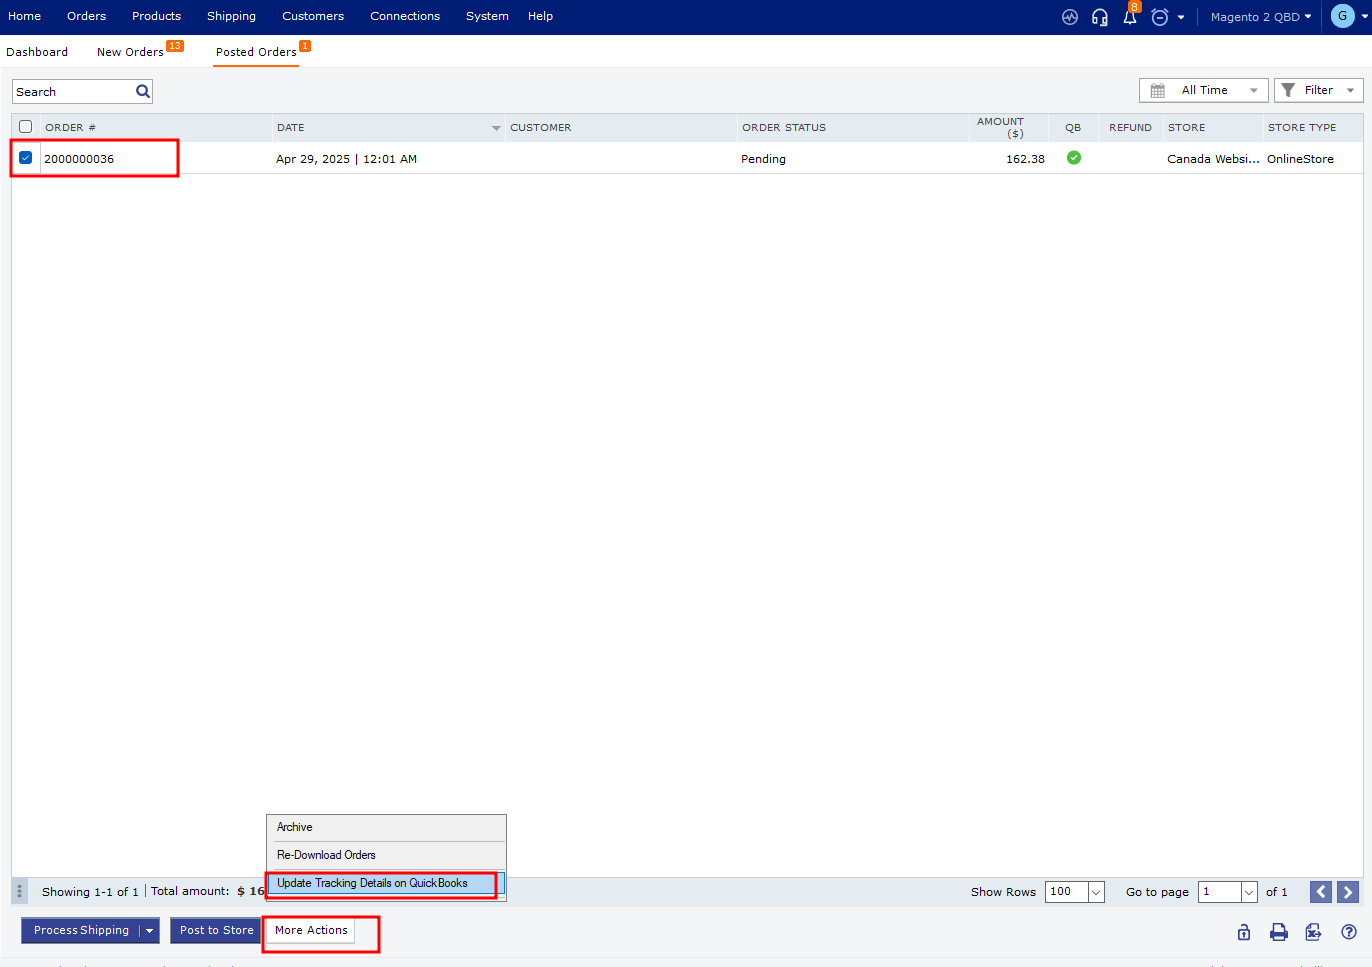
- Confirm that the tracking ID appears in the order details.
- If required, use Post to Store to send the tracking information to the sales channel.
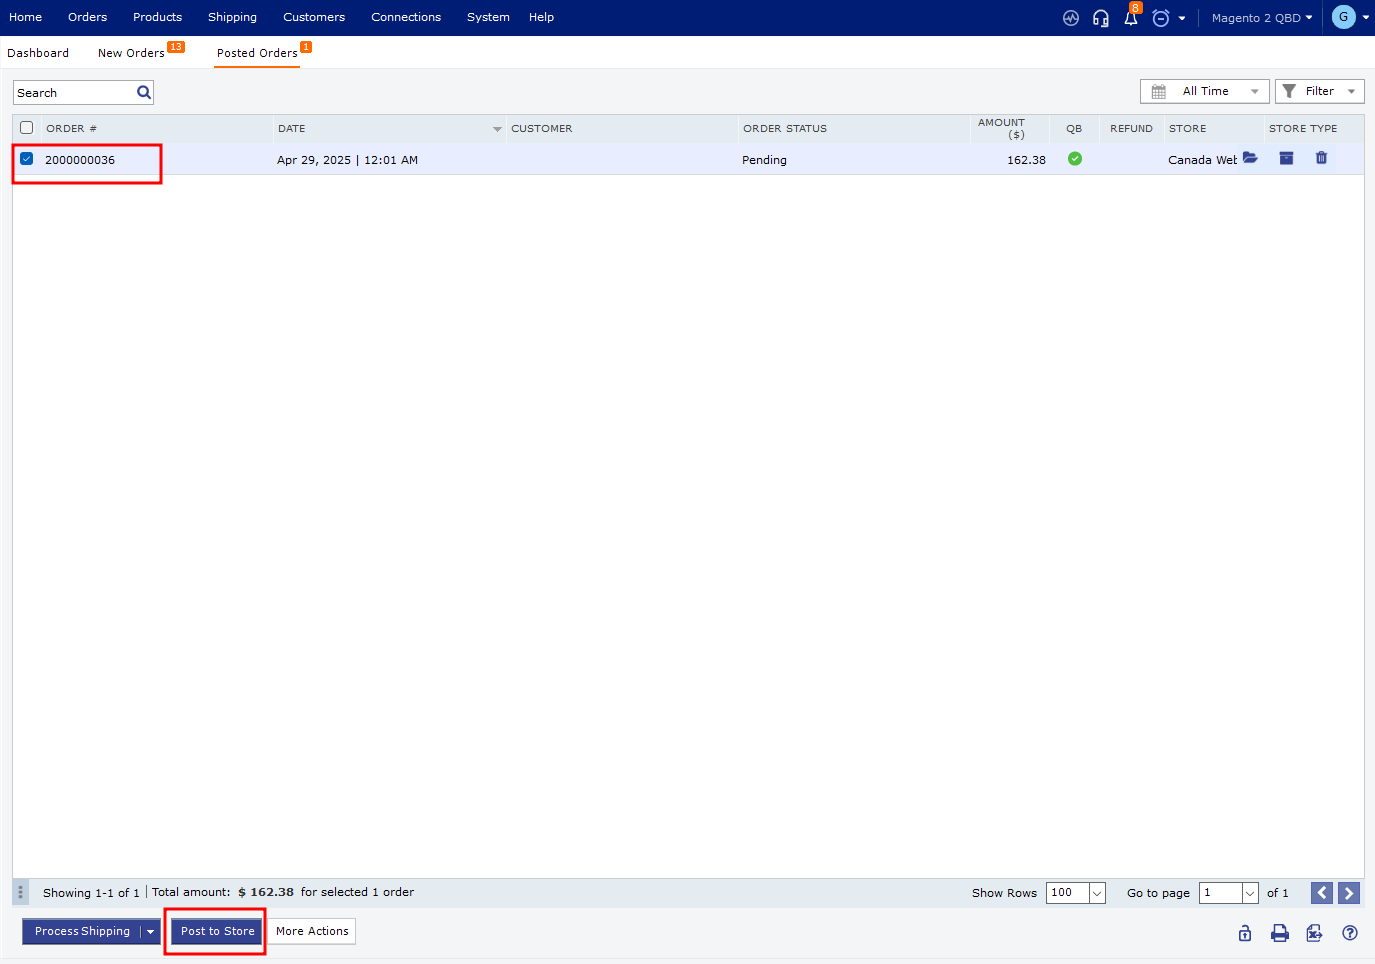
For more information, see How to Retrieve Tracking ID from QuickBooks and Post to Store.
If the tracking ID is retrieved successfully, the issue is resolved.
If the add-on user still cannot retrieve the tracking ID while the primary user can, contact Webgility Support for further assistance.