
When Webgility Desktop posts an order to QuickBooks under the wrong customer — a different customer from the one you expected to see on the invoice or sales receipt — the cause is the Standard Customer selection under Sync Settings > Customers pointing at the wrong QuickBooks record. Re-selecting the correct customer and saving the panel routes future posts to the right record.
When This AppliesUse these steps when orders are posting to QuickBooks under an unexpected customer name even though your Sync Settings previously looked correct, and a test post after re-selecting the customer confirms the fix.
Why This HappensWebgility Desktop keeps a Standard Customer selection in Sync Settings > Customers that drives order posting when the per-order matching criteria do not identify a specific QuickBooks customer. If that selection drifts — for example, after a chart-of-accounts cleanup, after a customer merge in QuickBooks, or after an upgrade that reset the dropdown — Webgility falls back to a different customer than the one originally configured, and every subsequent post lands on that fallback.
Important Note: "After re-selecting the customer, post one test order and confirm the resulting QuickBooks transaction is tied to the expected customer before letting the Scheduler run on the full backlog."
Steps to Re-Select the Standard CustomerStep 1: In Webgility Desktop, open Connections > Accounting/POS/ERP > Sync Settings and select the Customer tab.
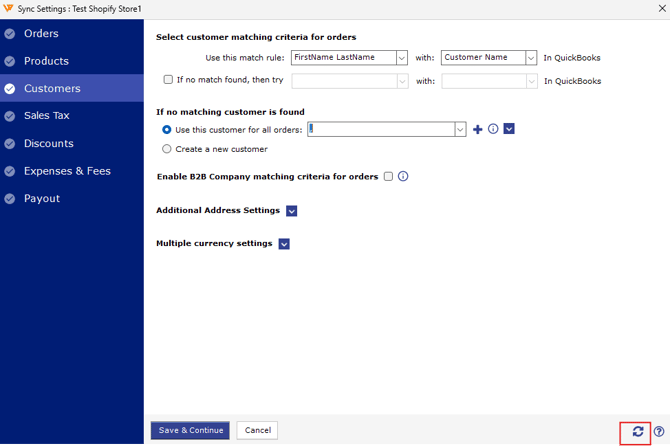
Step 2: Click the Refresh button on the Sync Settings screen so Webgility pulls the latest QuickBooks customer list in case the record was renamed, merged, or recently added. If the correct customer record does not appear after refreshing then download the QuickBooks customer data from scratch in Webgility by navigating to Connections > Get latest Data and Settings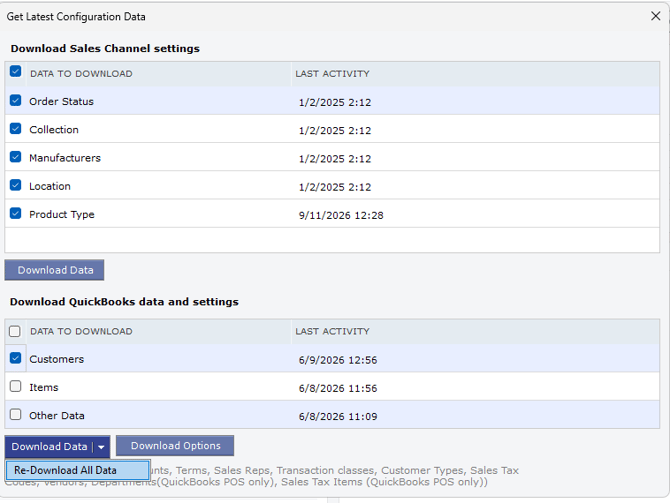
Step 3: Locate the Use this customer for all orders dropdown (or the equivalent Standard Customer selector described in Customer Settings in Webgility Desktop), re-select the correct QuickBooks customer, and click Save.
Step 4: Post one test order from the Orders tab and open the resulting QuickBooks transaction to confirm it is tied to the expected customer.
Step 5: For orders already posted to the wrong customer, decide whether to leave them in place (if small volume), re-post them after unsyncing (if the Scheduler will reprocess cleanly), or ask your accountant to re-link the transactions in QuickBooks directly (if the volume is large and QuickBooks-side correction is faster).
Key RecommendationAfter any QuickBooks-side customer cleanup — merge, rename, or deactivate — open Sync Settings > Customer the same day and re-save the Standard Customer selection. The dropdown is cached and silently drifts when the underlying QuickBooks customer changes.
Additional SupportIf orders continue to post to the wrong customer after Step 4, contact Webgility Support at support@webgility.com with the order ID, the customer name you expected, the customer name the order posted under, and a screenshot of your Sync Settings > Customer tab so support can trace the matching on your account.