
Problem Description
"You just installed Webgility Desktop on a new server and payments are not posting from Shopify to QuickBooks. When Webgility tries to open QuickBooks, you see the error 'Could not start QuickBooks'."
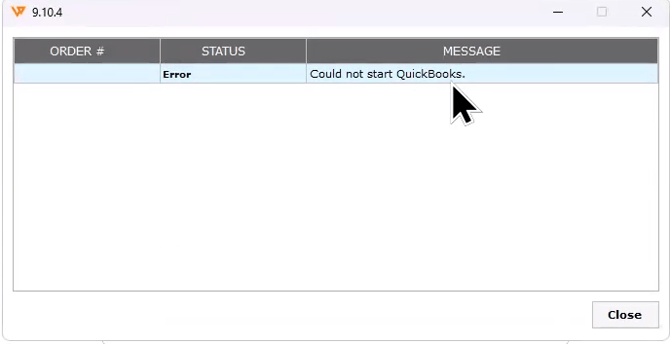
Root Cause
After a server migration, the QuickBooks company file path stored in Webgility Desktop still points at the old server's location. Because that path no longer exists on the new server, Webgility cannot open QuickBooks, and payment posting from any connected sales channel stops. Copying the current company file path from QuickBooks itself into Webgility's connection settings restores the link.
Solution Steps
Step 1: Open QuickBooks Desktop on the new server, and press FN + F2 (or just F2) to open the Product Information window. You'll see the exact company file location listed near the top of that window — copy it.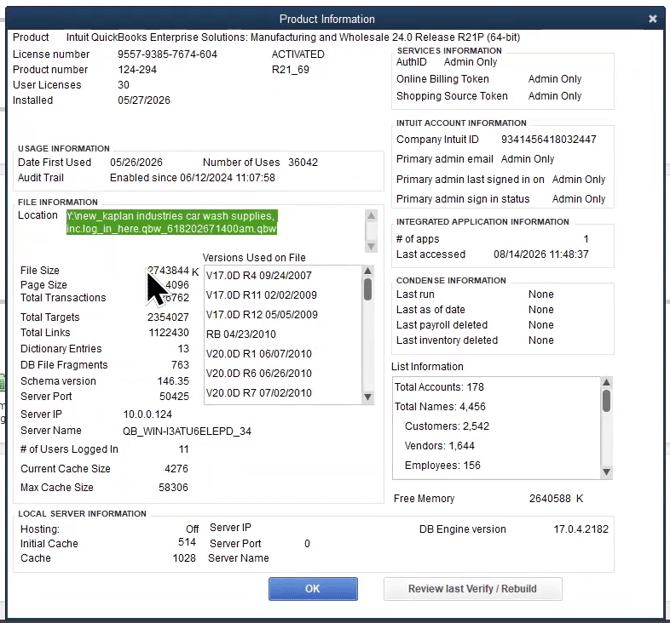
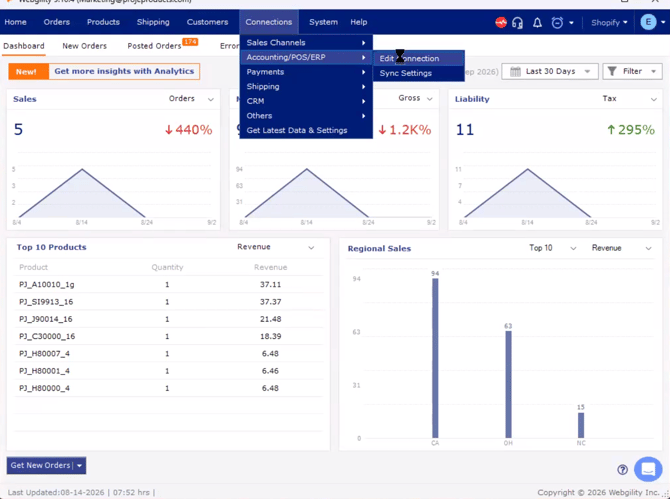
Step 2: Open Webgility Desktop and go to Connections > Accounting/POS/ERP > Edit Connection. Paste the copied path into the QuickBooks company file field and save.
Step 3: Sign in with your QuickBooks admin account and verify the connection. A successful connection shows a Connected confirmation next to the company file field.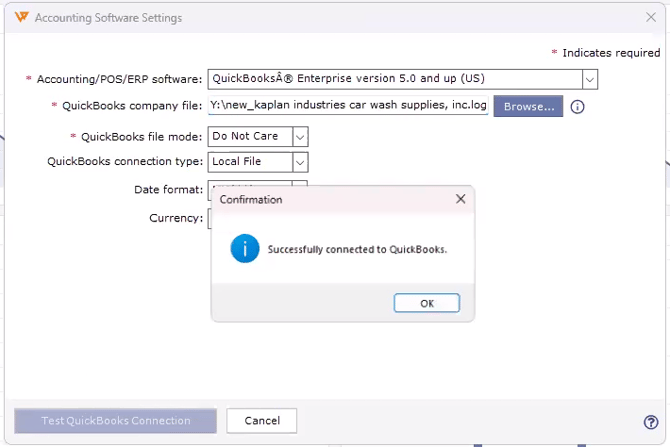
Important Note
"Always match Webgility Desktop's company file path exactly to what QuickBooks shows in F2 — even a single mismatched folder segment will cause the 'Could not start QuickBooks' error. If your organization uses a UNC path (\\\\server\\share), copy the UNC path from QuickBooks, not a mapped drive letter."
Further Assistance
If the error persists after pasting the correct path, contact Webgility Support with the exact path shown in QuickBooks F2 and the path currently saved in Webgility so Support can compare them.