
Overview
If a NetSuite class does not appear under Posting Settings > Transaction Settings > Transaction Class in Webgility Desktop, it may not be assigned to the appropriate subsidiary.
Follow the steps below to update the class and refresh the data in Webgility Desktop.
Steps to Resolve the IssueStep 1: Assign the Subsidiary in NetSuite
- Log in to NetSuite and navigate to Lists > Accounting > Classes.
- Open the missing class.
- Under Subsidiary Restrictions (or Subsidiary), select the appropriate subsidiary.
- Click Save.
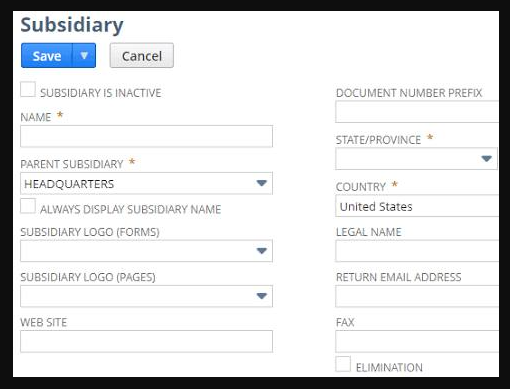
If the class applies to multiple subsidiaries, select all applicable subsidiaries.
Step 2: Refresh the Configuration Data
- Open Webgility Desktop and navigate to the relevant sales channel's configuration settings.
- Refresh the NetSuite configuration data to retrieve the updated class list.
For guidance, see Recommended Posting Settings for NetSuite in Webgility Desktop.
Step 3: Verify the Transaction Class
- Navigate to Connections > Accounting > Sync Settings > Orders > Posting Rules. Under Select the transaction type for posting orders, click Setup.
- Confirm that the class appears in the dropdown.
- Select the appropriate class and save the settings.
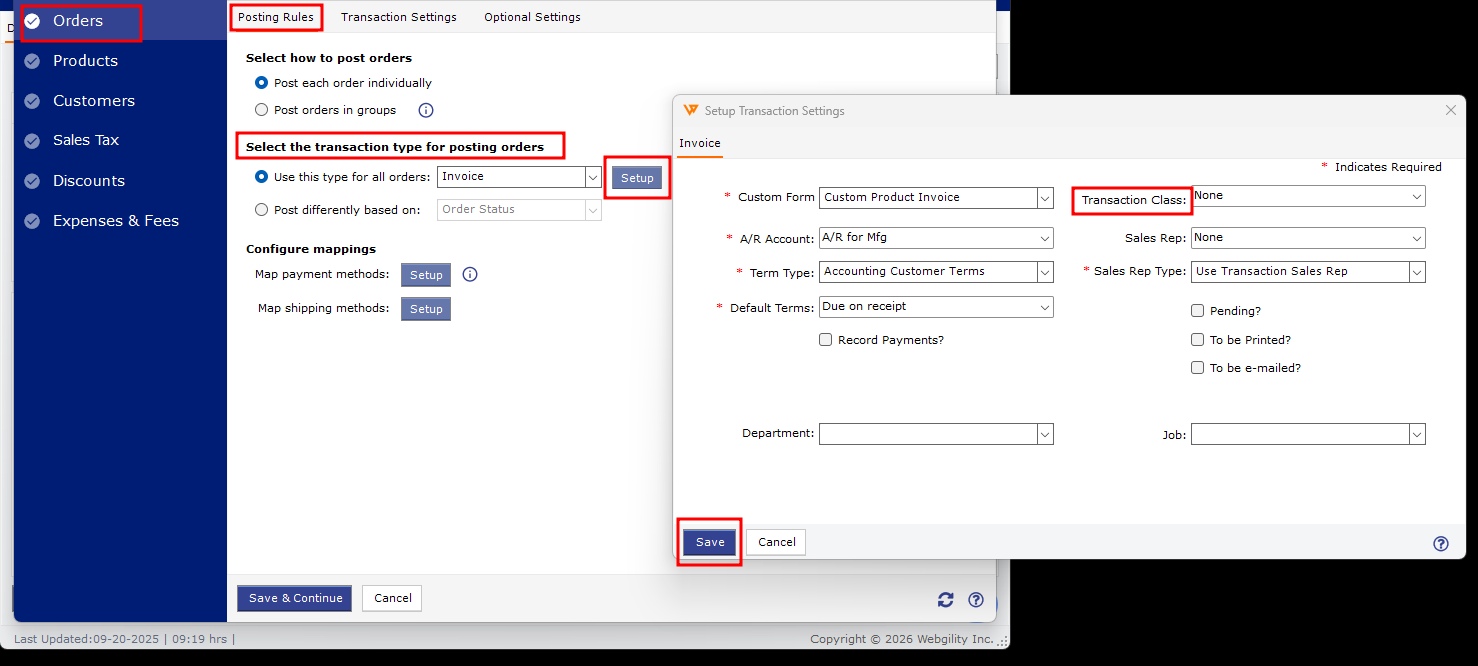
If the class is still missing, refer to the Webgility Desktop–NetSuite Integration Guide to review your integration configuration.
If you have any questions or need more help, please contact our support team.