
Symptoms
You may notice one or more of the following symptoms:
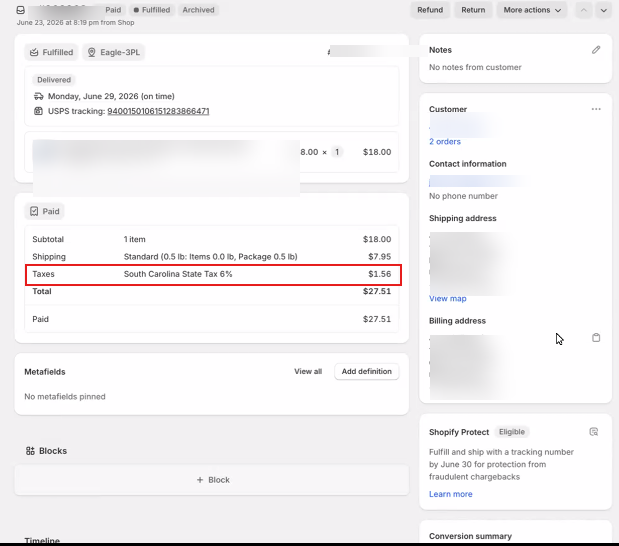
- Shopify tax appears in the order’s Marketplace Tax area instead of posting as the required line item in QuickBooks Desktop.
- Shopify discounts are grouped into one General Ledger account instead of being tracked separately.
- An order posts successfully, but the tax or discount values require manual accounting adjustments.
-png.png?width=611&height=443&name=order_screenshot_blurred%20(1)-png.png)
Resolution:
Shopify: record sales tax as a line item
Use this configuration when Shopify tax should appear explicitly on each QuickBooks sales receipt, invoice, or sales order.
- Open Webgility Desktop.
- Go to Connections → Accounting/POS/ERP → Sync Settings.
- Open the Sales Tax tab.
- Enable Record Sales Tax as a Line Item in QuickBooks.
- Select the taxable sales tax item that already exists in QuickBooks Desktop.
- Select the non-taxable sales tax item used for tax-exempt orders.
- Save the settings.
The taxable and non-taxable items must be available in QuickBooks before they can be selected in Webgility.
Reprocess existing Shopify orders
Changing the setting does not automatically correct transactions that were already synchronized. For affected orders:
- Undo sync for the affected order.
- Redownload the order.
- Post one order as a test.
- Confirm that the tax appears in the intended QuickBooks line item.
- Reprocess the remaining orders after the test is correct.
Shopify: post discounts as separate line items
Use this configuration when discounts need to be tracked separately or mapped to specific QuickBooks accounts.
- Go to Connections → Sales Channel → Settings for the Shopify connection.
- Enable Get discount as a line item.
- In QuickBooks Desktop, create the discount-type items required by the accounting team.
- Return to Webgility Desktop and go to Connections → Get the latest data and settings.
- Download the latest QuickBooks data and settings.
- Post an order that contains a discount.
- If an Item Mismatch message appears, map the Webgility discount line to the correct QuickBooks discount item.
- Repost the order.
A separate QuickBooks discount item can be mapped to the General Ledger account selected by the accounting team. Create separate discount items when different discount categories need separate reporting.
Choose a different discount presentation
If discounts should not appear as separate line items, disable both Get discount as a line item and Get Discounted Item Price so the discount is recorded at the subtotal level.
For Shopify and BigCommerce connections, you can alternatively enable Get Discounted Item Price to apply the discount directly to the item price.
Select one discount method that matches the accounting workflow. Do not enable multiple methods without confirming the expected transaction layout.
If you require any further assistance, please feel free to contact Webgility Support.