
Overview
When connecting a WooCommerce store hosted on RightWorks, you must sign in to your WooCommerce admin account within your RightWorks session before starting the connection in Webgility Desktop. This helps Webgility complete the connection process successfully.
Steps to Connect Your WooCommerce Store- Sign in to WooCommerce through RightWorks. Open your RightWorks session, sign in to your WooCommerce admin panel (
/wp-admin), and keep the session open. - Add the WooCommerce sales channel. In Webgility Desktop, navigate to Connections > Sales Channels > Add New Sales Channel.
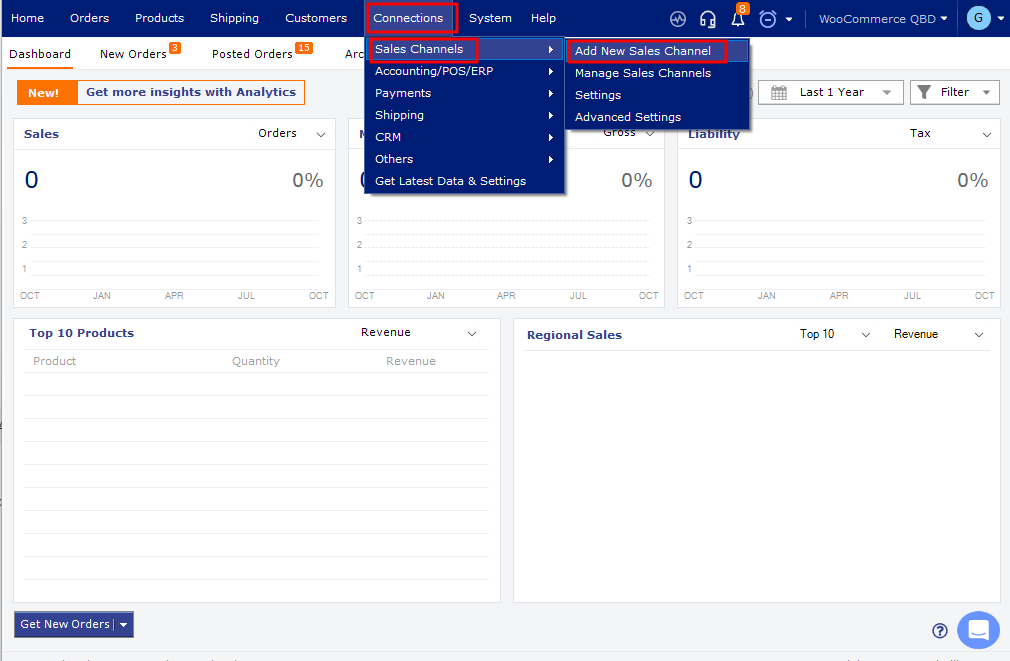
- Follow the standard connection process. Select WooCommerce and follow the setup wizard to connect your store. For detailed instructions, see How to Connect Webgility Desktop with WooCommerce.
- Complete the sign-in. When Webgility opens the WooCommerce sign-in page, complete the authentication within your RightWorks session. Follow the remaining prompts to finish connecting the store.
- Connect additional stores if needed. If you have multiple WooCommerce stores hosted in the same RightWorks environment, repeat the process for each store.
Important: Keep your RightWorks session active until Webgility confirms the connection.
Troubleshooting
If the connection fails, see How to Troubleshoot Issues with Your WooCommerce Sales Channel Connection for troubleshooting guidance.
If the WooCommerce sign-in page does not load within RightWorks, contact your RightWorks administrator to verify access to your WooCommerce domain.
If you have any questions or need more help, please contact our support team.