Overview:
When posting to QuickBooks, an error occurs due to an invalid reference to the Accounts Receivable (AR) account in the invoice. The error message states that the currency of the account must be either the home currency or the transaction currency.
To resolve this, you need to download the latest data from QuickBooks (as an admin) and properly map the currency under customer settings.
Error Message:
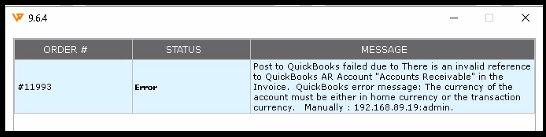
Post to QuickBooks failed. Invalid reference to QuickBooks AR Account "Accounts Receivable" in the invoice.
QuickBooks error message: The currency of the account must be either in the home currency or the transaction currency.
Resolution Steps:
1. Log in as Admin to your QuickBooks:
Open QuickBooks and log in using admin credentials.
2. Enable Multi-Currency Feature:
Navigate to edit on the top left, then select Preferences and click on the left panel for Multiple currencies on the new box that appears. Go to Company preferences on the top and select "Yes, I use more than one currency" and say "Yes" after reading the dialogue box, and click "OK" to activate the Multi-Currency feature.
Important: Once enabled, the Multi-Currency feature cannot be deactivated.
Kindly refer to the screenshot below.
3. Create Currencies:
Go to Company on the top, click on Manage currency, and select currency list as shown in the screenshot. Enable the required currencies in QuickBooks.
4. Customer Setup:
Click on Customer Center from the top and go to Customer Center.
Create separate customers for each required currency as shown in the screenshot below.
5. Bank Account Setup:
Create a bank account in QuickBooks for each currency needed as shown in the below screenshot.

6. AR Account Setup:
Establish Accounts Receivable (AR) accounts in QuickBooks for each currency.

7. Sync with Webgility Desktop:
In Webgility Desktop, download the latest data from QuickBooks to sync the newly created currencies, customers, and AR accounts.
8. Currency Mapping:
Map the correct currency under customer settings in Webgility Desktop.
9. Retry Posting:
After completing the currency mapping, try posting the order from Webgility Desktop to QuickBooks again.
By following these steps, you should resolve the currency and AR account reference issue, enabling successful posting to QuickBooks.