Overview:
Webgility Desktop and QuickBooks Online need to be connected properly to ensure seamless data exchange between Webgility Desktop and QuickBooks Online. However, sometimes the connection between QuickBooks Online and Webgility Desktop breaks, which will need to be fixed.
Resolution: To fix the QuickBooks Online connection issue, just follow the below steps:
Step 1: Open Webgility Desktop and go to “Connection”, “Accounting”, “Edit connection”, then click on “Disconnect QuickBooks Online”. You will get a confirmation popup, click on “Yes”. A popup will appear saying “Successfully disconnected”.Click on “OK”.

Step 2: Now click on the “Connect to QuickBooks” button.
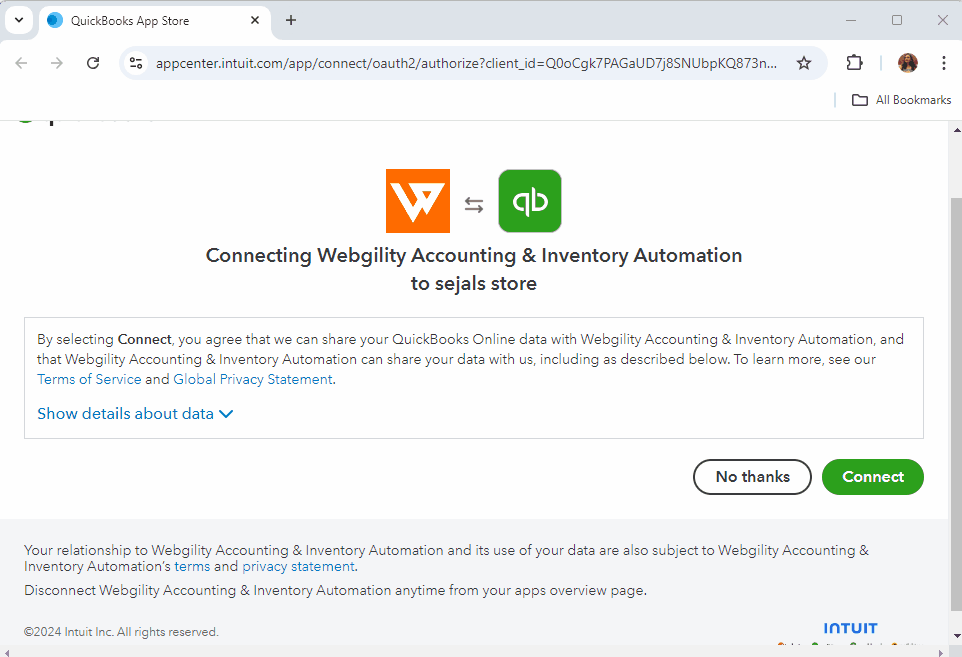
Step 3: It will take you to a browser where you can log in to QuickBooks Online and if you are already logged in then just select the company file and authenticate the app by clicking on the “Connect” button, you will get a connection successful popup.
Note: If a QuickBooks Online online account is already logged in on your browser and you want to connect to a different account then first log out of that account from the browser.
Step 4: Now go back to Webgility Desktop, you will see the company file name that you have connected.
Step 5: Click on “Save” in Webgility Desktop. You will get a popup asking to configure posting settings then select ‘No’ and close the connection screen.
Note: If you have connected to a different company file than the one that was earlier connected, then please reconfigure the posting settings under “Connections”, “Accounting/POS/ERP” then click on “Sync Settings.”.