Overview:
If you want to enable shipping on an add-on user account in Webgility Desktop, please follow the steps below:
Steps to follow:
1). Login to Webgility Desktop Application using the primary account credentials.
2). Click on the profile dropdown on the top-right corner of the screen.
3). Select "Manage Users" from the dropdown menu.

4). Select the shipping option for the add-on user you want to enable shipping for.

5). Once shipping is enabled, log out of Webgility Desktop and log back in as the add-on user.
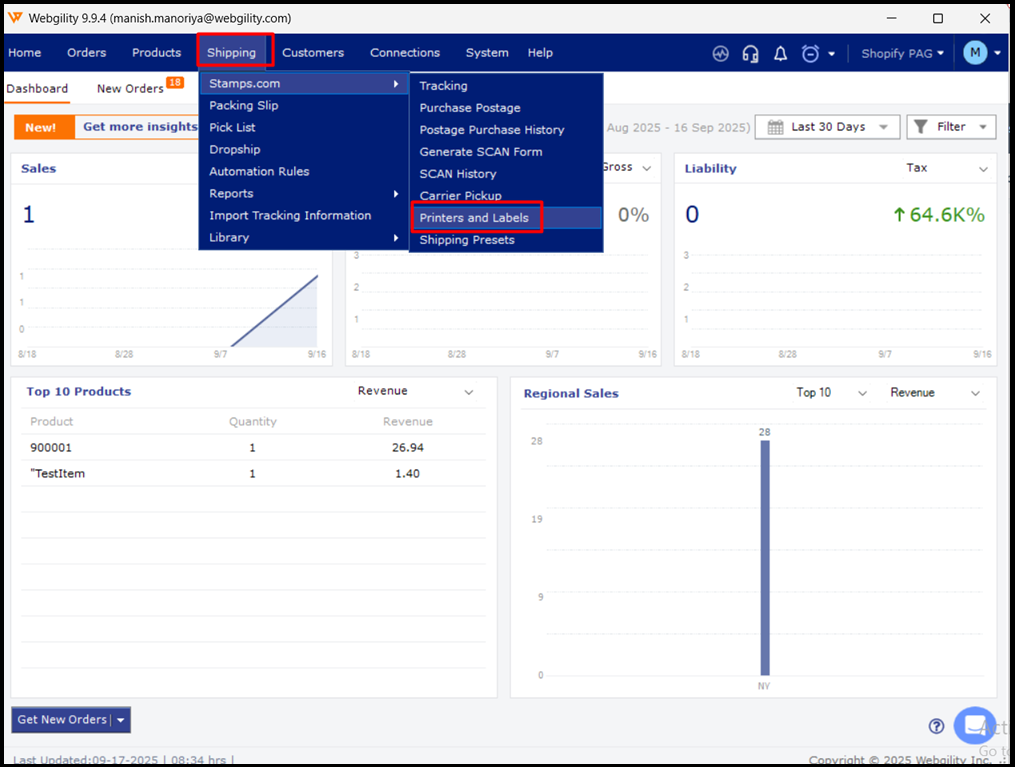
6). Click on the “Shipping” option and select your shipping provider (Stamps, FedEx, etc.).
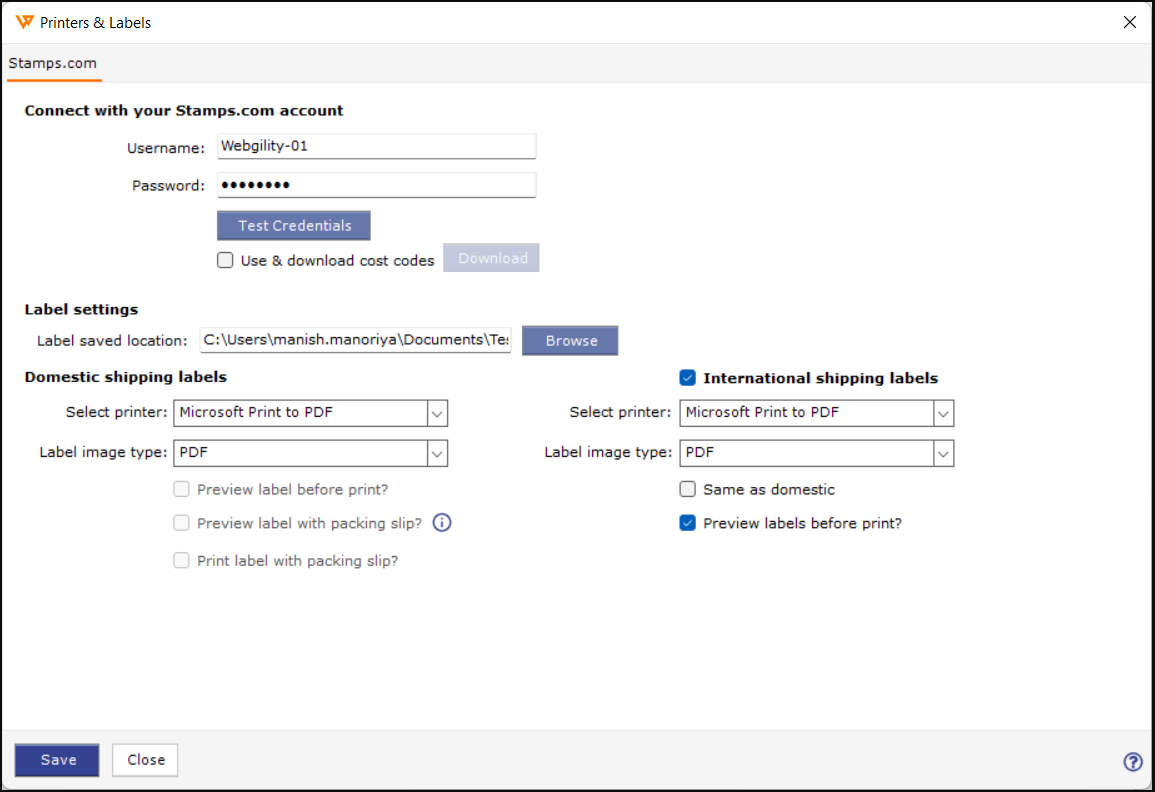
7). Select a folder for storing labels and choose a printer.
8). Save the settings.
By following these steps, you will be able to enable shipping for an add-on user account in Webgility Desktop.