Overview:
Ensuring smooth transaction posting and product syncing requires SKUs to point to the correct QuickBooks items. Manually matching items via a CSV file is an effective way to bulk-match the SKUs that do not match their respective QuickBooks items via product settings.
Follow the below-mentioned steps to prepare a .csv file to bulk import product mappings in Webgility Online
A). How to identify the total number of items that do not match based on the product matching criteria setup:
1. In Webgility Online, go to Products and click on Product Catalog, and select the Refresh Data icon at the top right to update the Product Catalog Report with the latest items from both the Sales Channel and QuickBooks Online. Wait for the 'Success' message.
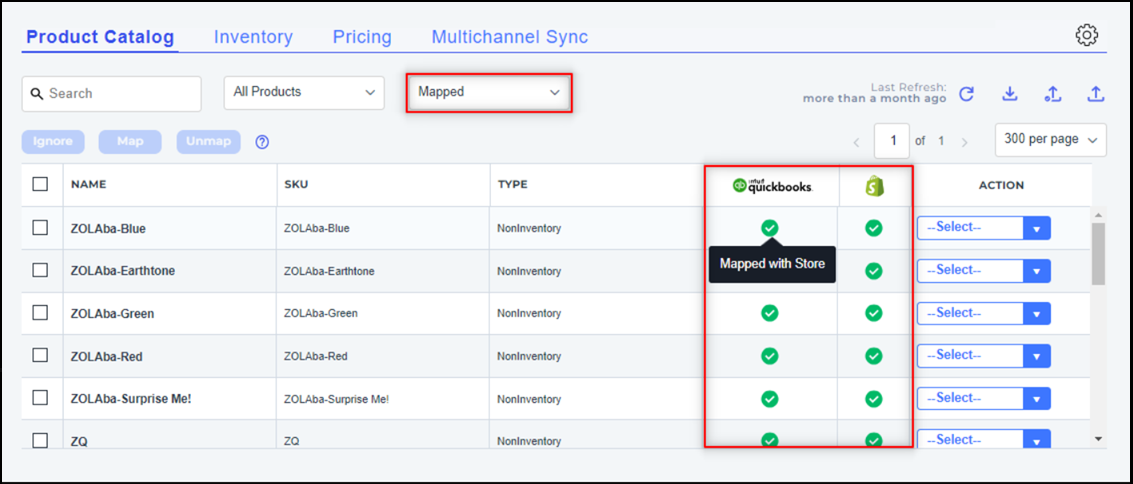
2. After generating the latest report, navigate to Products and then navigate to Product Catalog and click on Missing in Webgility. In the Missing tab, you will find a list of SKUs that do not match the QuickBooks Item Name/Number according to the matching criteria specified in the Product Settings.
B). How to export the missing items list and mapping template:
1. Export an Excel spreadsheet file containing non-matching products by clicking on the Export Product option from the top-right and opening the corresponding file in Microsoft Excel or a similar program. You will receive a popup notification upon successful export.
2. This Excel sheet contains the list of Sales Channel items that do not match with items in QuickBooks Online.
3. Now, export the template manually matched products, go to the Manual Matched tab, and select the Export option. You will need to have at least one manually matched item here. Refer to this guide: Manual Product Matching and Updating Previously Matched Items in Webgility Online.
The below image is an example of the Template file.
C). How to Map items in CSV file
Copy SKUs and Sales Channel item names from the sales channel Items List spreadsheet. Paste them in the manual-matching-template CSV as per the steps below:
1. Update the sales channel SKU under the "Sales Channel SKU" & "ReplacementItemName" columns.
2. The sales channel item name under the "Sales Channel ItemName" column.
3. Update QuickBooks item name under the "QBItemName" column, including sales channel profile name, status ("Valid" always), and ItemType (as in QuickBooks).
4. Save the CSV after updates.
D). Import the CSV file
1. Now navigate back to Products and the Product Catalog section, go to the Manual Matched tab, click on the Import option, and then it will ask you to browse the Excel file in CSV format so browse it from the required location and click on Next.
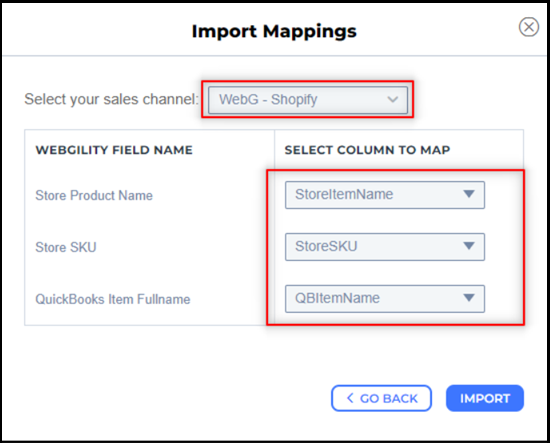
2. Next, select the correct sales channel profile for importing item mappings. Map Webgility Online field names with CSV file columns, ensuring accurate configuration. Click "Import" once completed.
3. As soon as you click on the Import button, it will start performing some backend processes.
4. After importing, a success message will display "Item mappings Imported" along with the number of records imported, items successfully mapped, and any error-faced mappings. Click "Done" to finish.
5. Now you can refresh the page of the web browser and verify the newly matched items by again navigating to the Manual Matched tab.