Steps to Sync Inventory:
Go to https://my.webgility.com and sign in with your credentials.
2. Navigate to Inventory
In the left navigation panel, select Products, then choose Inventory.
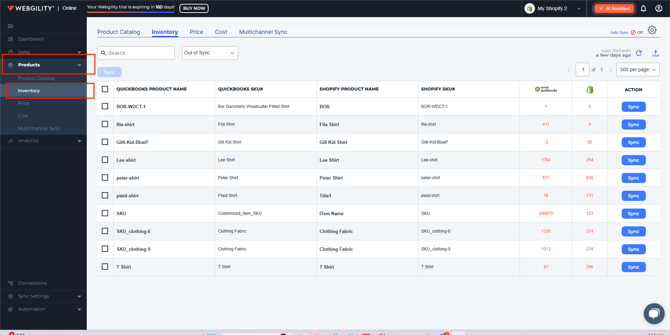
3. Filter Out-of-Sync Items
From the dropdown menu at the top, select Out of Sync to identify products whose quantities don’t match between systems.
4. Select Items to Sync
Check the boxes next to the items you want to update, then click the Sync button.
5. Choose Sync Direction
-
In the sync prompt, set:
-
From: Source system (e.g., QuickBooks)
-
To: Destination system (e.g., Sales Channel)
-
-
This direction tells Webgility where to pull the quantity data from and where to update it.

6. Confirm Synchronization
A confirmation message will appear once the inventory has been successfully synchronized.
