Steps:
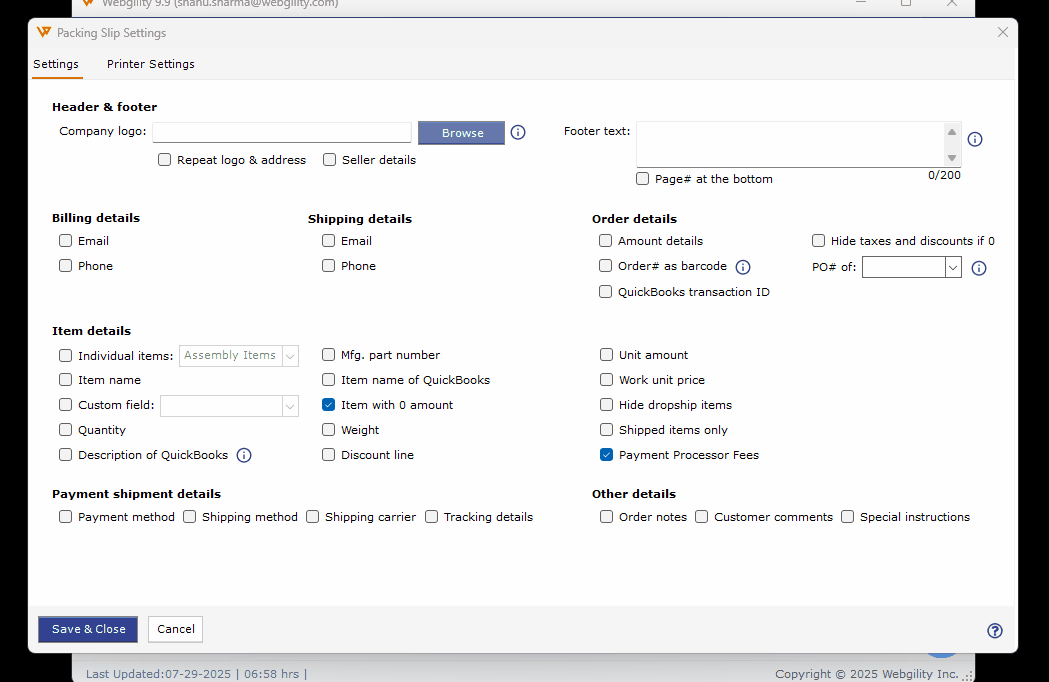
1. To configure packing slip settings, go to Shipping > Packing Slip.
2. Go through the available options including the information that you want on the packing slip and click Save & Close.

3. Once you have selected the details to include on the Settings page, go to the next tab to set up the Printer Settings. The options within these settings include:
-
Printing packing slips on a thermal printer that you generally use for shipping labels.
-
Printing only one packing slip for all orders shipped using multiple packages.
-
Enabling a print preview.
-
Printing packing slips without the preview pop-up.

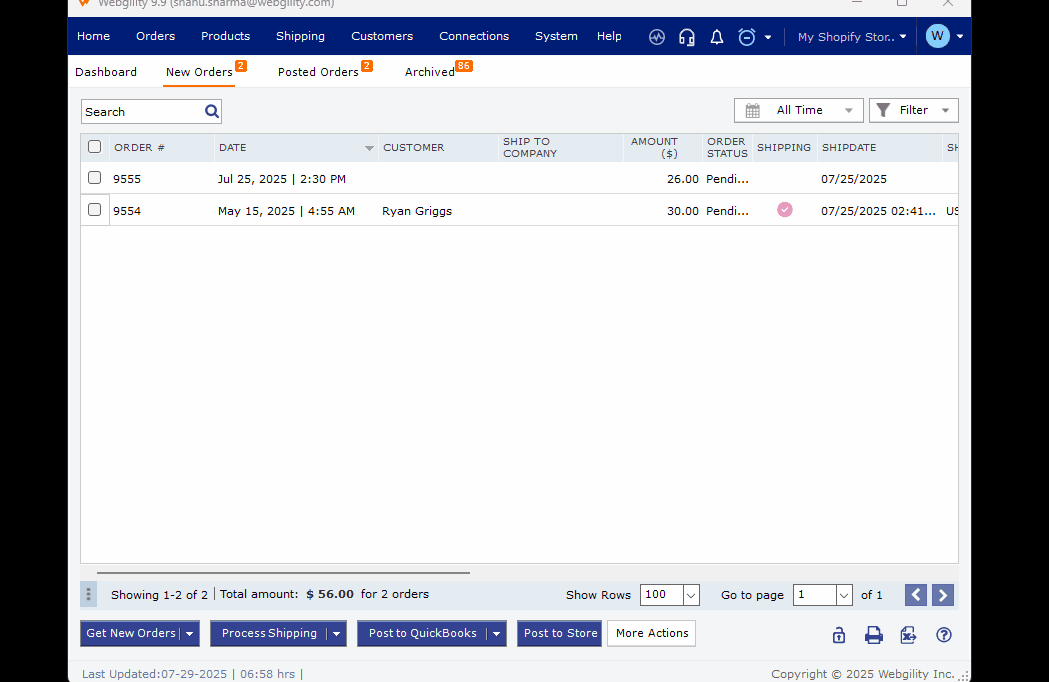
4. To print the packing slip manually, go to the New Orders tab and select each order that you want to print the packing slip for - this can be one individual order or multiple orders. Then click Print Packing Slip. If this option is selected, you will be shown a preview in the packing slip settings.
Setup a Different Printer on a Second Webgility Computer (add-on user)
You can configure a different printer on the second user’s machine for printing packing slips. To do this, you must have a printer connected to the computer from where you want to print the packing slip.
Log in to the Webgility add-on computer as the add-on user, go to Shipping, and click on Packing Slip from the dropdown menu. In this section, you will then define the Printer Settings for Packing Slip.
Automating the Printing of Packing Slip
You can configure Webgility Desktop to print packing slip automatically:
-
After posting an order to QuickBooks
-
After generating a shipping label through the Webgility Desktop
Either of these two actions can trigger the printing of packing slip.
To automate printing the packing slip after an order is posted to QuickBooks you need to go to Connections > Accounting/POS/ERP > Sync Settings.
In Optional Settings, you will need to navigate to Customize post options and select the checkbox to enable Print Packing slip after posting to Quickbooks.
To automate printing the packing slip after generating a shipment you will need to go to Connections > Shipping > Shipping Settings. Under Options, you will need to select the checkbox to enable Print Packing slip after generating shipment.

Tool tip: The current printer settings are configured for individual users.