Overview:
When Webgility adds custom features or modifications to your Webgility Desktop app, a one-time customization fee will be required. These charges are separate from your regular subscription.
Customization charges apply when:
-
Custom features are added to your Webgility Desktop app.
-
Special modifications are made to existing functionalities.
-
Webgility implements specific requirements tailored to your business needs.
Step-by-Step Payment Process:
Follow these steps to pay the customization fee through the Webgility portal:
01. Access the Webgility Portal:
Navigate to portal.webgility.com.
02. Log In:
Sign in using your Webgility account credentials.
03. Navigate to Plan & Usage:
Once logged in, select Plan & Usage from the main menu.
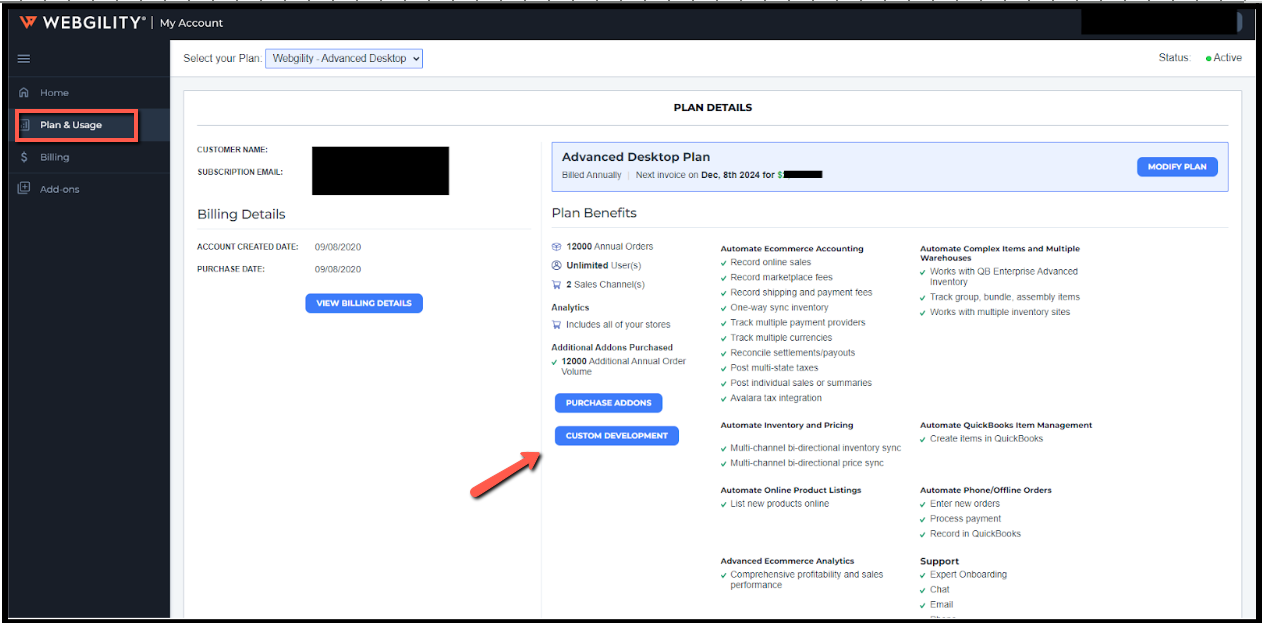
04. Select the CUSTOM DEVELOPMENT Option:
Choose the Custom Development section to proceed with payment.
05. Enter the Customization Amount:
Enter the exact amount as requested by Webgility.
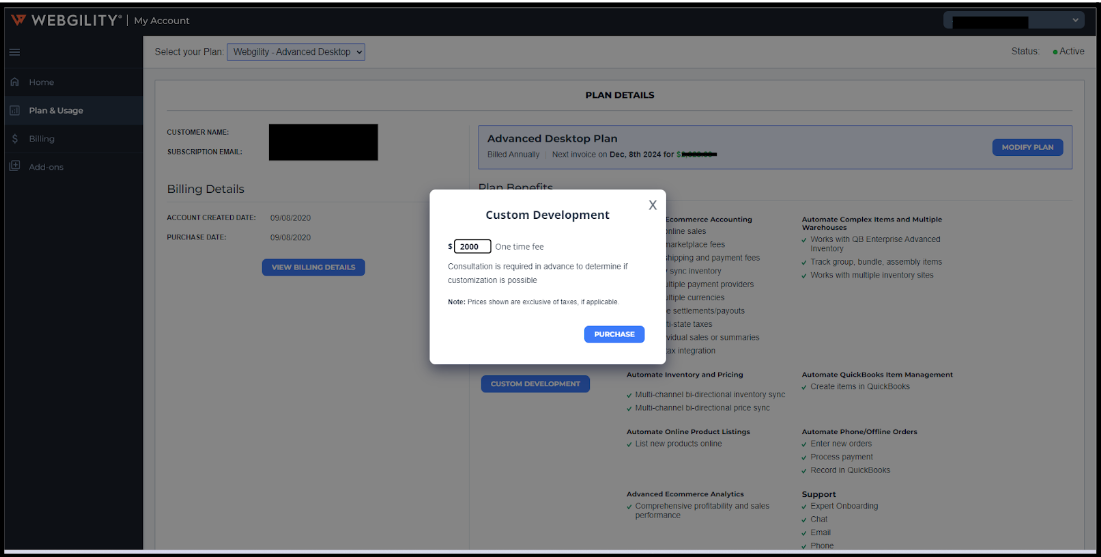
06. Complete the Payment:
Click on Purchase to finalize and submit your payment.
Important Notes:
-
Ensure you enter the correct amount as provided by Webgility.
-
Keep a copy of your payment confirmation for future reference.
-
If you have questions or require clarification about the customization charges, reach out to Webgility Support.
Additional Information:
-
Customization fees are one-time payments.
-
These charges are separate from your regular subscription fees.
-
The fee amount varies depending on the complexity and scope of the custom development
Note: Custom features will only be activated once customization is successfully delivered after payment is completed.