Windows Cannot Complete the Extraction, the Destination File Could Not Be Created
This article helps Webgility Desktop users resolve the error message "Windows cannot complete the extraction. The destination file could not be created" when extracting a ZIP file. It explains common causes such as insufficient permissions, long or invalid file paths, corrupted files, antivirus interference, low disk space, or outdated extraction tools, and provides steps to troubleshoot each scenario.
Windows Cannot Complete the Extraction; the Destination File Could Not Be Created
The error "Windows cannot complete the extraction. The destination file could not be created" typically occurs when there is an issue creating a new file during the extraction process. This could be due to several reasons, such as
-
Insufficient permissions: The user account used to extract the file may not have sufficient permissions to create a new file in the specified location.
-
File path issues: The file path specified for the extracted files may be too long, contain invalid characters, or be invalid in some other way.
-
Corrupted file: The file being extracted may be corrupted or damaged, which can result in an error while extracting.
-
Anti-virus software: Sometimes, anti-virus software can interfere with the extraction process, causing errors.
-
Lack of disk space: If there is not enough free disk space on the destination drive, the extraction process may fail.
-
Outdated or corrupted software: The software used for extraction may be outdated or corrupted, which can lead to issues.
Insufficient permissions: The user account used to extract the file may not have sufficient permissions to create a new file in the specified location.
File path issues: The file path specified for the extracted files may be too long, contain invalid characters, or be invalid in some other way.
Corrupted file: The file being extracted may be corrupted or damaged, which can result in an error while extracting.
Anti-virus software: Sometimes, anti-virus software can interfere with the extraction process, causing errors.
Lack of disk space: If there is not enough free disk space on the destination drive, the extraction process may fail.
Outdated or corrupted software: The software used for extraction may be outdated or corrupted, which can lead to issues.
Troubleshooting:
To resolve the error, try the following troubleshooting steps:
-
Check the file path to ensure that it is valid and does not contain invalid characters.
-
Ensure that the user account used to extract the file has sufficient permissions to create a new file in the specified location.
-
Try disabling anti-virus software temporarily and then extract the file again.
-
Check that there is enough free disk space on the destination drive.
-
Try using different extraction software to extract the file.
-
If none of the above steps work, try repairing or reinstalling the software used for extraction.
Check the file path to ensure that it is valid and does not contain invalid characters.
Ensure that the user account used to extract the file has sufficient permissions to create a new file in the specified location.
Try disabling anti-virus software temporarily and then extract the file again.
Check that there is enough free disk space on the destination drive.
Try using different extraction software to extract the file.
If none of the above steps work, try repairing or reinstalling the software used for extraction.
Here are the detailed troubleshooting steps:
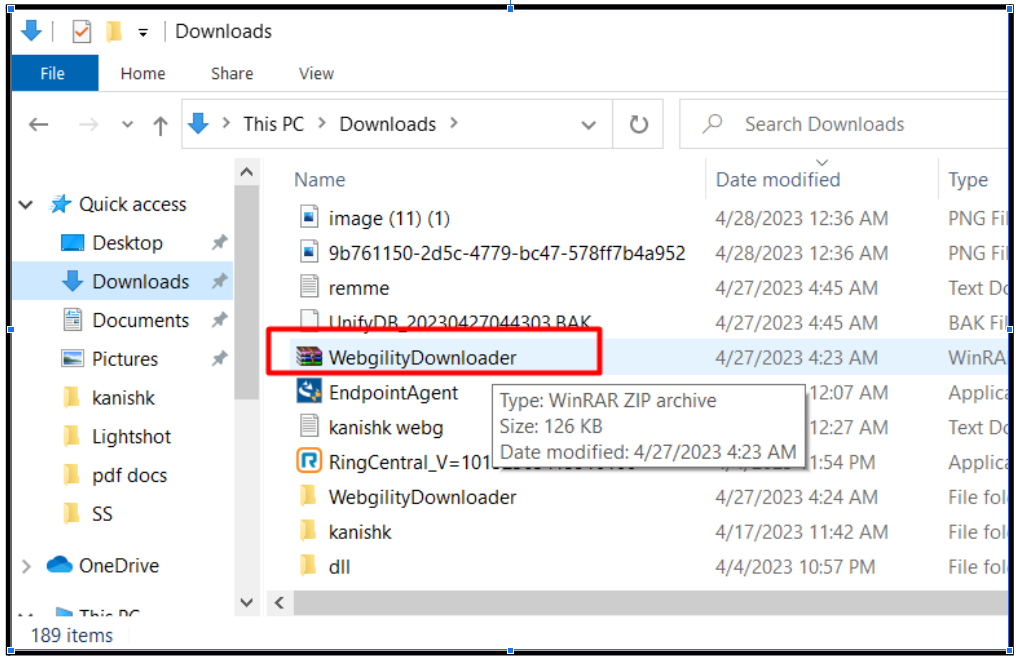
1). Go to the Download folder on your computer and copy the downloaded Webgility Downloader file as shown below.
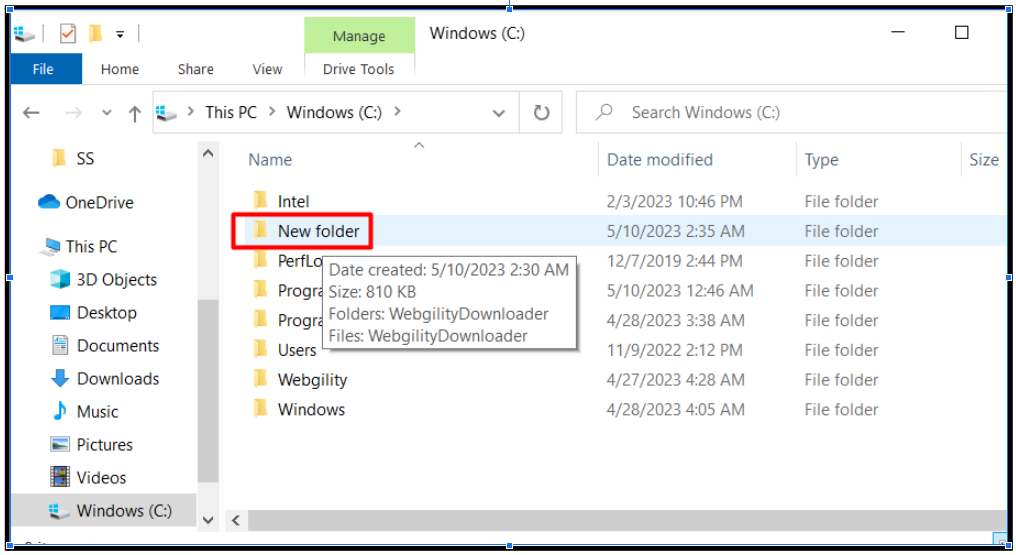
2). Create a new folder in the C: drive on your computer and paste the file into the new folder in the C: drive.
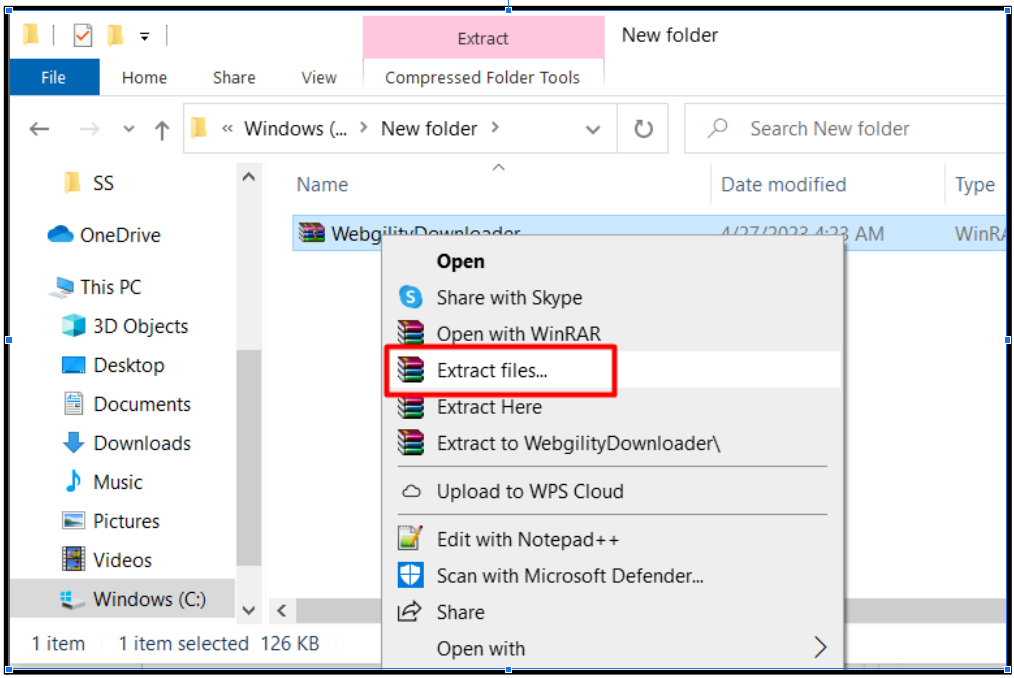
3). Right-click on the copied file and select "Extract All."
4). Open the extracted folder.
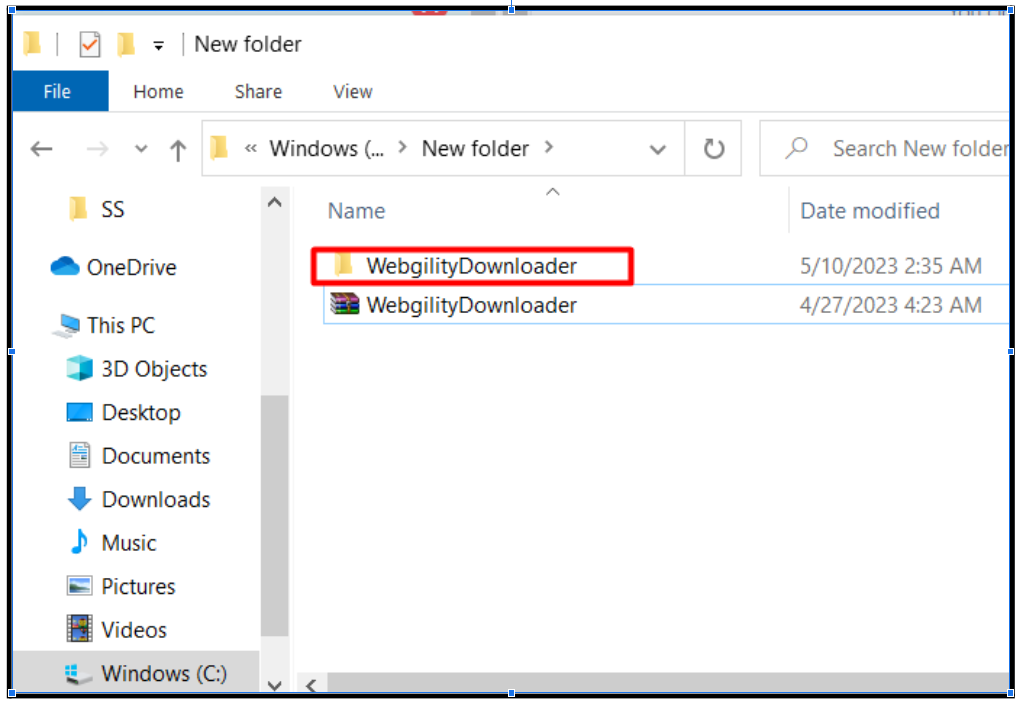
5). Right-click on the Webgility downloader and select "Run as Administrator."
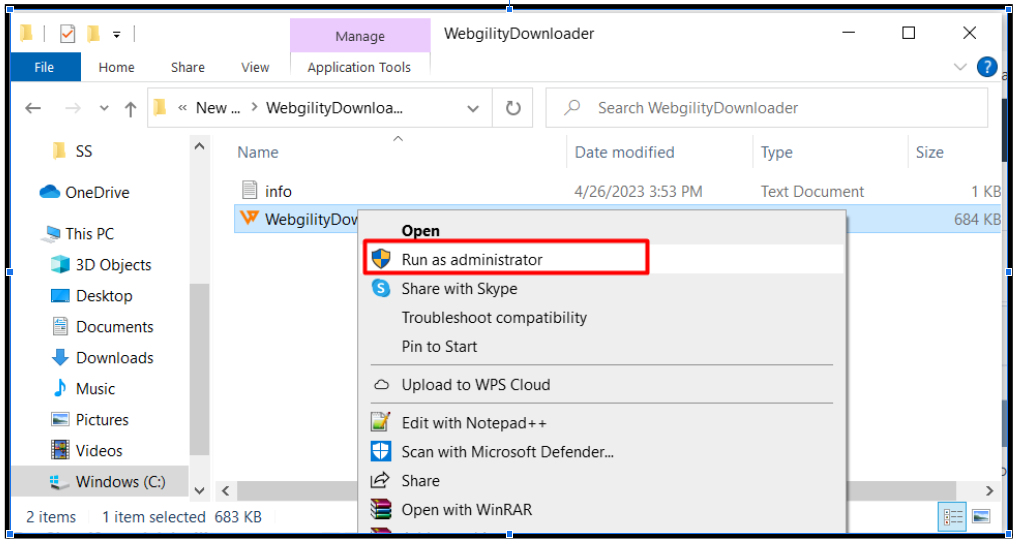
By following these steps, you should be able to successfully extract and install the downloaded file without encountering the error message.
